Prepare the door for installation – Pella 818T0101 User Manual
Page 5
81-1/2"
81-1/2"
3"
3"
21"
9-1/4"
9-1/4"
3"
3"
21"
21"
3"
3"
21"
6-3/4"
6-3/4"
3"
3"
21"
21"
97-1/2"
21"
97-1/2"
6"
6" 6"
6"
6" 6"
= Screw or clip location other than at hinge or strike.
2B
2B
2B
2B
2B
2B
2B
2B
2C
2C
2C
2C
2C
2C
2C
2C
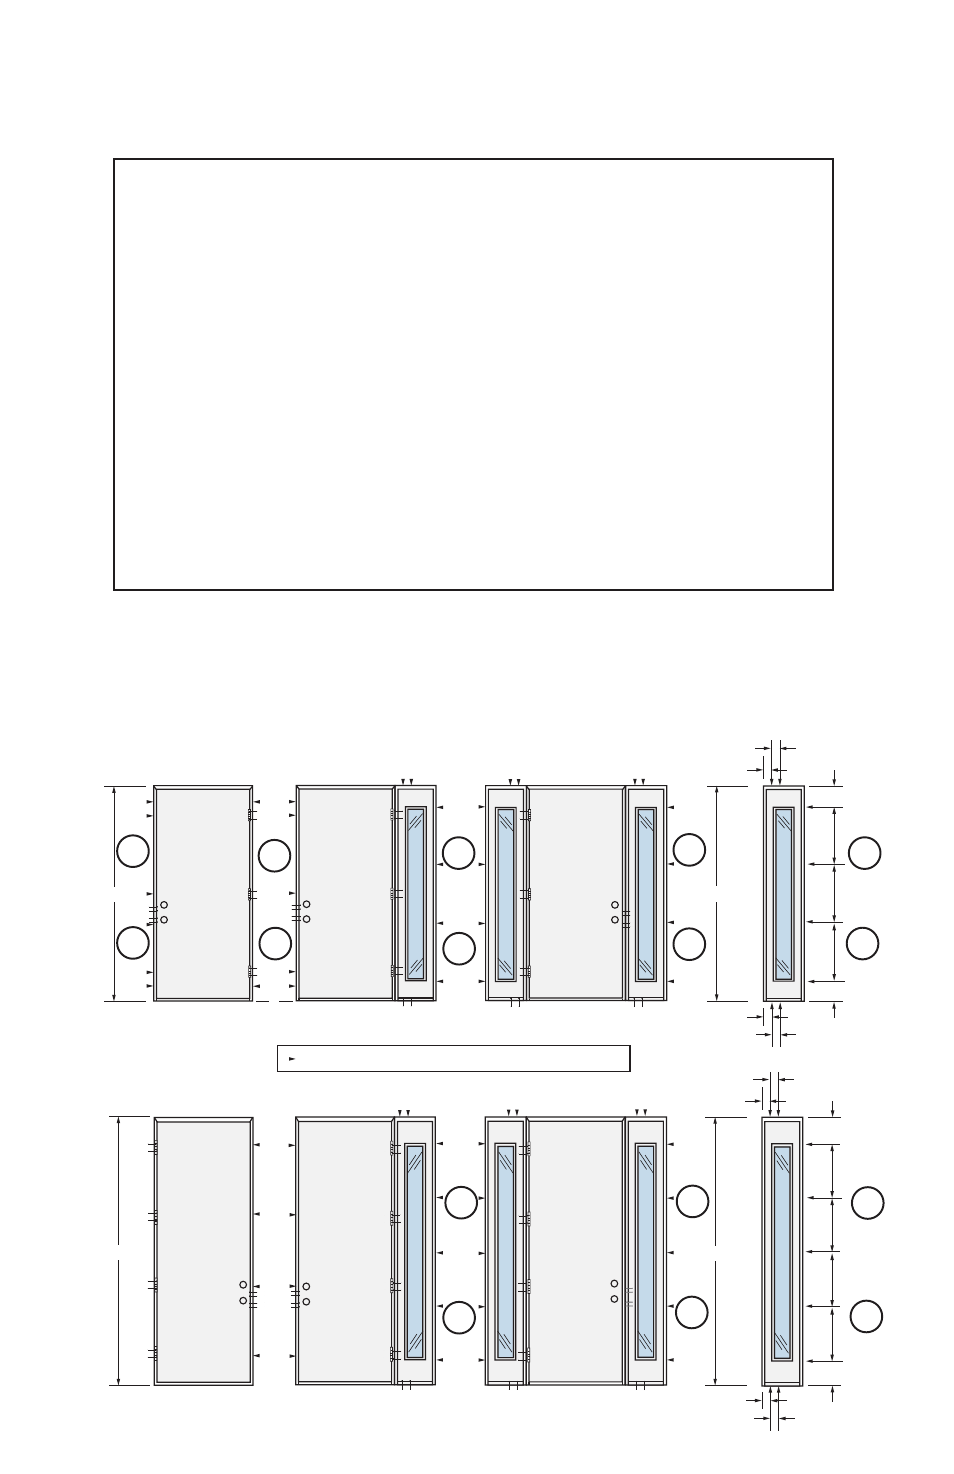
Anchor Spacing for Single Units:
Ř 2 – #10 x 2-1/2" screws at each hinge
Ř 2 – #10 x 2-1/2" screws at each strike
Ř #10 x 3" screw or clip directly across from each hinge
Ř #10 x 3" screw or clip 6" from each corner on 81-1/2" entry door frames only
(not sidelights) interacting with the rough opening
Ř #10 x 3" screw or clips as indicated on 97-1/2" entry door frames
Anchor Spacing for Combination Units:
Ř 2 – #10 x 3" screws at each sidelight head and sill
Ř #10 x 3" screw or clip at other indicated locations
Ř 2 - #10 x 2-1/2" screws at each hinge
Ř 2 - #10 x 2-1/2" screws at each strike
Diagrams for placement of installation clips or frame screw clearance
holes for 6'8" and 8' height doors and single doors with sidelights.
2
PREPARE THE DOOR FOR INSTALLATION