Setting and fastening the door (continued) – Pella 818T0101 User Manual
Page 10
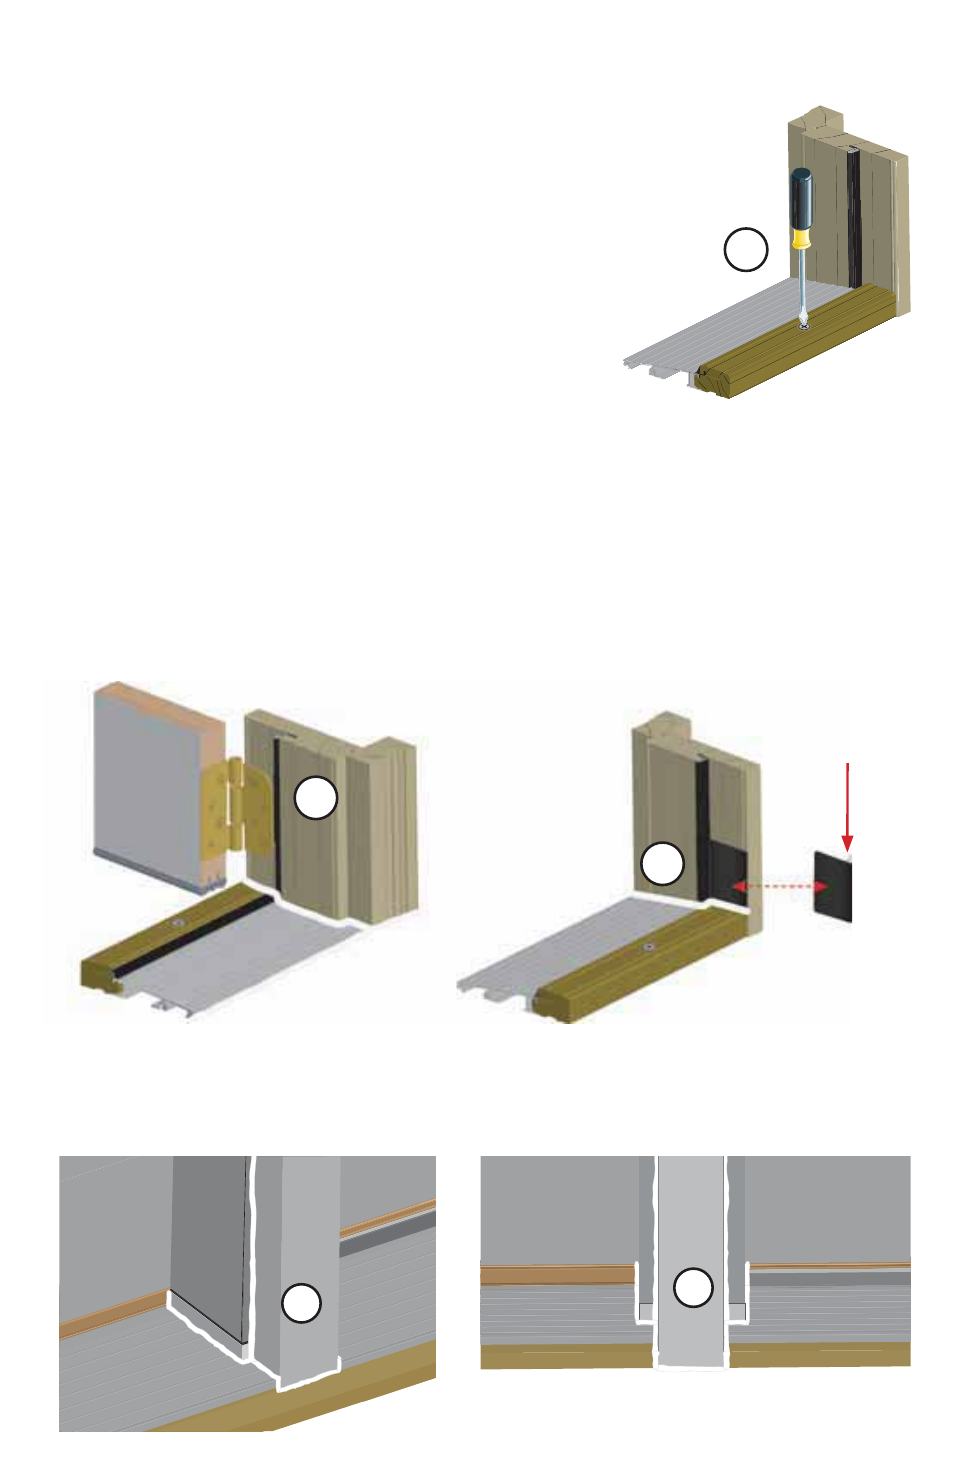
O. If needed, the height of the threshold can be
adjusted to achieve appropriate contact with
the door sweep. Remove screw cover caps as
necessary and use a #3 Phillips screwdriver to
turn the adjustment screws clockwise to lower
the threshold or counter-clockwise to raise the
threshold.
P. Place a 1/4" bead of sealant along the corners
where the sill meets both side jambs.
Q. Before the sealant sets up; remove paper
backing from the corner seal pad and position the
pad embedded in the sealant and tight against the top of
the adjustable threshold, with the thin portion of the pad
flush with the interior face of the jamb (both jambs).
R. Install handle and lock hardware. Refer to manufacturer’s
instructions included with the hardware.
Note: At this time, install any additional fasteners if
needed to meet local code requirements such as those
required to comply with the Florida Building Code.
3S
3S
Front View
Interior
3O
Exterior
Remove paper
backing from the
corner seal pad
3Q
3P
S. Apply 1/4" bead of sealant where each sidelight jamb meets the
sidelight sill and around the exterior mullion cover where the door and
sidelight frame are joined together.
3
SETTING AND FASTENING
THE DOOR (CONTINUED)