Assembly, Legs to saw base, Wrench hook to saw base – Porter-Cable RS830 User Manual
Page 9
9
ASSEMBLY
WARNING: FOR YOUR OWN SAFETY, DO NOT CONNECT THE MACHINE TO THE POWER SOURCE UNTIL
THE MACHINE IS COMPLETELY ASSEMBLED AND YOU READ AND UNDERSTAND THE ENTIRE INSTRUCTION
MANUAL.
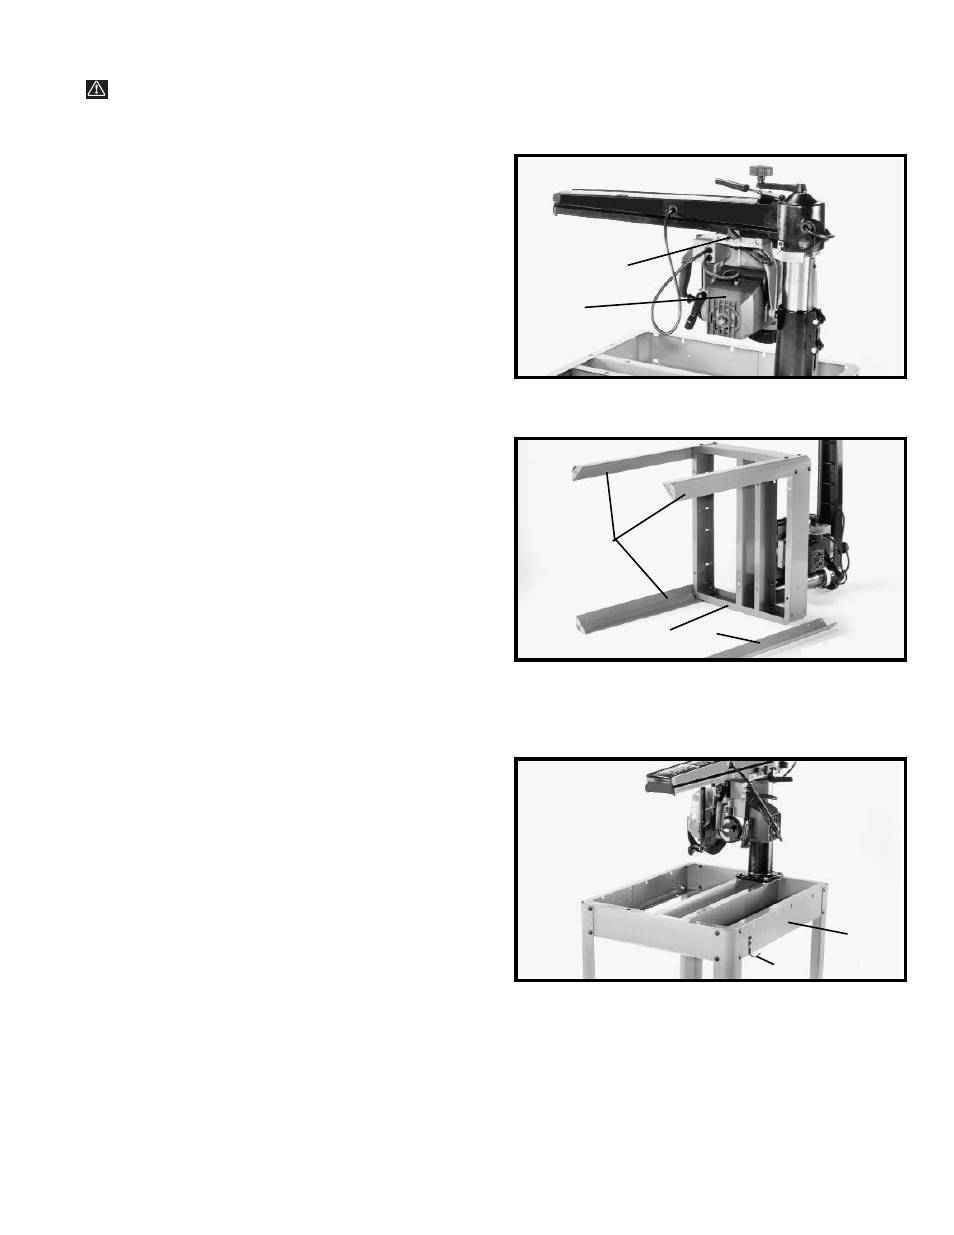
LEGS TO SAW BASE
1.
Loosen lock knob (A) Fig. 8, and move cutting-head
(B) to the rear position as shown. Then tighten knob (A).
2.
IMPORTANT: Make certain the cutting-head is
clamped securely at the back of the track arm.
Fig. 8
A
B
3.
Place Radial Arm Saw on its back and assemble legs
(C) Fig. 9 (three of which are shown assembled) to each
corner of saw base (D) using sixteen 5/16-18 x 5/8"
carriage head screws, 5/16" flat washers, 5/16" external
tooth lockwashers, and 5/16-18 hex nuts. Place flat
washer on bolt. Insert bolt through holes then assemble
lockwasher and nut. Hand tighten, hardware at this time
but do not completely tighten.
4.
Stand the saw in the upright position and securely
tighten all stand hardware.
Fig. 9
C
C
D
WRENCH HOOK TO
SAW BASE
Assemble wrench hook (K) Fig. 10, to the front right
(as shown), or back left, side of saw base (D), using two
#10 x 1/2" sheet metal screws.
Fig. 10
K
D