Through dovetails, Basic joints, Cutting the tails – Porter-Cable 4210 User Manual
Page 15
15
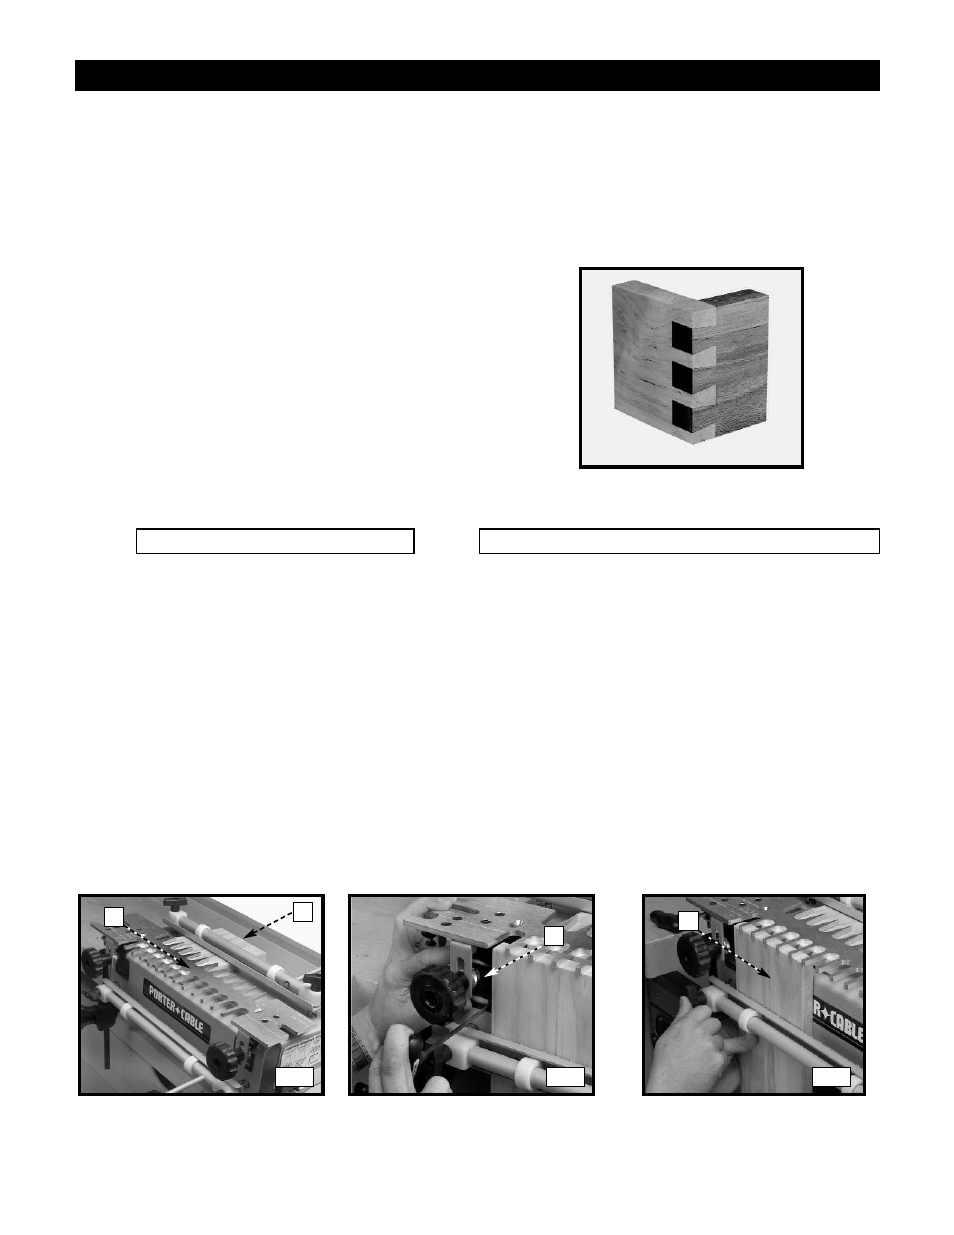
THROUGH DOVETAILS
The through dovetail has a look that is visually appealing, especially in boxes and chests.
Step 1 - Clamp a spacer board (A) Fig. P1 (equal to the thickness of your pinboard) in the upper clamp. Mount the
through dovetail template (B) on the base with the “tails” side facing you.
Move the offset guide (A) Fig. P2 to the far left.
Clamp the tailboard (A) Fig. P3 in the lower clamp with the outside surface of the board facing the jig.
Step 2 -
CUTTING THE TAILS
Step 3-
BASIC JOINTS
A
B
A
A
P1
P2
P3
ITEMS NEEDED
Through Dovetail and Box Joint Template
17/32", 7° Dovetail Bit 43776PC
13/32" Straight Bit, 43743PC
3/4" O.D. Template Guide, 42040 (with dovetail bit)
5/8" O.D. Template Guide, 42046 (with straight bit)
Template Guide Lock Nut, 42239
Miniature Dovetail Template
9/32", 7° Dovetail Bit 43777PC
3/16" Straight Bit, 43014PC
3/8" O.D. Template Guide, 42037 (with dovetail bit)
5/16" O.D. Template Guide, 42055 (with straight bit)
Template Guide Lock Nut, 42239
●
●
●
●
●
●
●
●
●
●
●
●
NOTE:
For miniature through dovetails, use the 4215
accessory kit.
Cut both the pins and tails in the vertical position.
Cut the tails first.
Use two routers (if possible) - one for the pins and
the other for the tails - to make the process quicker
and easier.
If you are using the 4210 dovetail jig, you will need
the 4213 accessory kit to make this joint.
ITEMS NEEDED FOR MINIATURE
(See the section “POSITIONING THE WOOD” in this manual.)