Drawers project lay out – Porter-Cable 4210 User Manual
Page 14
14
Tips for making drawers:
Tails (A) Fig. O1 are cut into the sides of the drawers, while pins (B) Fig. O1
are cut into the fronts and backs of drawers.
You can use either solid wood or plywood for the drawer bottoms (A) Fig. O2.
Insert the bottoms in a groove along the bottom of the fronts and sides.
Allow the drawer bottom to be free-floating (without glue) to allow for
seasonal expansion and contraction.
The grooves can go all the way to the ends of the boards if the joints are half-
blind dovetails. To accomplish this, position the groove so that it runs
through one of the tails on the side (Fig. O2). You will have to stop the
grooves on through dovetails or box joints before they reach the end of the
board to prevent them from being seen (Figs. O5 and O6).
DRAWERS
PROJECT LAY OUT
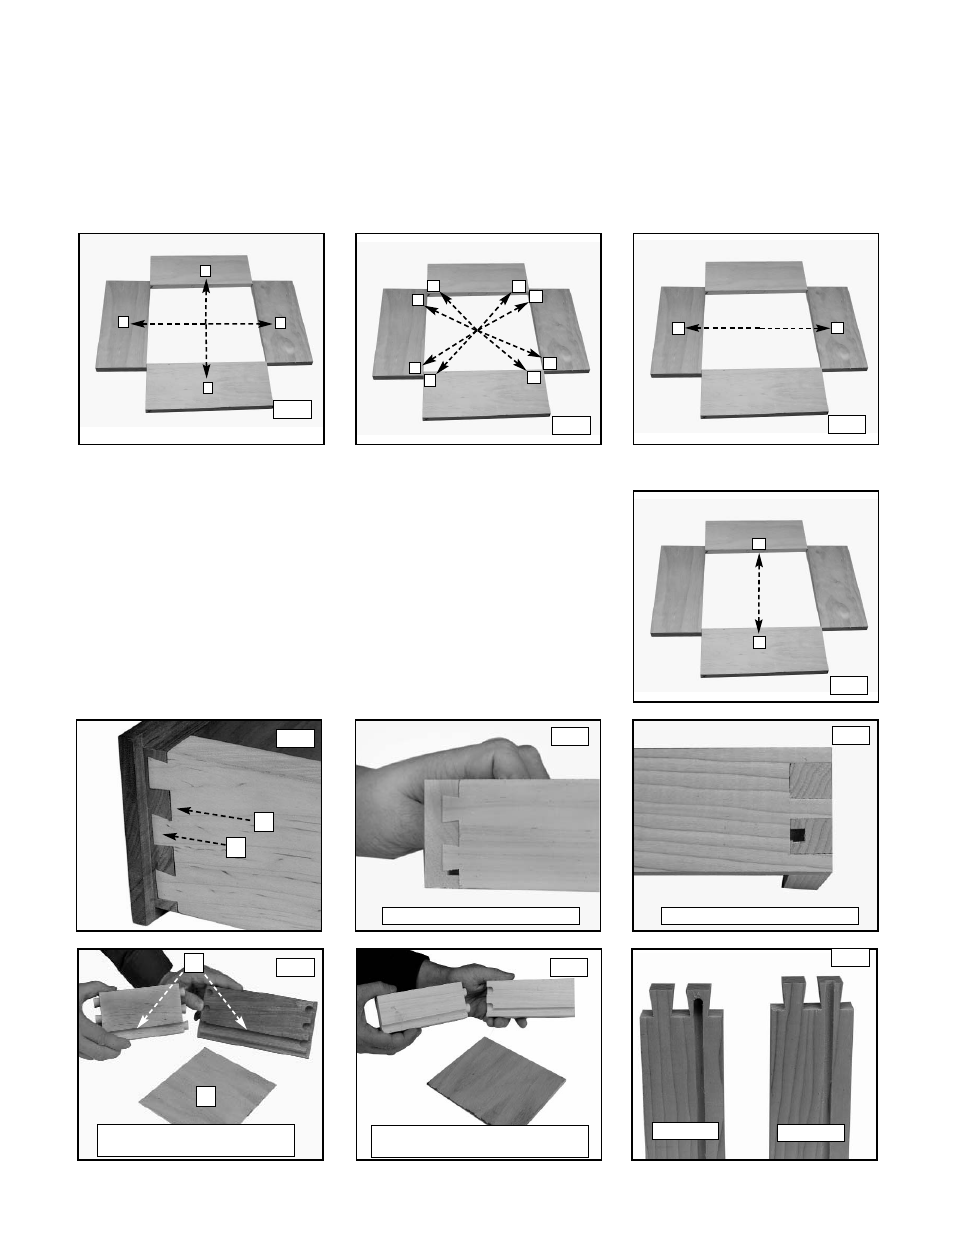
Keeping track of the outer and inner face of each workpiece and how the different parts mate with each other is
very important.
Step 3 -
Step 4 -
Step 1 -
Step 2 -
Lay out the workpieces face down and label the inside faces with an “I” (Fig. N1).
Label the corners “A”, “B”, “C”, and “D” (Fig. N2).
Label the tail boards (drawer sides) with a “T” (Fig. N3).
Label the pin boards (drawer fronts) with a “P” (Fig. N4)
A
A
B
B
C
C
D
D
I
I
I
I
T
T
P
P
N1
N2
N3
N4
O1
02
03
04
06
05
B
A
HALF-BLIND DOVETAILS
GROOVE ALIGNED WITH TAIL
WRONG
WRONG
A
B
HALF-BLIND DOVETAILS
GROOVE NOT ALIGNED WITH TAIL
WRONG
RIGHT