Installing the hide-away unit, Din front/rear-mount, Din front-mount – Pioneer Super Tuner III D+ AVH-P7950DVD User Manual
Page 17
English
Español
Deutsch
Français
Italiano
Nederlands
PyÒÒÍËÈ
16
Installing the hide-away unit
Mounting with Brackets
Fig. 12
Mounting with Hook and Loop Fastner
Thoroughly wipe off the surface before
affixing the hook and loop fastner.
Fig. 13
DIN Front/Rear-mount
This unit can be properly installed
either from “Front” (conventional DIN
Front-mount) or “Rear” (DIN Rear-
mount installation, utilizing threaded
screw holes at the sides of unit chas-
sis). For details, refer to the following
illustrated installation methods.
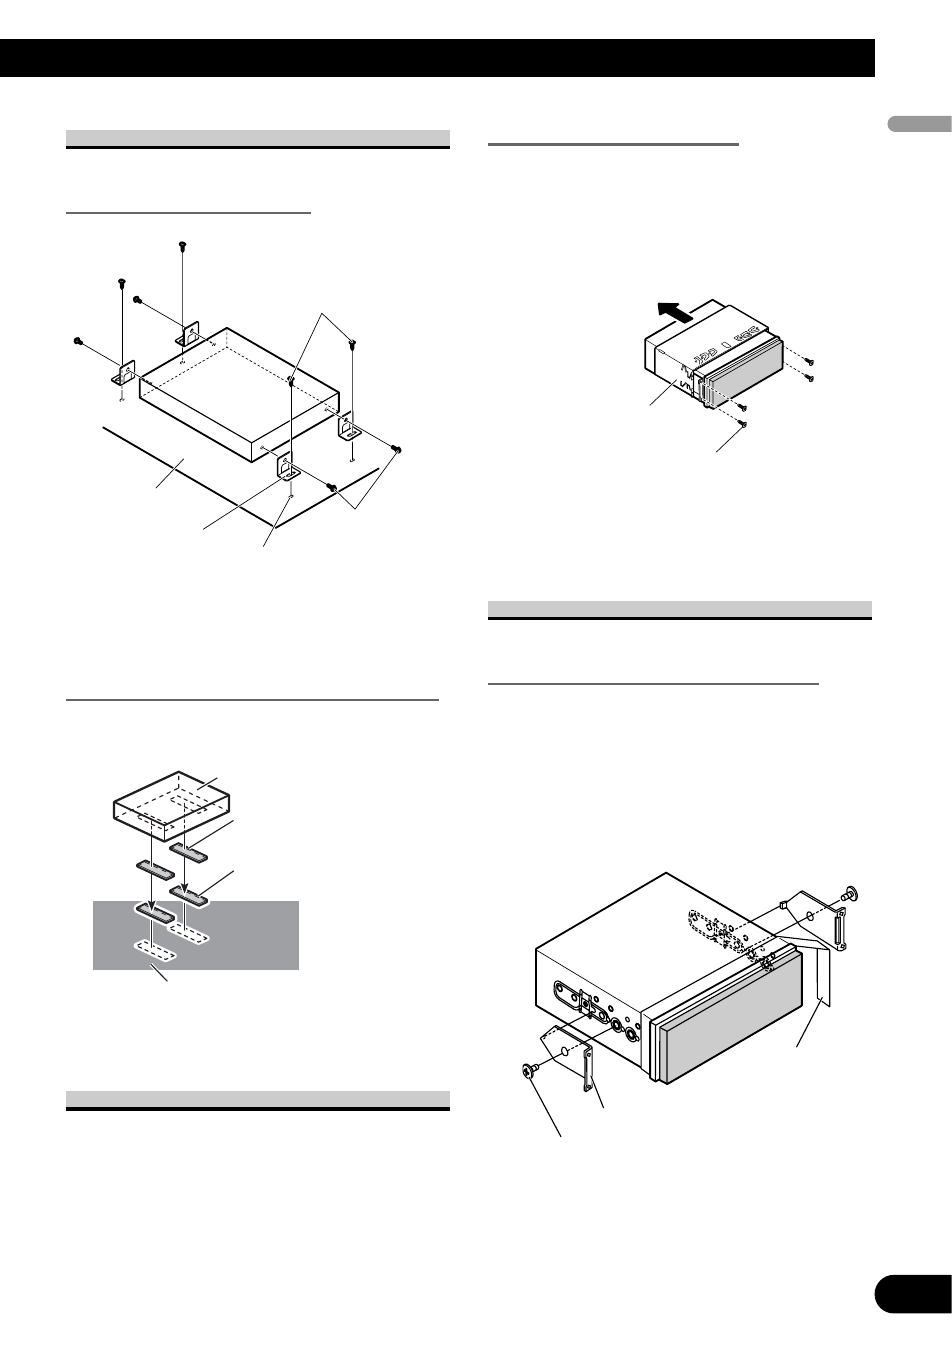
Before installing the unit
• Remove the mounting sleeve.
(Fig. 14)
Loosen the screws (2 mm
× 3 mm)
and then remove the mounting sleeve.
Fig. 14
DIN Front-mount
Installation with the rubber bush
1. Decide the position of the side
brackets. (Fig. 15)
When installing in a shallow space,
change the position of side brackets. In
this case, stick concealing tape on
parts that protrude from the dashboard.
Fig. 15
Side bracket
Concealing tape
Flush surface screw (5 mm
× 6 mm)
Mounting sleeve
Screw (2 mm
× 3 mm)
Hook and loop fastner
(large) (hard)
Car mat or chassis
Hook and loop fastner
(large) (soft)
Hide-away unit
Screw
(4 mm
× 8 mm)
Tapping screw
(4 mm
× 12 mm)
Car mat or chassis
Drill 2 mm to 2.5 mm
diameter holes.
Bracket