Functional description carton contents, Assembly, Foreword – Porter-Cable 3/8" KEYLESS DRILL 2614 User Manual
Page 8: Installing and removing drill bits
8
FOREWORD
FUNCTIONAL DESCRIPTION
CARTON CONTENTS
Carton contents include the drill, an auxiliary handle for models 2614 and
2615 only, an instruction manual, and a parts list.
ASSEMBLY
Porter-Cable drills are designed to drill holes of various sizes in wood and
metal as indicated in the following chart:
NOTE: This tool is shipped completely assembled. No assembly time or
tools are required.
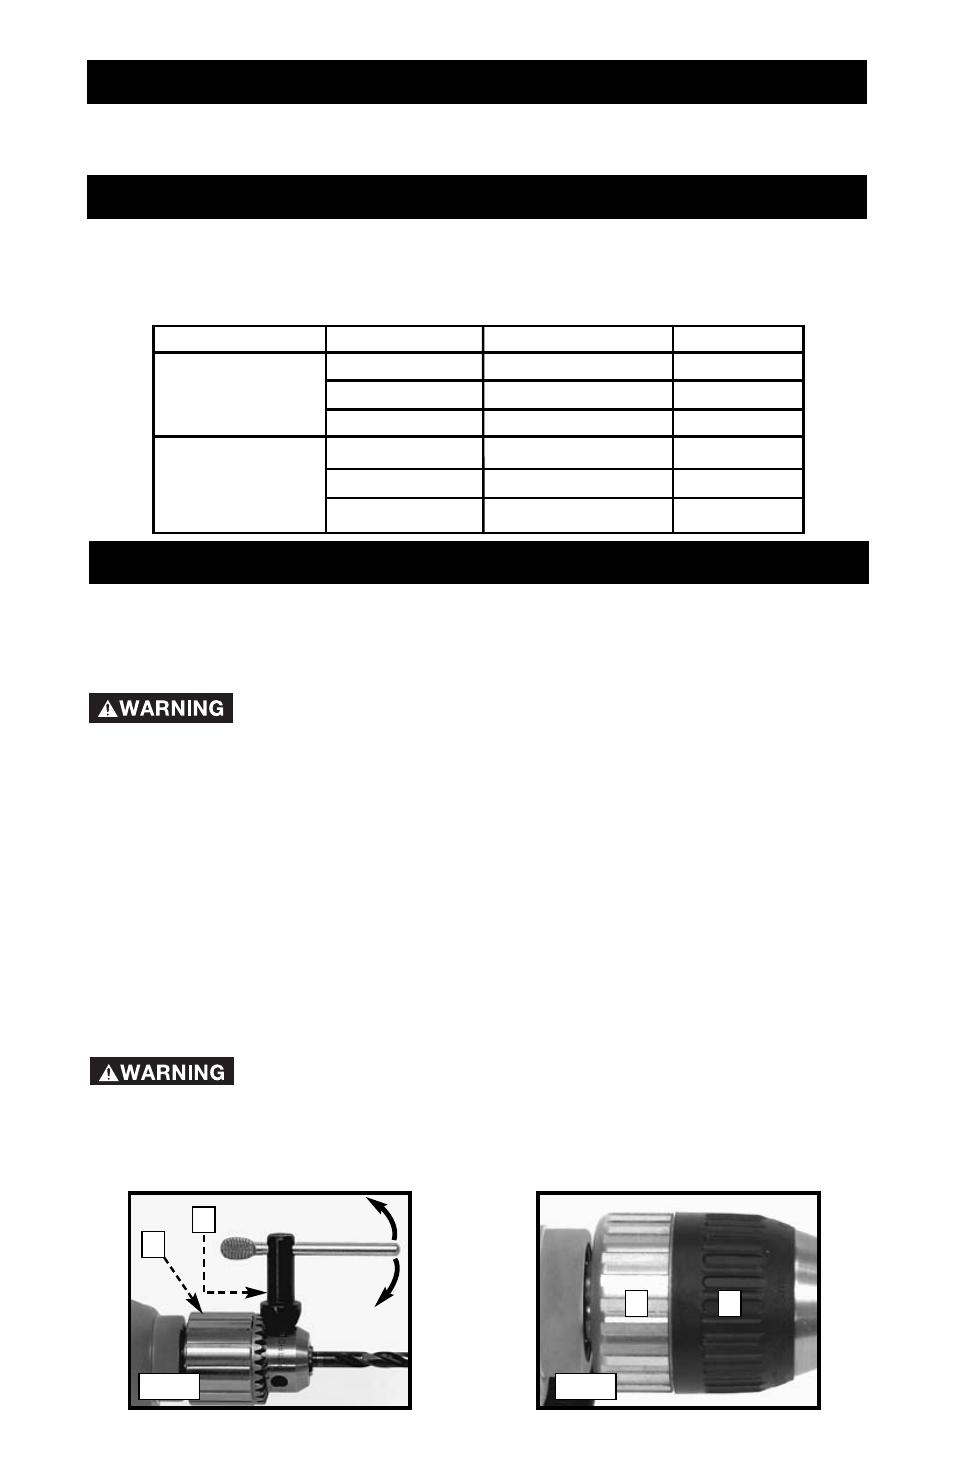
INSTALLING AND REMOVING DRILL BITS-
Disconnect tool from power source.
1.
For keyed chucks, open the jaws by turning the outer sleeve (A) Fig. 1
counter-clockwise. For keyless chucks, open the jaws by turning the
outer sleeve (A) Fig. 2.
2.
Clean and insert the smooth end of the drill bit as far as it will go into the
chuck, then withdraw the bit approximately 1/16", or up to the flutes for
small bits.
3.
While holding the bit with one hand, turn the outer sleeve (A) Fig.1 for
keyed chucks or (A) Fig. 2 for keyless chucks clockwise until the
chuck grips the bit.
4.
For keyed chucks, insert the chuck key (B) Fig. 1 into each of 3
keyholes in the chuck body (A) Fig. 1 in succession and tighten securely
by turning the key clockwise. For keyless chucks, hold the inner sleeve
(B) Fig. 2 and turn the outer sleeve (A) Fig. 2 clockwise.
Remove the chuck key before starting the tool.
5.
To remove the bit for keyed chucks, loosen the chuck with the key. For
keyless chucks, hold the inner sleeve (B) Fig. 2 and turn the outer
sleeve (A) Fig. 2 counter-clockwise.
Fig. 1
LOOSEN
TIGHTEN
A
A
B
Fig. 2
MODEL # OF DRILL
MAX. DIA. HOLE
TYPE OF BIT
MATERIAL
Twist Drill
Spade Bit
Self-feed Bit
Twist Drill
Spade Bit
Self-feed Bit
Steel
Wood
Wood
Steel
Wood
Wood
2610
2611
2614, 2615
3/8"
3/4"
3/8"
1/2"
1-1/2"
1-1/4"
B