Sn g r, Detail 1, Installation using wall arm bracket – Peerless Industries Peerless-Av Dukane Projector Short Throw Wall Arm UST-WallArm3 User Manual
Page 9: Projector position for 60" - 70" screen size, Detail 2
9 of 14
ISSUED:07-25-11 SHEET #: 125-9225-1
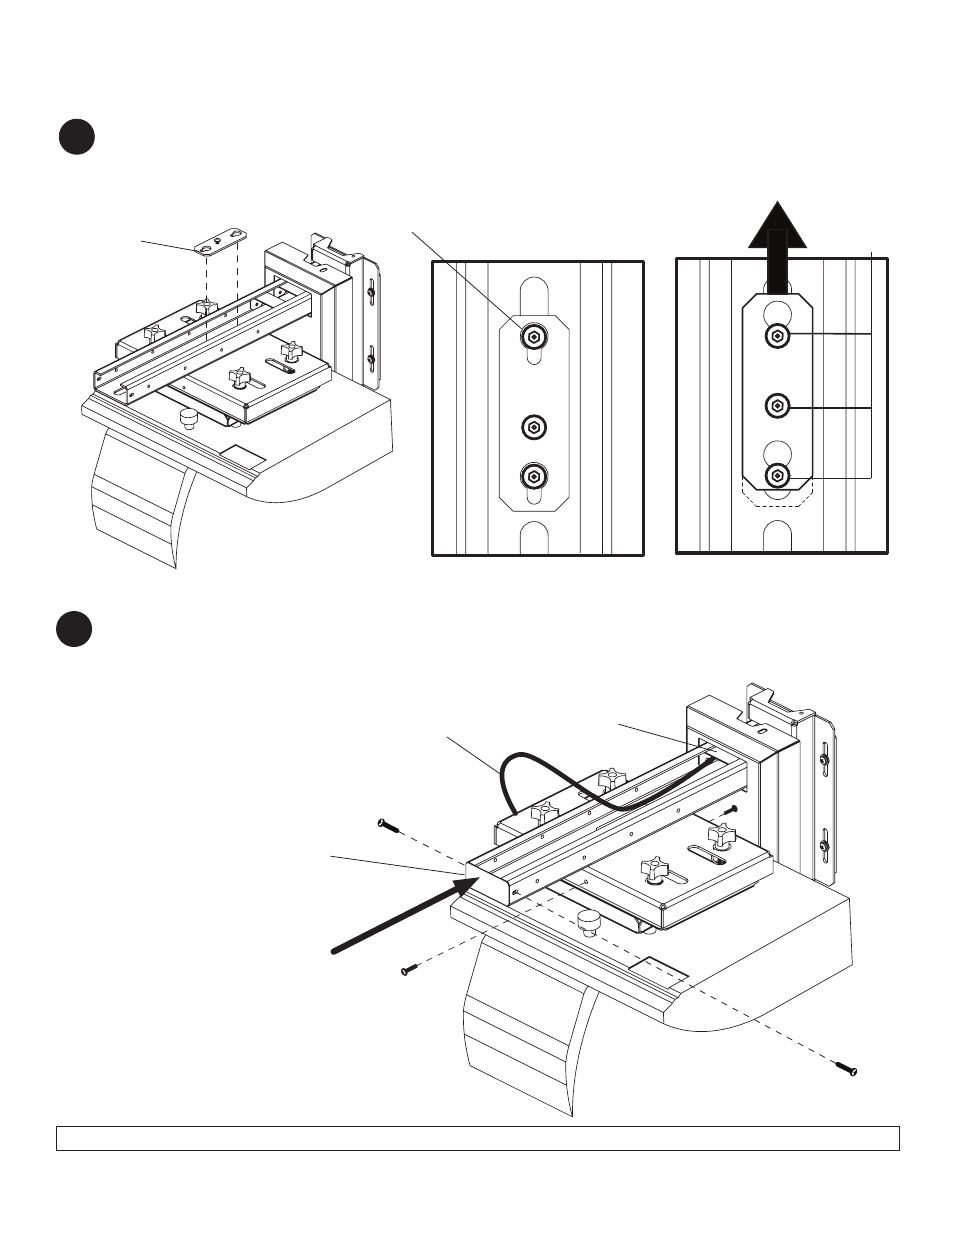
DETAIL 1
Secure wall arm cap (
S) into wall arm bracket (C) using two #8 x 3/8" sheet metal screws (N).
Route projector cables as shown. Use two cable management brackets (
G) as needed.
NOTE: #8 x 3/8" sheet metal screws (N) will be shortened for production.
Fasten two M5 x 20 mm socket pin serrated washer head screws (
R) into top of adapter plate assembly (A).
SKIP TO PAGE 11.
10
Attach exposed M5 x 20 mm socket pin serrated washer head screws (
R) on top of adapter plate assembly (A)
through slot in wall arm bracket (
C) and keyholes in projector attachment bracket (H) as shown in detail 1.
Slide projector attachment bracket (H) toward wall. Once in locked position tighten all three M5 x 20 mm socket pin
serrated washer head screws (
R) using security wrench (Q) as shown in detail 2.
9
FRONT OF PROJECTOR
FRONT OF PROJECTOR
FRONT OF PROJECTOR
Installation using Wall Arm Bracket
PROJECTOR CABLES
TIGHTEN
SCREWS
S
N
G
R
NOTE: Verify that all screws
are in the center of the slot.
PROJECTOR POSITION FOR 60" - 70" SCREEN SIZE
SKIP TO PAGE 9 IF MOUNTING WITH 70" - 100" SCREEN SIZE
H
DETAIL 2
R