Getting started, Setting up – Panasonic KX-TG4132 User Manual
Page 9
Getting Started
9
For assistance, please visit http://www.panasonic.com/help
Setting up
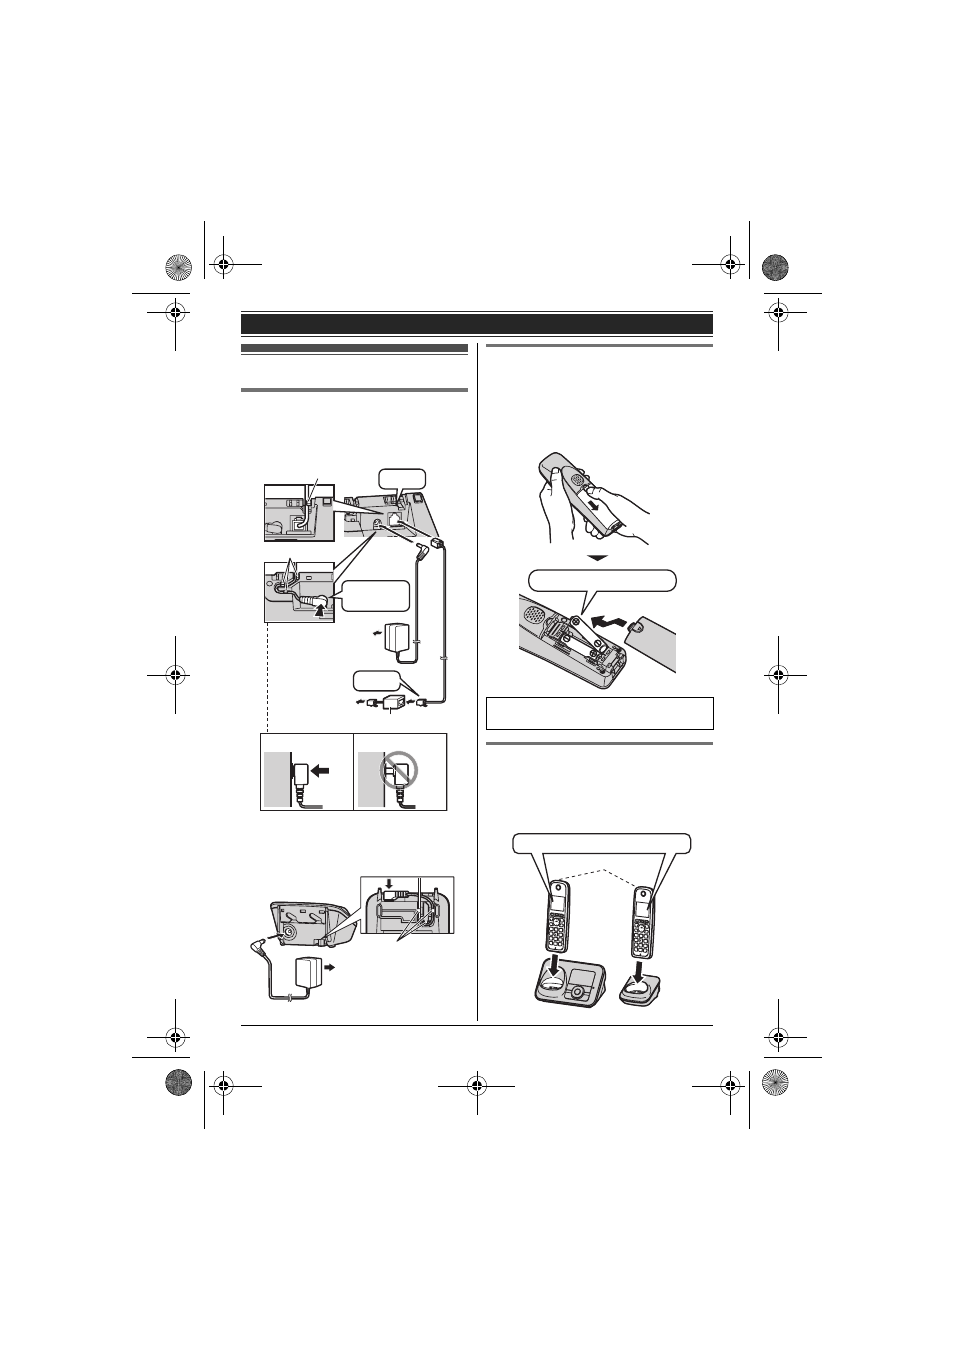
Connections
L
Use only the supplied Panasonic AC
adaptor PNLV226.
■ Base unit
*DSL/ADSL filter (not supplied) is required if
you have DSL/ADSL service.
■ Charger
Battery installation
L
USE ONLY Ni-MH batteries AAA (R03)
size.
L
Do NOT use Alkaline/Manganese/Ni-Cd
batteries.
L
Confirm correct polarities (S, T).
Battery charging
Charge for about 7 hours.
L
When the batteries are fully charged, the
charge indicator goes off and “Fully
charged
” is displayed.
DSL/ADSL filter*
Hook
Hooks
“Click”
Press plug
firmly.
(120 V AC, 60 Hz)
To single-line
telephone jack
(RJ11C)
“Click”
Correct
Wrong
(120 V AC, 60 Hz)
Hooks
L
When the date and time setting is
displayed, see page 12.
Rechargeable Ni-MH ONLY
Confirm “Charging” is displayed.
Charge indicator
TG413x(e).book Page 9 Tuesday, December 7, 2010 8:01 AM