Vii. care and maintenance – Pride Mobility 1400 User Manual
Page 34
34 www.pridemobility.com Go-Chair
Battery Replacement
A battery wiring diagram is printed on a decal located on the
front battery tray. See the specifications table for correct battery
specifications.
MANDATORY! Battery posts, terminals, and
related accessories contain lead and lead
compounds. Wear goggles and gloves when
handling batteries and wash hands after handling.
WARNING! The batteries in your travel chair
should only be serviced or replaced by an
authorized Pride Provider or a qualified technician.
WARNING! Do not replace the batteries when
seat is occupied.
WARNING! Travel chair batteries are heavy.
See specifications table. If you are unable to
lift that much weight, be sure to get help. Use
proper lifting techniques and avoid lifting
beyond your capacity.
WARNING! Do not mix old or new batteries.
Always replace both batteries at the same time.
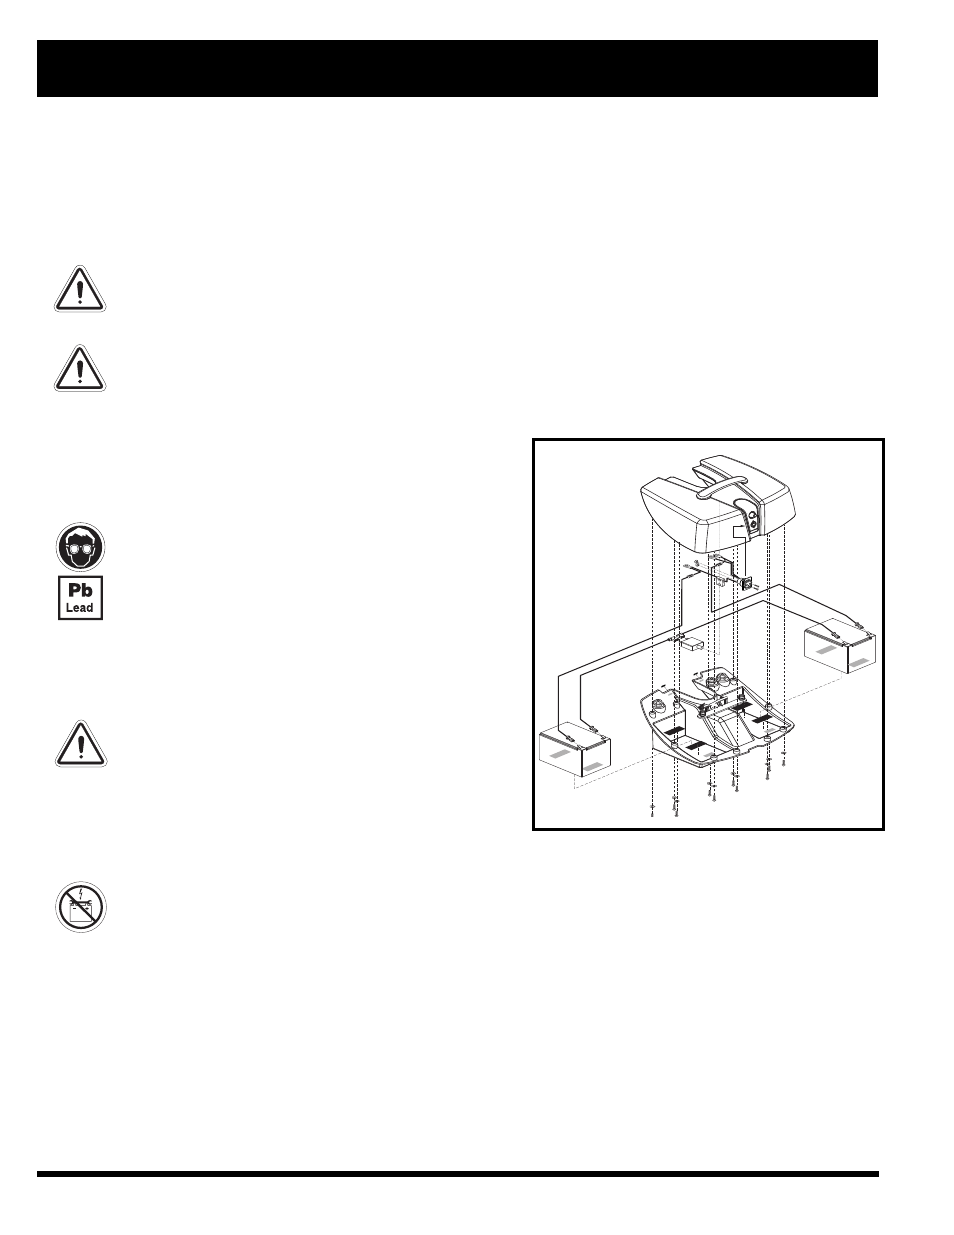
Figure 25. Go-Chair Battery Box
PROHIBITED! Keep tools and other metal objects away from the battery terminals. Contact with
tools can cause electrical shock.
You may need the following to change your batteries:
metric/standard socket set and ratchet
adjustable wrench
To replace the batteries:
1. Remove the battery box from the Go-Chair.
2. Turn the pack upside down.
3. Remove all screws that hold the battery box halves together. See figure 25.
4. Flip the battery box back over so the handle is up and remove the lid.
5. Remove the red (+) positive and black (-) negative battery cabels from each battery.
To replace the wheel:
1. Turn off the power to the controller.
2. Set the Go-Chair up on blocks.
3. Remove the drive wheel nut and washer from the axle. See figure 24.
4. Pull the wheel off the axle.
5. Slide the new wheel back onto the shaft. Make sure that the key is in the axle slot.
WARNING! Failure to ensure that the axle key is properly installed into the axle slot when mounting
the wheel can result in electronic brake failure, personal injury, and/or product damage.
6. Reinstall the drive wheel nut and washer onto the axle and tighten.
WARNING! Make sure both the nut and washer are reinstalled and tightened properly.
7. Remove the Go-Chair from the blocks.
V I I . C A R E A N D M A I N T E N A N C E