Philips VR 617/07 User Manual
Page 9
E
NGLISH
C
ONNECTING ADDITIONAL DEVICES
9
9
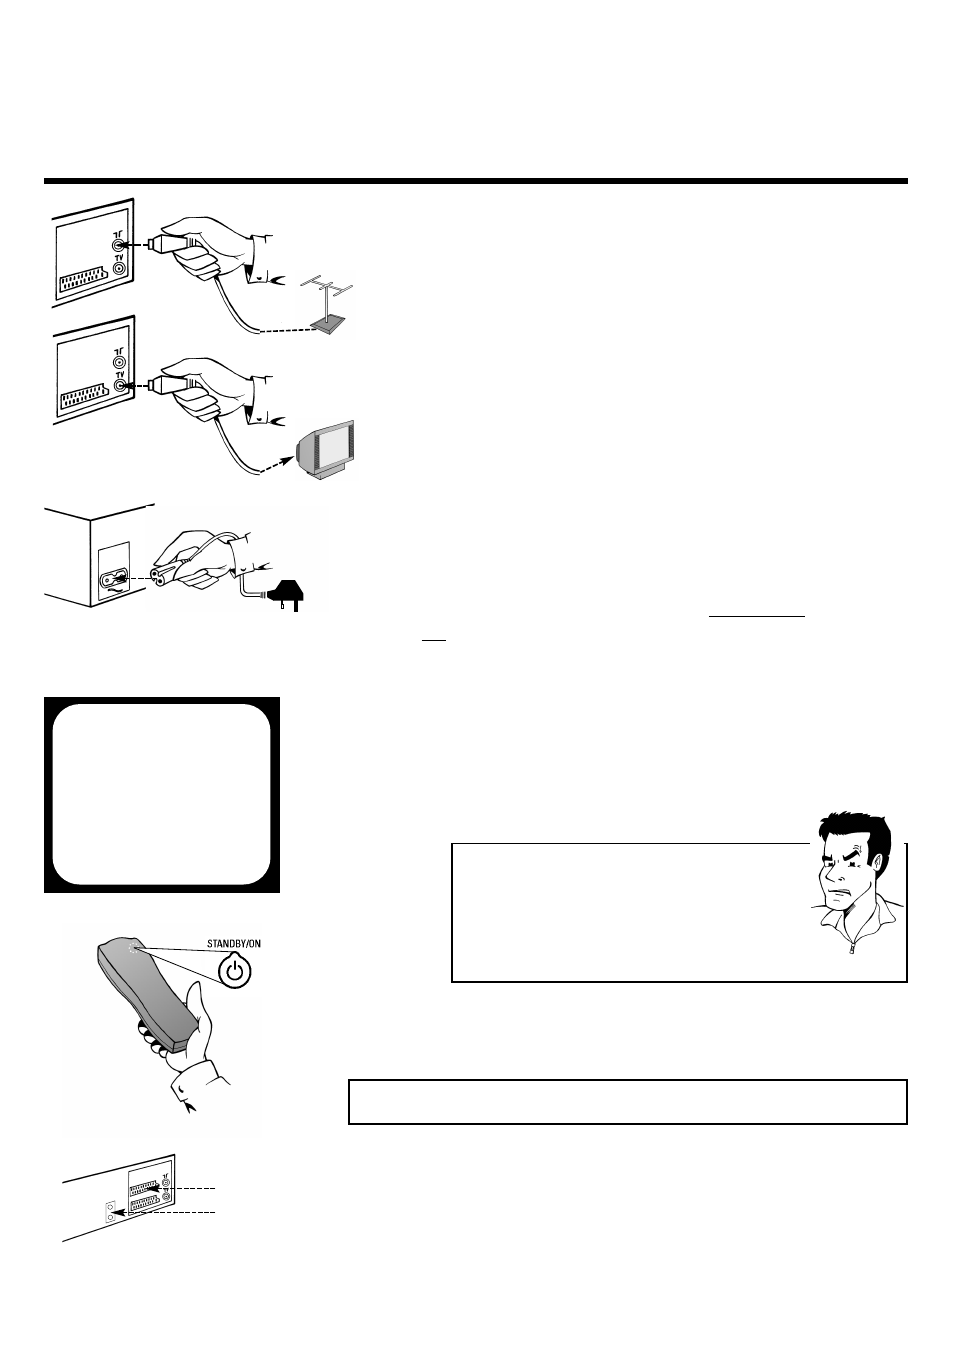
5 Take the enclosed mains cable and connect
the appropriate end to the mains socket 4
4
on the back of the video recorder and the
other to the nearest free socket
6 Switch on your TV set and select on your TV
set the programme number which will in
future be used for operation with the video
recorder
7 Change the settings of this programme
number on your TV set until you see the
adjacent welcome screen clearly and in
colour on the screen
PPRRO
OBBLLEEM
M
8 Switch off the video recorder with the
Standby button m
m
8
8 TThheerree iiss nnoo tteesstt iim
maaggee
4
4 Your video recorder broadcasts on the
frequency 583MHz (CH35) in the UHF range (ultra
high frequency). Repeat the matching of the
selected programme numbers on the TV set
4
4 Check the cable connections
3 Remove the aerial cable plug from the back of
your TV set and insert it into the aerial
socket 2
2 on the back of the video recorder
4 Take the enclosed aerial cable and connect
the appropriate end to the aerial socket of
your TV set and to the TV socket 3
3 on the
back of the video recorder
CONGRATULATIONS
YOU NOW OWN A NEW
PHILIPS
VIDEO RECORDER
CONTINUEPOK
C
Coonnnneeccttiinngg aaddddiittiioonnaall ddeevviicceess
Additional devices, such as a decoder, camcorder, satellite receiver, etc., can be
connected to the scart socket A
AVV22 EEX
XTT22 on the back of the video recorder.
You will need a scart cable for this (available from specialist stores).
There are two audio output sockets on the back of the video recorder -
A
AU
UD
DIIO
O O
OU
UTT LL RR.You can connect a stereo system to these.
AV2 EXT2
AUDIO OUT