Panasonic EY7440-U1 User Manual
Page 6
Ref. No. 2D
Procedure 2A
→
→
→
→ 2B →
→
→
→ 2C→
→
→
→ 2D
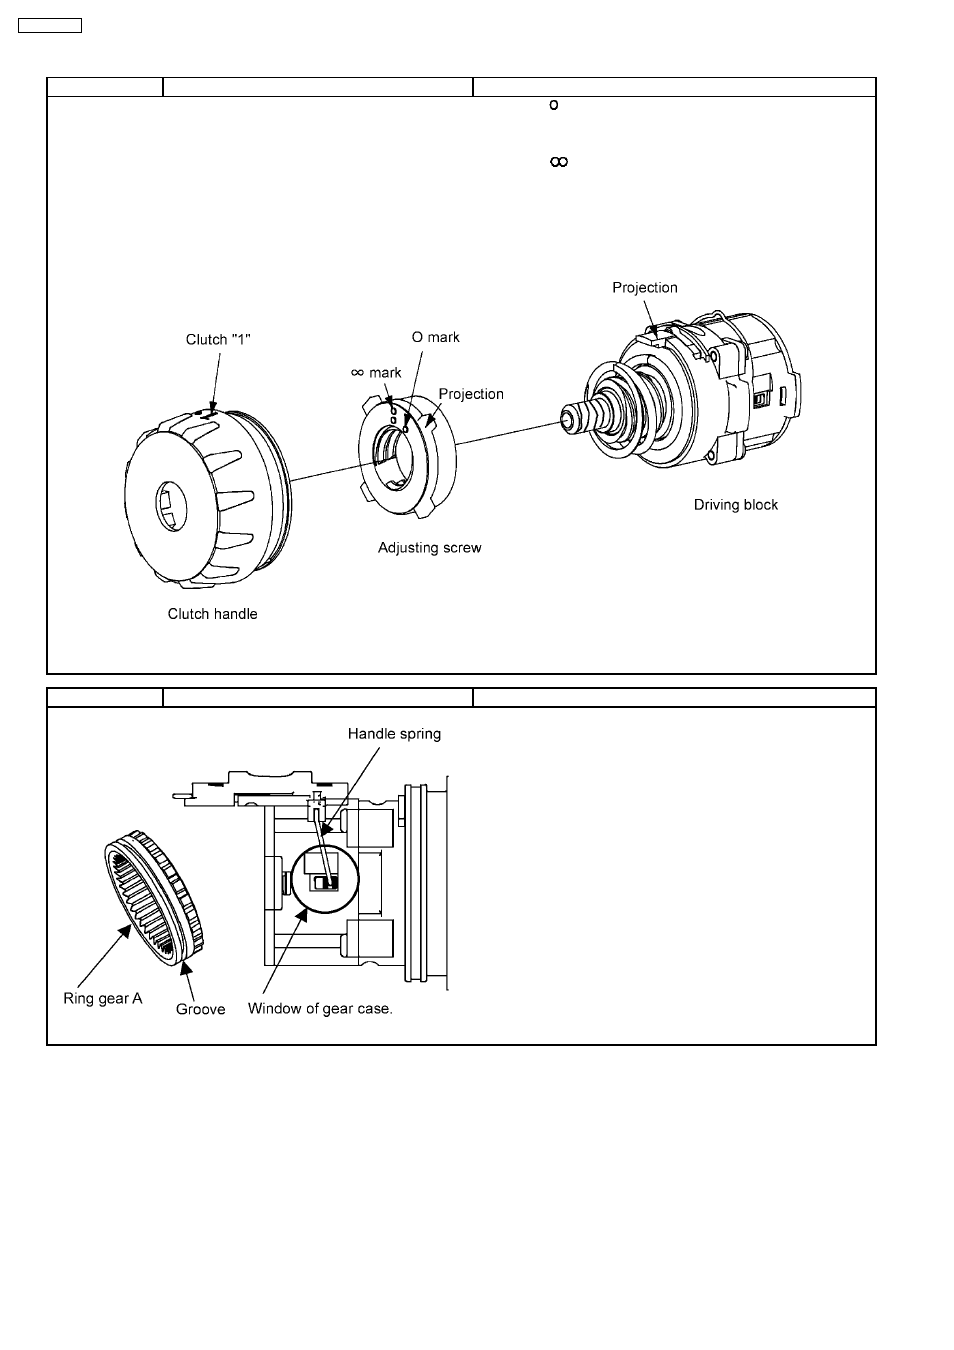
Assembly of the Adjusting Screw and the Clutch Handle.
1. Align the
mark of adjusting screw with the projection (A) of
driving block.
2. Turn the adjusting screw into the driving block about one rotation
for clockwise direction.
3. Align the
mark of adjusting screw with the projection (A) of
driving block.
4. Set the clutch handle with position 1 on top.
(Aligh the position 1 of clutch handle with the projection (A) of driving
block.)
5. Insert the clutch handle with adjusting the tabs of adjusting screw
to the groove of inside clutch handle.
Fig. 8
Ref. No. 2E
Procedure 2A
→
→
→
→ 2B →
→
→
→ 2C→
→
→
→ 2D→
→
→
→ 2E
Attachment of the H/L Change Handle.
1. Insert the both side of handle spring into the groove of Ring gear
A.
6
EY7440-U1 /
- HHR370AH (1 page)
- PTO 540 RPM (12 pages)
- EY6930 (9 pages)
- EY6230 (12 pages)
- MDDDT3530P (133 pages)
- EY4542 (63 pages)
- EY6100 (16 pages)
- EY7411 (44 pages)
- EY7411 (140 pages)
- EY6105 (16 pages)
- HHR160A (5 pages)
- EY6812 (12 pages)
- MINAS A3 Series (24 pages)
- EY7410 (14 pages)
- EY6813-U1 (10 pages)
- AK-MSU930P (16 pages)
- EYFLA2Q (48 pages)
- EY6431 (11 pages)
- CGR18650AF (1 page)
- AW-IF400G (22 pages)
- AW-IF400G (112 pages)
- EY7271 (120 pages)
- EY7270 (120 pages)
- EY7440 (16 pages)
- AC Geared-Motor M9RZ90GB4LG (3 pages)
- EY6506 (12 pages)
- EY6535 (16 pages)
- EY6903 (68 pages)
- LC-P0612P (2 pages)
- KW4S (6 pages)
- EY7540 (48 pages)
- EY7540 (136 pages)
- SV-AV30U (74 pages)
- AC Servo MINAS E Series IMC80A (62 pages)
- AM-4PI (2 pages)
- EY7840 (48 pages)
- EY7840 (148 pages)
- EY7840 (144 pages)
- EY6450 (12 pages)
- EY3544 (80 pages)
- 3343109 (6 pages)
- EY6813 (12 pages)
- LC-XC1238AP (1 page)
- Aluminum Electrolytic Capacitors NHG (5 pages)