Understanding the indicators on the a 21 – Parasound A 21 User Manual
Page 13
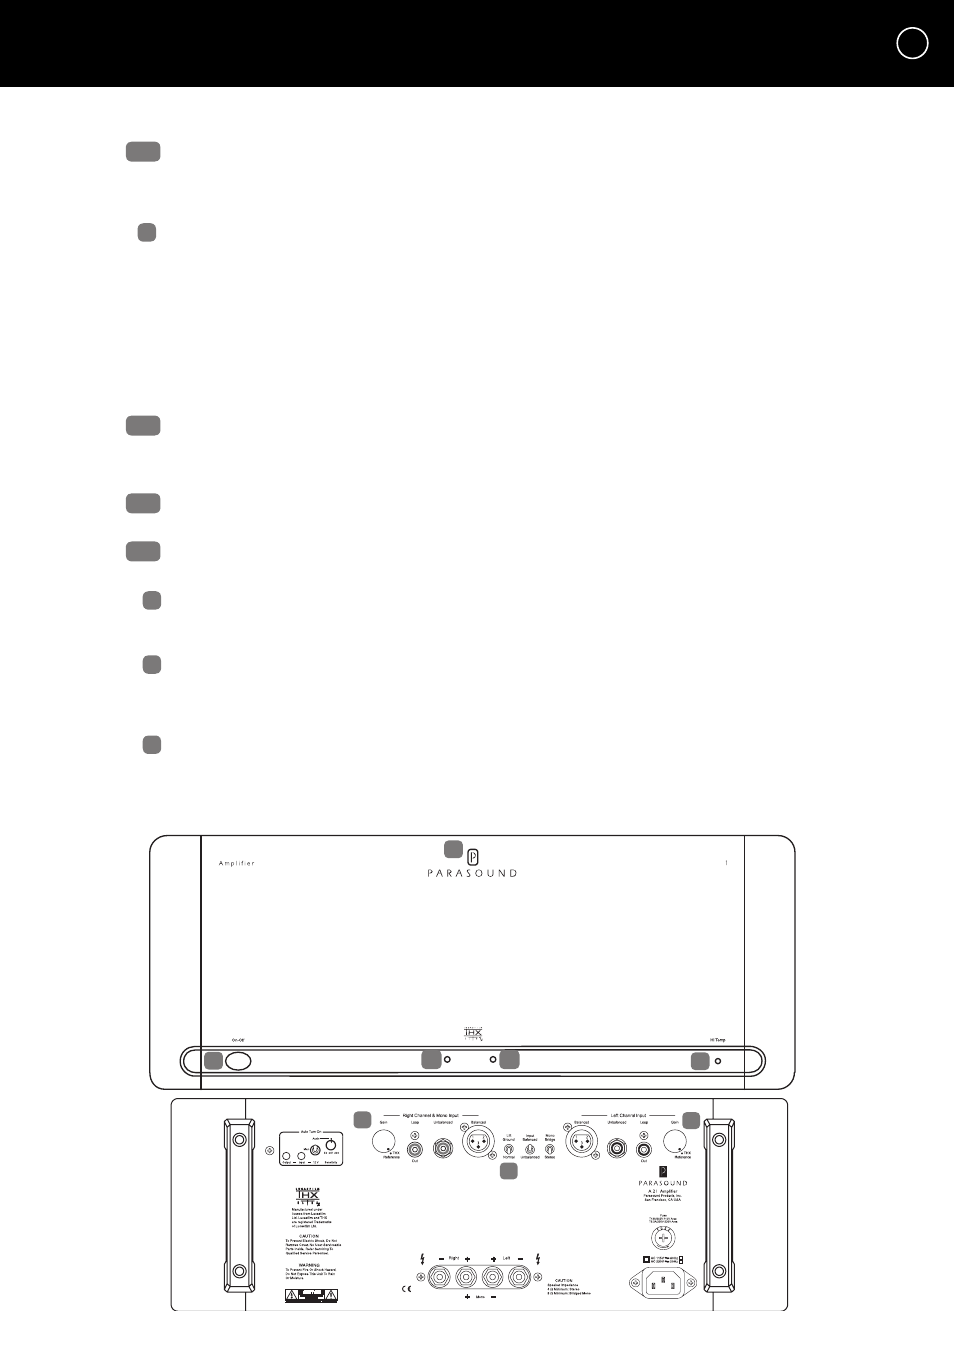
UNDERSTANDING THE INDICATORS ON THE A 21
AC Present Indication
When the A 21 is plugged into a live AC outlet, a soft blue halo glows behind its On-Off button
and its red “P” Badge glows faintly. These indicate that the unit is plugged into a live AC
outlet, even when it is turned off.
On, Off and Fault/Protection Status Indicators
Whenever the A 21 is turned on, the soft blue glow behind its On-Off button will change to
red for about five seconds as its internal circuits stabilize. Then the red glow is replaced
by a brighter blue glow to indicate normal operation. If the glow remains red after
turn on or while the amp is playing, it indicates activation of the A 21’s protection
circuits and no sound will be heard from the speaker. The A 21 protects itself from external
conditions such as excessive heat, load impedance that is too low, or a short-circuited
speaker connection or wire. After you correct the fault, the A 21 will resume operation. If
the A 21 remains “in protection” after it has cooled down and you’ve confirmed there
are no external faults, it could indicate an internal problem. Please contact Parasound’s
Technical Service Department.
Left and Right Channel Status Indicators
These are two small round indicators in the center of the recess in the front panel. The indicator
on the left displays the status of the left channel and the indicator on the right displays the
status of the right channel.
Both Illuminated
When both channels are operating normally, these both glow blue.
No Illumination:
When the A 21 is turned off, these indicators are off.
High-Temp Indicator
This indicator is near the right side of the panel recess. It will glow red if either channel
overheats. The On-Off button will also glow red if the A 21 overheats.
Gain Control Knobs
These adjust the gain (level) of the A 21. We recommend that you rotate the
Left and Right Gain controls to their maximum clockwise positions, marked THX Reference.
Refer to Gain Controls in Technically Speaking for more information about these adjustments.
Ground Switch
The Ground switch can assist in reducing audible hum caused by ground loops in your
system. This switch should be in its Normal (down) position. If you hear hum you can move
it to its Lift (up) position to eliminate it. Refer to the Technically Speaking section for more
information about ground loops.
10
A
B
E
C
D
A 2
F
G
F
G
A
&
B
C
&
D
B
E
F
C
&
D
C
&
D