Useful adjustment settings 09, Selecting a screen size automatically, Detecting side masks – Pioneer PDP-428XG User Manual
Page 38
Useful adjustment settings
09
38
En
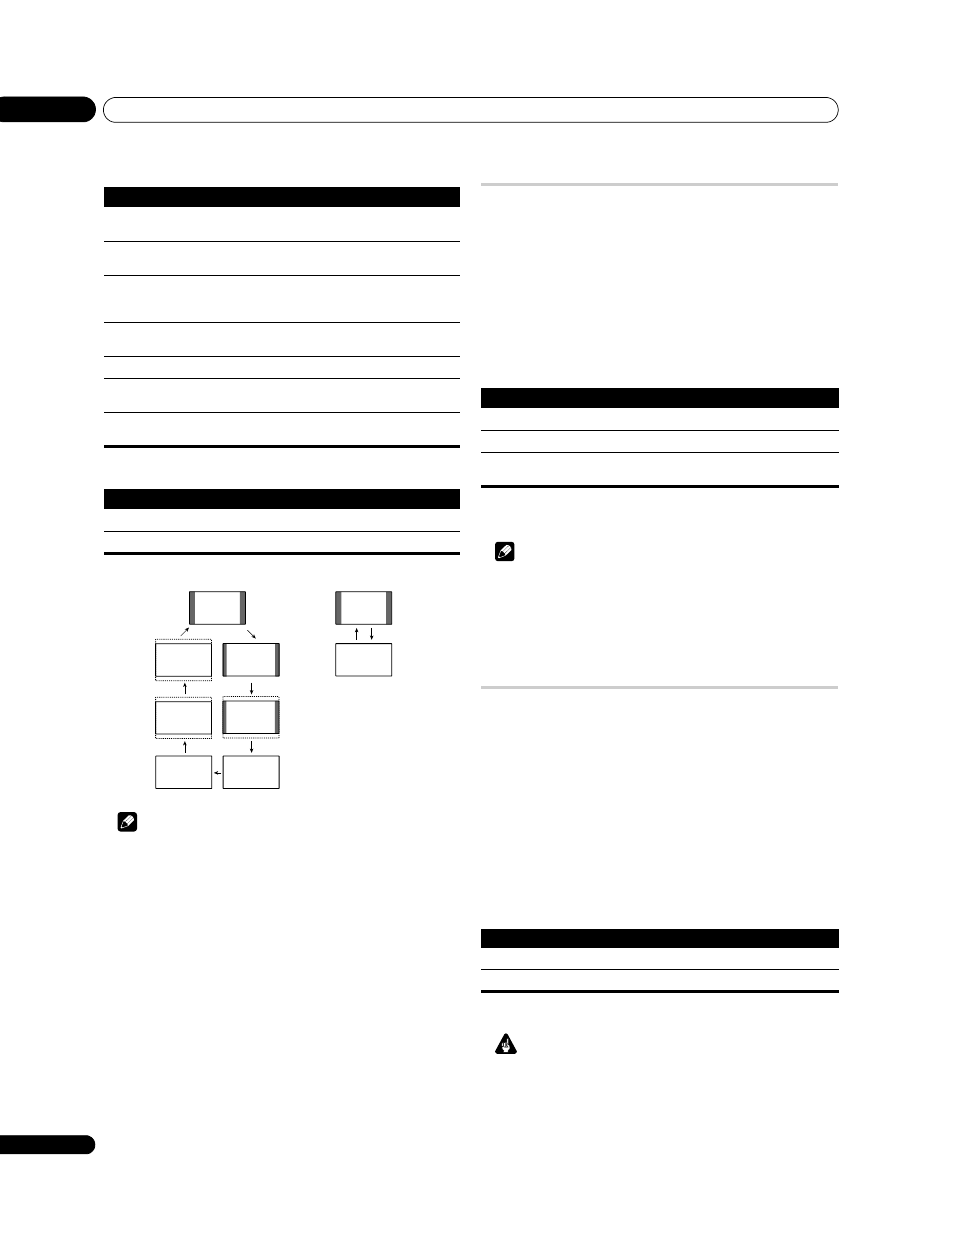
AV source
PC source
AV source
PC source
Note
• The specifications given for the PC source are for the PDP-
508XG. For the PDP-428XG, the number of panel pixels is
different, and thus signal processing and actual viewing
conditions will vary slightly.
• While receiving High Definition video signals, pressing
f
switches among FULL, WIDE, 4:3, and ZOOM.
• Some HD broadcasts may display 4:3 content with side masks,
which may cause uneven wear. After viewing it is
recommended to view full-screen motion video (see Detecting
side masks).
Selecting a screen size automatically
The plasma television automatically selects an appropriate screen
size when the received video signals contain WSS (wide screen
signaling) information or when video signals are received from a
connected HDMI equipment (see Using the HDMI Input on
page 45). To activate this function, use the following procedure.
1
Press HOME MENU.
2
Select “Option“ (
/ then ENTER).
3
Select “Auto Size“ (
/ then ENTER).
4
Select “Natural” or “Wide-Zoom” (
/ then ENTER).
5
Press HOME MENU to exit the menu.
Note
• Manually select an appropriate screen size if an image does
not automatically switch to a correct screen format.
• When the video signal contains no aspect ratio information,
the function will not work even with “Natural” or “Wide-Zoom”
selected.
Detecting side masks
Some HD broadcasts may display 4:3 content with side masks. The
plasma television automatically detects these side masks to
provide gray side masks when “Natural” has been selected for
“Auto Size”, or display the image full screen with the side masks
removed when “Wide-Zoom” has been selected. This function does
not operate when “Off” is selected for “Auto Size”.
1
Press HOME MENU.
2
Select “Option“ (
/ then ENTER).
3
Select “Side Mask“ (
/ then ENTER).
4
Select “Detection” (
/).
5
Select “On” (
/).
6
Press HOME MENU to exit the menu.
Important
• The “On” setting prevents uneven wear on 4:3 content and side
masks and can reduce the possibility of image retention.
Item
Description
4:3
For 4:3 “standard” pictures. A side mask appears on each
side.
FULL 14:9
For 14:9 squeeze pictures. A thin side mask appears on each
side.
CINEMA 14:9
For 14:9 letterbox pictures. A thin side mask appears on
each side, and you may also see bars on the top and bottom
with some programs.
WIDE
In this mode the picture is progressively stretched toward
each side of the screen
FULL
For 16:9 squeeze pictures
ZOOM
For 16:9 letterbox pictures. Bars may appear on the top and
bottom with some programs.
CINEMA
For 14:9 letterbox pictures. Bars may appear on the top and
bottom on some programs.
Item
Description
4:3
Fills the screen without altering the input signal aspect ratio
FULL
Full 16:9 screen display
4:3
CINEMA
FULL 14:9
ZOOM
CINEMA 14:9
FULL
WIDE
4:3
FULL
Item
Description
Off
Deactivates the Auto Size function
Natural
Naturally adjusts the image to the screen
Wide-Zoom
Enlarges and displays only the 4:3 aspect ratio portion in full
and wide screen
Item
Description
Off
Deactivates the Side Mask detection
On
Activates the Side Mask detection