Save these instructions, Warning – Pentair Underwater Light AmerQuartz User Manual
Page 7
Rev. D • Rev. D • Rév. D 10-29-07
7
P/N • Núm/Pte. • Réf. 99101600
WARNING
Use only the special pilot screw provided with this underwater
light. This screw mounts and electrically grounds the housing
securely to the mounting ring and wet niche. Failure to use the
screw provided could create an electrical hazard which could
result in death or serious injury to pool users, installers or
others due to electrical shock.
10. Fill pool until the underwater light is completely submerged
in water before operating the light for more than
10 seconds. Turn on main switch or circuit breaker, as
well as the switch which operates the underwater light
itself, to check for proper operation.
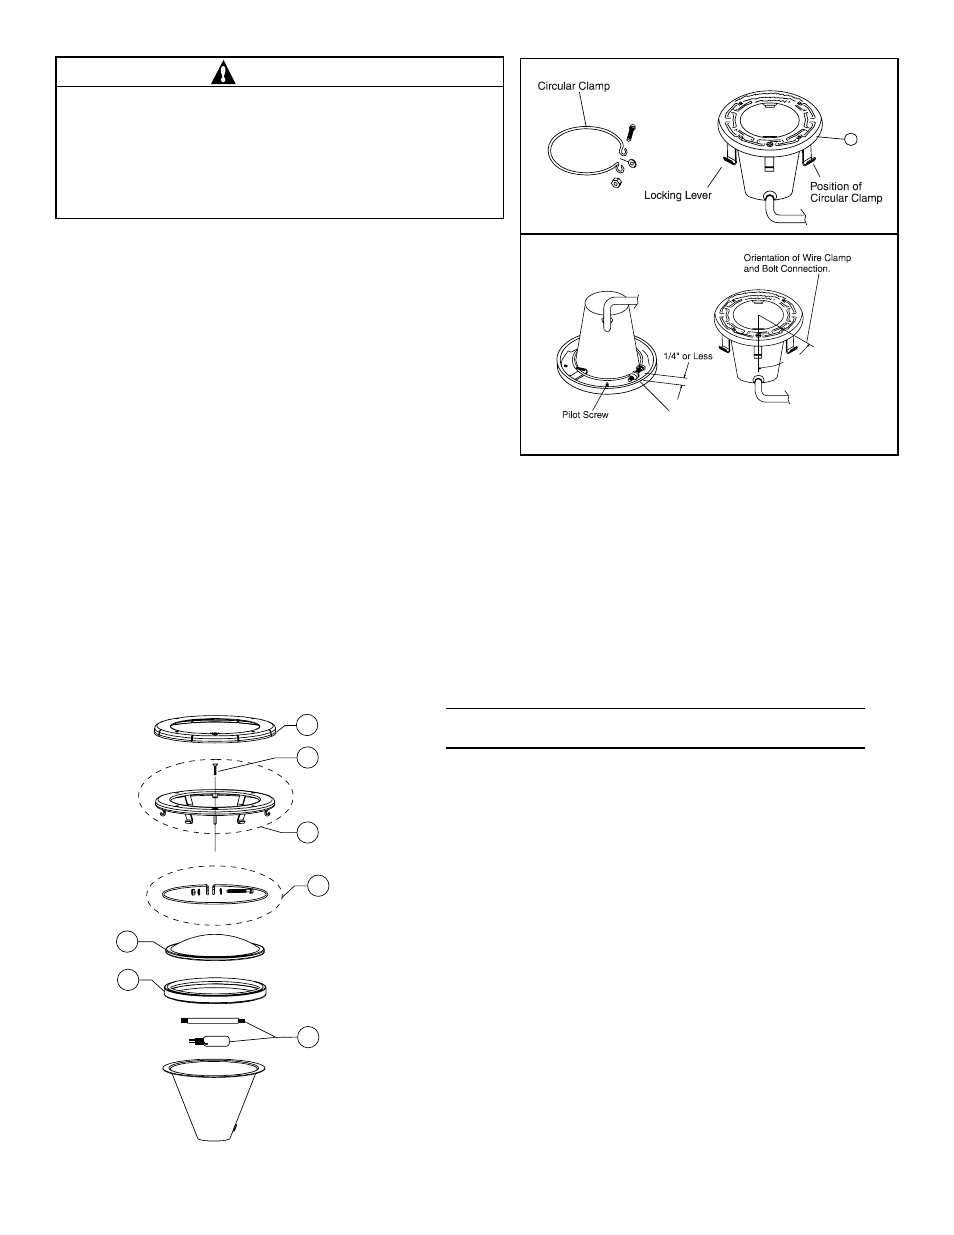
Section IV. Stainless Steel Face Ring Assy. Instructions
1. With the light resting on its base, place the gasket assembly
on top of the light shell as shown, see Figure 4. A NEW
LENS GASKET MUST BE USED EACH TIME THE
LIGHT IS REASSEMBLED. Center the stainless steel
face ring and place it over the lens and gasket assembly.
The locking levers should all be hanging freely down to install over the lens and gasket. Align the special pilot screw
on the face ring with the letter "R" of the word "Before" as used in the phrase "SUBMERGE BEFORE LIGHTING"
found on the lens surface and the compression fitting on the light shell, see Figure 1.
2. With the bent ends of the circular uni-tension clamp pointing down spread the clamp and place it in the “U” recesses
of the locking levers. Be sure the bent ends of the clamp are located between the pair of locking levers as shown
in Figure 3, location A. Check to see that the clamp is properly engaged with all of the levers.
3. Turn the light so that it is now resting on its lens. Tighten the screw and nut until the distance between the ends of the
clamp equals 1/4 inch or less; see Figure 4.
A
Bolt and nut are to be tightened at approx. 45 degrees
from the pilot screw between the tabs on the face ring
as shown above.
45 degrees
Figure 3.
Figure 4.
Item
Part
No.
No.
Description
1
79212100
Face ring, large plastic, white
1
79212165
Face ring, large plastic, gray
1
79212111
Face ring, large plastic, black
2
79104800
Pilot Screw, with captive gum washer, brass
2
619355
Pilot Screw, with captive gum washer, S/S
3
79110600
Face ring assembly, S/S
4
79111000
Uni-tension wire clamp assy.
5
79100100
Lens, clear, 8-3/8 in. dia., tempered
6
79101601
Gasket, 8-3/8 in. lens
7
79131000
Bulb, 300 watt, 120 volt, double-ended T3 R7S
7
79131100
Bulb, 500 watt, 120 volt, double-ended T3 R7S
7
79131400
Bulb, 50 watt, 12 volt, 2 Pin T3 GY 6.35, 2 req.
7
79131200
Bulb, 100 watt, 12 volt, 2 Pin T3 GY 6.35, 2 req.
78900700
Kwik-change lens cover, green
78900800
Kwik-change lens cover, blue
78900900
Kwik-change lens cover, red
78901000
Kwik-change lens cover, amber
Section V.
AmerQuartz Replacement Parts
SAVE THESE INSTRUCTIONS
1
2
3
4
5
6
7