Linksys HomeLink HPPO200 User Manual
Page 9
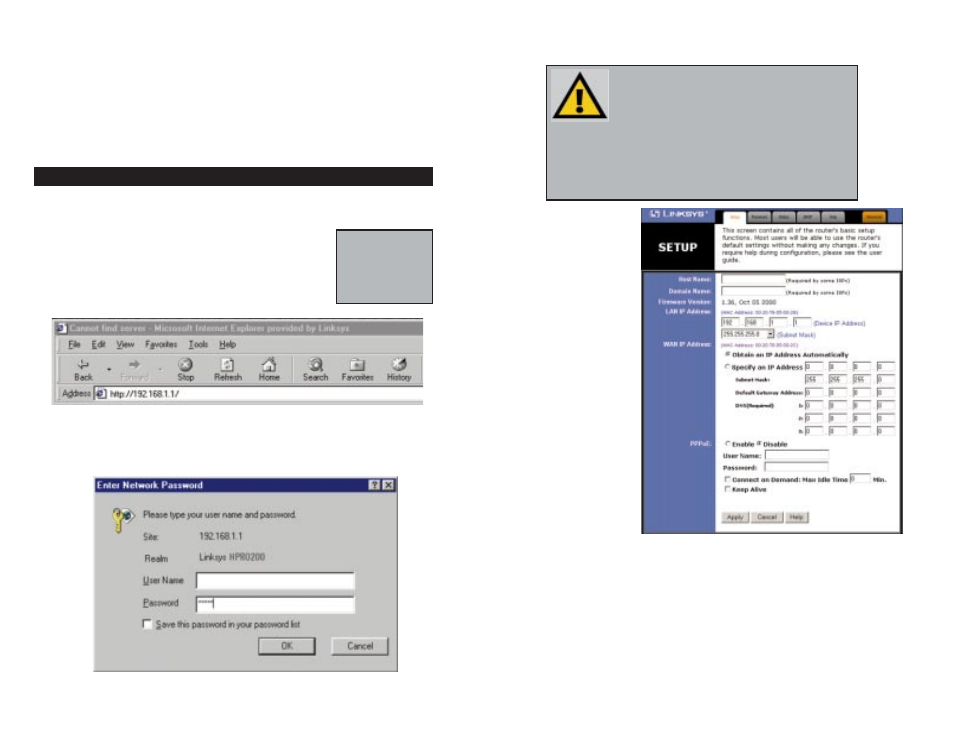
3. The HomeLink
Phoneline 10M
C a b l e / D S L
Router’s Setup
page will appear.
4. Configure the following values.
Router Name & Domain Name These fields allow you to supply a host
and domain name for the HomeLink Phoneline Router. Some ISPs require
these names as identification. You may have to check with your ISP to see
if your Broadband Internet service has been configured with a host and
domain name. In most cases, leaving these fields blank will work.
Configuring Your Ethernet
Network with the HomeLink
Phoneline 10M Cable/DSL Router
Now that your HomeLink Phoneline Router is wired into your network, you
can begin configuring your system.
1. Open your web browser
and type
http://192.168.1.1
in the browser’s Address
box. This number is the default IP address of the
HomeLink Phoneline Router. Press the Enter key.
2. A username and password prompt will appear. Leave the User Name box
empty and type
admin
(the default password) in the Password box. Click
the OK button.
Phoneline 10M Cable/DSL Router
12
N
No
otte
e:: If you have previously enabled an Internet Sharing
Proxy Service on any of your PCs, you must disable it
now.
• If you are running Netscape Navigator: Click E
Ed
diitt >> P
Prre
effe
erre
en
nc
ce
e >>
A
Ad
dv
va
an
nc
ce
ed
d >> P
Prro
ox
xiie
es
s> and click D
Diirre
ec
ctt C
Co
on
nn
ne
ec
cttiio
on
n tto
o tth
he
e IIn
ntte
errn
ne
ett.
• If you are running Internet Explorer v5 or better, click S
Stta
arrtt>>
S
Se
ettttiin
ng
gs
s>> C
Co
on
nttrro
oll P
Pa
an
ne
ell>> IIn
ntte
errn
ne
ett O
Op
pttiio
on
ns
s>> C
Co
on
nn
ne
ec
cttiio
on
ns
s>> L
LA
AN
N
S
Se
ettttiin
ng
gs
s. Remove the checks from all three boxes. Click O
OK
K to con-
tinue.
11
HomeLink™ Series
Configuring the HomeLink Phoneline Router
N
No
otte
e::
If the TCP/IP
protocol is not con-
figured on your PC,
go to the Appendix
for TCP/IP installa-
tion instructions now.