Plate slip clutch, Disassembly, Assembly – Land Pride RC15 Series User Manual
Page 21: Disassembly assembly, Table of contents 4-plate slip clutch
19
Section 5 Maintenance and Lubrication
9/25/08
RC15, RC25, and RC35 Series Rotary Cutter 312-298M
Land Pride
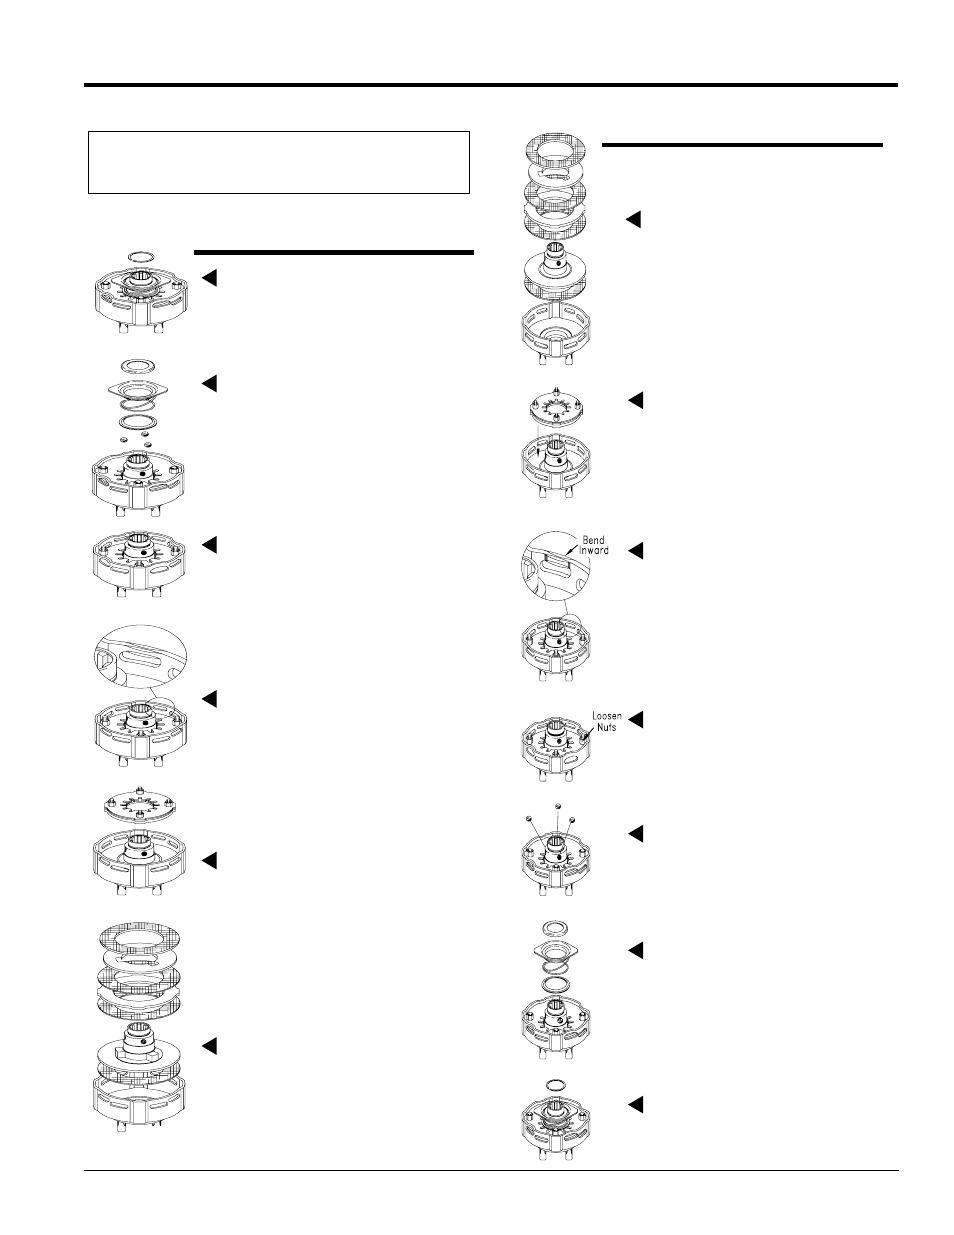
4-Plate Slip Clutch
NOTE: Before proceeding, secure the clutch firmly in
a vise or other clamping device to prevent injury.
15353
Step 1
Remove snap ring.
Step 2
Remove backup ring, lock collar,
compression spring, bottom backup
ring, and balls.
Step 3
Tighten the four hex nuts uniformly
until the clutch pack and hub are
loose.
Step 4
Bend all four retaining lugs out on the
edge of the clutch housing.
Step 5
Remove the thrust plate with the
Belleville Springs and lug rings to ac-
cess friction disks and hub for inspec-
tion or service.
Step 6
Inspect friction disks and hub.
Step 2
Compress the Belleville Springs to
the pressure plate by tightening the
four hex nuts and then placing the as-
sembly into the clutch housing.
Step 3
Bend the retaining lugs inward over
the Belleville Spring edges to secure
the spring before backing the four hex
nuts off.
Step 4
With the lugs bent in, loosen the four
hex nuts completely to the end of the
threaded studs.
Step 5
Insert greased balls.
Step 6
Install bottom backup ring, compres-
sion spring, lock collar, and top back-
up ring.
Step 7
Install snap ring.
Step 1
Place the hub and friction disks into
the housing.
Disassembly
Assembly
14232