Lochinvar MFH-I&S-02 User Manual
Page 8
8
MFH-I&S-02
6. At least once a year, check the combination temperature and pressure
relief valve to insure that the valve has not become encrusted with lime.
Lift the lever at the lever at the top of the valve several times until the
valve seats properly without leaking and operates freely.
7. Monthly drain off a gallon of water to remove silt and sediment.
8. If the combination temperature and pressure relief valve on the appliance
discharges periodically, this may be due to thermal expansion in a closed
water supply system. Contact the water supplier or local plumbing inspector
on how to correct this situation. Do not plug the combination temperature
and pressure relief valve outlet.
WARNING
When lifting lever of the combination temperature and pressure
relief valve, hot water will be released under pressure. Be
careful that any released water does not result in bodily injury
or property damage.
CAUTION
FOR YOUR SAFETY, DO NOT ATTEMPT REPAIR OF COMBINATION GAS CONTROL,
BURNERS OR GAS PIPING. REFER REPAIRS TO A QUALIFIED SERVICE TECHNICIAN.
WARNING! THIS WATER MAY BE HOT.
9. A combination sacrificial anode rod/hot water outlet nipple has been
installed to extend tank life. The anode rod should be inspected periodically
(every 2 years) and replaced when necessary to prolong tank life. Water
conditions in your area will influence the time interval for inspection and
replacement of the anode rod. Contact the plumbing professional who
installed the water heater or the manufacturer listed on the rating plate for
anode replacement information. The use of a water softener may increase
the speed of anode consumption. More frequent inspection of the anode
is needed when using softened (or phosphate treated) water.
Contact your supplier or plumbing professional for replacement parts or contact
the company at the address given on the rating plate of the water heater.
Provide the part name, model and serial numbers of the water heater when
ordering parts.
4-08/Printed in USA
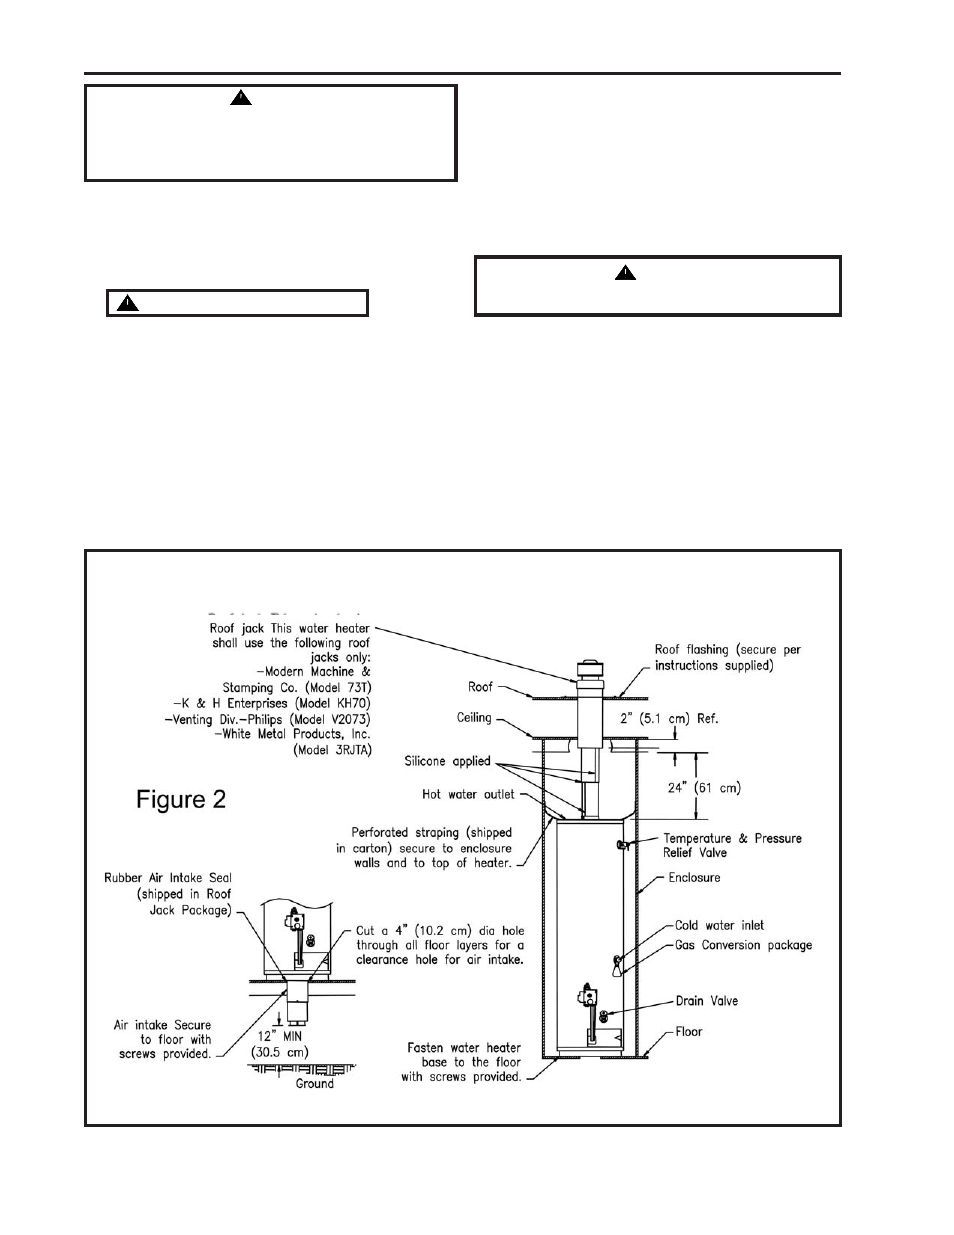
TYPICAL INSTALLATION - VENTING
Figure 4