LifeCore Fitness LC-R100 User Manual
Page 5
Page | 4
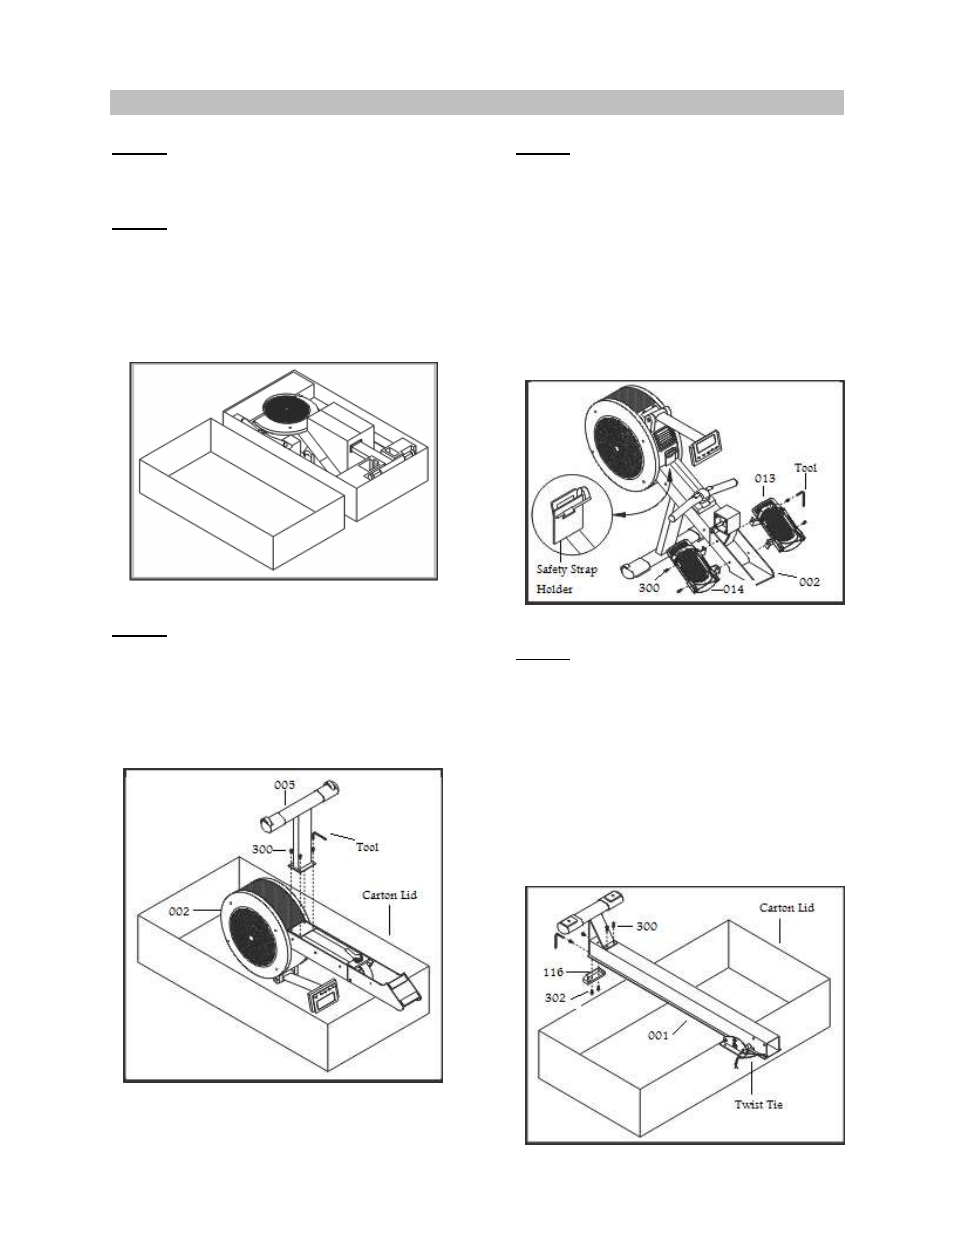
Assembly Instructions
Step 4:
Step 1:
Clear a big enough working space before
unpacking your R100 Rower.
Step 2:
Open the carton as shown in the diagram
below.
Note: To protect the Rower while assembling,
we suggest keeping the protective packing
material until it is assembled completely.
Step 3:
a) Place the Main Frame (002) in the carton lid
as shown in the diagram below.
b) Remove 4 bolts (300) from Main Frame
with the Tool provided.
c) Assemble the Front Stabilizer (005) with the
same 4 bolts and tighten firmly.
Step 4:
a) Remove the partly assembled Rower from
the carton lid and place it the correct way
up as shown in the diagram below.
b) Remove the Safety Strap Holder and
discard. Place the Handlebar in its holder.
c) Remove 4 bolts (300) from Main Frame
with Tool provided.
d) Assemble 2 Foot Rests (013 & 014) with
the same 4 bolts and tighten firmly. Each
Foot Rest is marked Left and Right with “L”
and “R” stickers.
Step 5:
a) Remove the Aluminum Beam (001) from
the carton and place it on top of the carton
lid as shown in the diagram below.
b) Remove 4 bolts (300) from Aluminum
Beam and 2 bolts (302) from Rear
Stabilizer (006) with the Tool provided.
c) Assemble Rear Stabilizer with the same 4
bolts and tighten firmly.
d) Assemble Aluminum Beam End Cap (116)
with 2 bolts and tighten firmly.
e) Remove the Twist Tie and discard.