Regarding disk capacity – KORG DIGITAL RECORDING STUDIO D16 User Manual
Page 20
18
This section explains how the D16V2 manages disk
capacity.
For explanatory purposes, we will assume that you
have recorded a song with the following structure.
It is not necessary that the Optimize Track opera-
tion explained here be used frequently. It is suffi-
cient to use it only if “Disk Busy” is displayed
when you are actually editing, or if you wish to
recover more disk free space after you have fin-
ished the song.
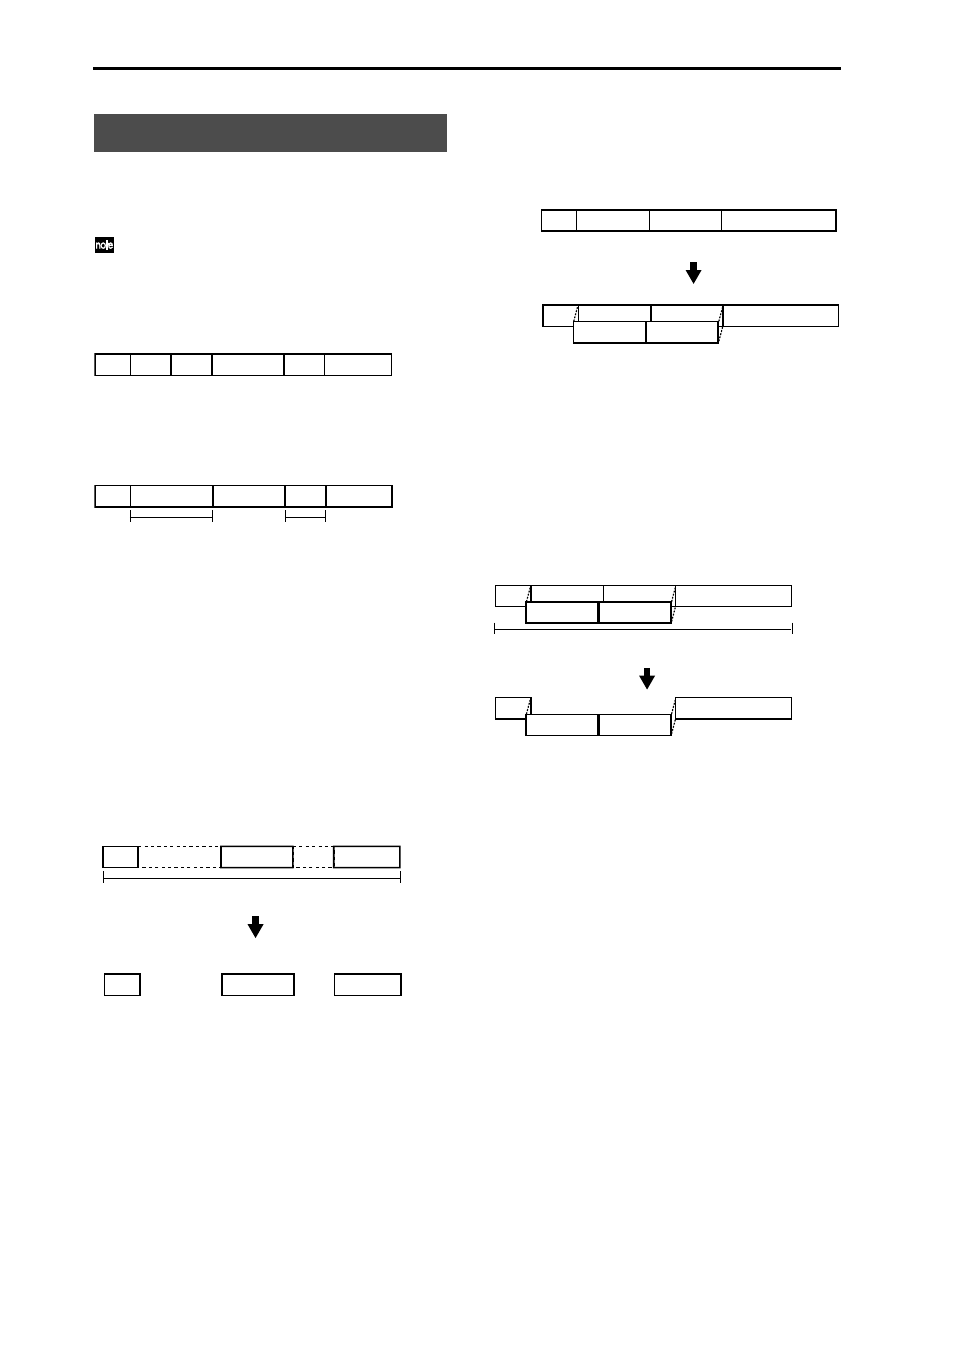
Example 1
Suppose that you began recording on track 1 from the
beginning of the song, and recorded only the Intro,
Solo, and Ending as the first pass of recording.
In this case, sections A, B, and the Break will be
recorded as silence (in reality, sound at the noise level),
and will occupy disk space unnecessarily. Execute the
Erase Track operation on the silent portions (A, B, and
Break) of track 1. At this time, the D16V2 is only “provi-
sionally” erasing the unwanted portions A, B, and
Break (the noise-level sound), meaning that the disk
capacity will not be recovered.
→
If you wish to retain only the audio data that you are
actually using (Intro, Solo, and Ending) and recover the
rest of the space, execute Optimize Track on track 1
between the beginning and end of the song. This will
create audio data for only the portions that are actually
used, so that only the Intro, Solo, and Ending will
occupy disk capacity.
Example 2
Suppose that you began recording on track 1 from the
beginning of the song, and played the Intro, A, B, and
Solo as the first take. Then you recorded A’ and B’ as the
second take.
In this case, the A and B (take 1) data underlying A’ and
B’ of track 1 will remain as a single piece of audio data
together with the Intro and Solo, in order to allow Undo
to be performed. This means that the disk capacity will
be occupied by data for the Intro, A+A’, B+B’, and Solo.
→
If you wish to recover disk capacity by erasing the A
and B data from the first take, execute the Optimize
Track command on track 1 from the beginning to the
end of the song. This will create audio consisting only
of the Intro of take 1, A’ of take 2, B’ of take 2, and the
Solo of take 1. Sections A and B of take 1 will no longer
occupy disk capacity.
Regarding disk capacity
Intro
A
B
Break
Solo
Ending
Intro
silence
silence
Solo
Ending
“EraseTrack”
IN
OUT
“EraseTrack”
IN
OUT
Intro
data
exists
data exists
Solo
Ending
“OptimizeTrack”
IN
OUT
Intro
Solo
Ending
data
erased
data erased
after execution
Intro
B
Solo
A
Intro
B
Solo
A
B'
A'
Take 1
Take 1
Take 2
Record take 2
“OptimizeTrack”
IN
OUT
Intro
B
Solo
A
B'
A'
Intro
Solo
B'
A'