Kidde 9 Volt Battery Operated Photoelectric/Ionization Smoke Alarm PI9000 User Manual
Page 6
2. To insure aesthetic alignment of the alarm with the hallway or
wall, the “A” line on the mounting plate should be parallel with
the hallway when ceiling mounting or horizontal when wall
mounting.
3. After selecting the proper smoke alarm location as described in
section 1, attach the mounting plate to the ceiling as shown in
figure 4. For wall mounting see figure 4. Place mounting plate
on the wall. Be sure the “A” line is horizontal. Use the screws
and anchors provided to secure the mounting plate (use 3/16”
drill bit for anchor holes).
4. Battery installation instructions are provided on the inside of the
battery door.
To ensure proper installation of the smoke alarm battery, follow
the instructions.
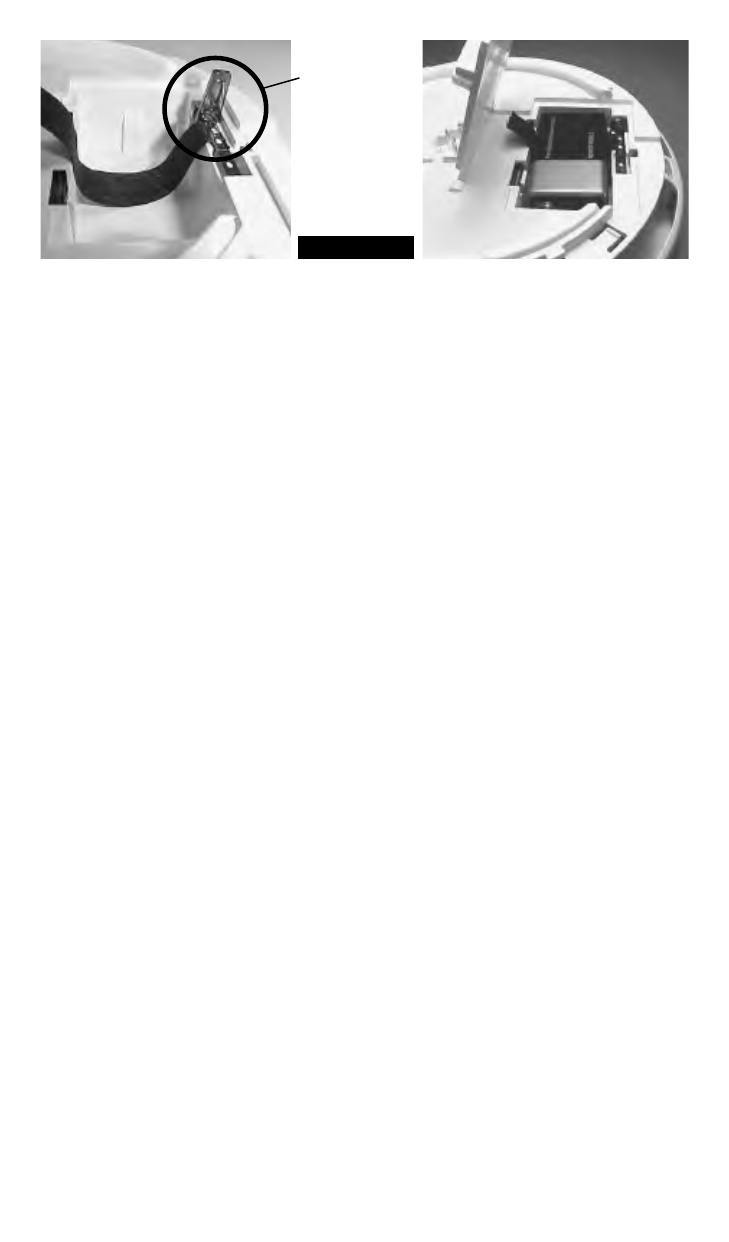
5. When installing the battery, press the battery reminder finger
down into the battery compartment and install the battery (see
figure 5).
CAUTION! IF THE BATTERY REMINDER FINGER IS NOT HELD
DOWN IN THE BATTERY COMPARTMENT BY THE BATTERY,
THE BATTERY DOOR WILL NOT CLOSE AND THE UNIT WILL
NOT ATTACH TO THE MOUNTING BRACKET.
6. Install the alarm on the trim ring and rotate the alarm in the direc-
tion of the "ON" arrow on the cover until the alarm ratchets into
place (this ratcheting function allows for aesthetic alignment).
TAMPER RESIST FEATURE: To make your smoke alarm tamper
resistant, a tamper resist feature has been provided. Activate the
tamper resist feature by breaking off the four posts in the square
holes in the trim ring (see figure 6). When the posts are broken
off, the tamper resist tab on the base is allowed to engage the
mounting bracket. Rotate the alarm onto the trim ring until you
hear the tamper resist tab snap into place, locking the alarm on
the trim ring. Using the tamper resist feature will help deter chil-
FIGURE 5
Battery
Reminder
Finger