Kawasaki 840330 User Manual
Page 8
M
MA
AIIN
NT
TE
EN
NA
AN
NC
CE
E A
AN
ND
D C
CL
LE
EA
AN
NIIN
NG
G
A
Allw
wa
ayyss U
UN
NP
PL
LU
UG
G tth
he
e tto
oo
oll ffrro
om
m tth
he
e p
po
ow
we
err sso
ou
urrcce
e b
be
effo
orre
e
cclle
ea
an
niin
ng
g o
orr m
ma
aiin
ntte
en
na
an
ncce
e..
• U
Usse
e cco
om
mp
prre
esssse
ed
d a
aiirr tto
o b
bllo
ow
w o
ou
utt a
an
nyy a
accccu
um
mu
ulla
atte
ed
d d
du
usstt o
orr g
grriitt.. Tiny
particles from metal grinding often accumulate inside your tool and could
create an electrical shock hazard.
• N
Ne
evve
err u
usse
e sso
ollvve
en
nttss o
orr h
ha
arrssh
h cch
he
em
miicca
allss.. Use only mild soap and a damp cloth
to clean the tool. Never let any liquid get inside the casing. Never immerse any
part of the tool in a liquid. Always keep the ventilation openings clear.
• R
Re
eg
gu
ulla
arrllyy cclle
ea
an
n tth
he
e vve
en
nttiilla
attiio
on
n ssllo
ottss iin
n yyo
ou
urr tto
oo
oll u
ussiin
ng
g a
a sso
offtt b
brru
ussh
h o
orr d
drryy
ccllo
otth
h..
A
AC
CC
CE
ES
SS
SO
OR
RIIE
ES
S
U
Usse
e o
on
nllyy a
acccce
esssso
orriie
ess tth
ha
att a
arre
e rre
ecco
om
mm
me
en
nd
de
ed
d b
byy tth
he
e m
ma
an
nu
uffa
accttu
urre
err ffo
orr yyo
ou
urr m
mo
od
de
ell..
Accessories that may be suitable for one tool may become hazardous when used on
another tool.
A
Allw
wa
ayyss a
atttta
acch
h g
grro
ou
un
nd
de
ed
d ((3
3--p
prro
on
ng
g)) e
exxtte
en
nssiio
on
n cco
orrd
dss tto
o g
grro
ou
un
nd
de
ed
d ((3
3--h
ho
olle
e)) o
ou
uttlle
ettss..
IIff yyo
ou
u m
mu
usstt u
usse
e a
an
n e
exxtte
en
nssiio
on
n cco
orrd
d,, b
be
e ssu
urre
e tth
ha
att tth
he
e g
ga
au
ug
ge
e iiss lla
arrg
ge
e e
en
no
ou
ug
gh
h tto
o cca
arrrryy
tth
he
e a
am
mo
ou
un
ntt o
off ccu
urrrre
en
ntt n
ne
ecce
essssa
arryy ffo
orr yyo
ou
urr p
po
ow
we
err tto
oo
oll.. If not, your tool may experi-
ence a loss of power, excessive voltage drop or overheating. The smaller the gauge
number, the heavier the cord (see table on next page).
14
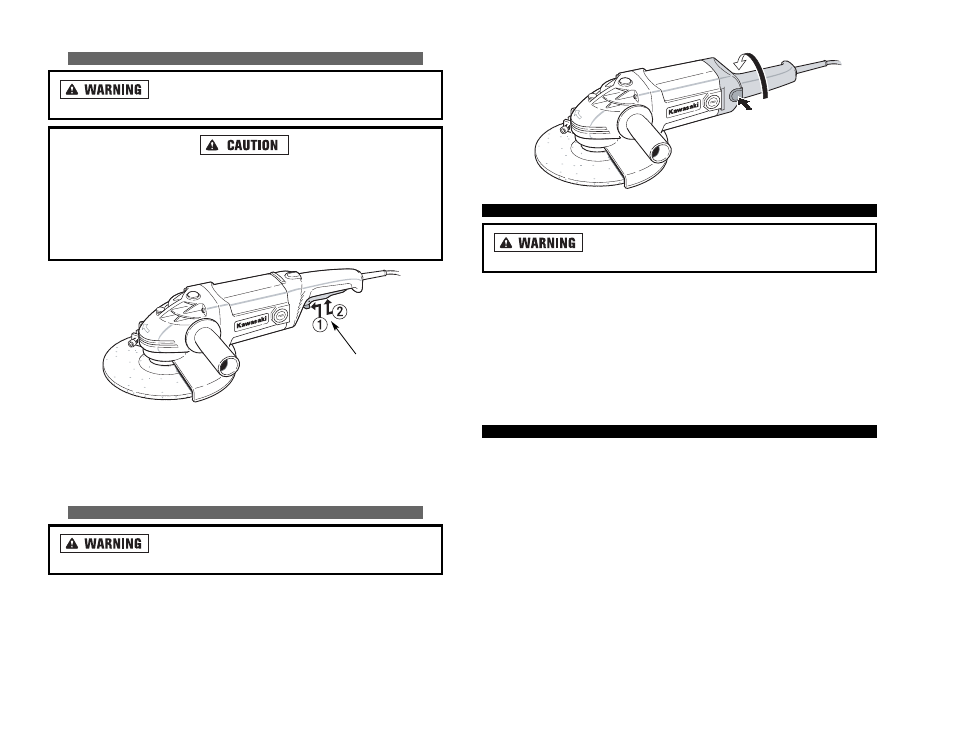
O
OP
PE
ER
RA
AT
TIIN
NG
G T
TH
HE
E O
ON
N//O
OF
FF
F S
SW
WIIT
TC
CH
H
N
Ne
evve
err ssw
wiittcch
h tth
he
e A
An
ng
glle
e G
Grriin
nd
de
err “
“O
ON
N”
” o
orr “
“O
OF
FF
F”
” w
wh
hiille
e
u
un
nd
de
err llo
oa
ad
d cco
on
nd
diittiio
on
nss..
A
Allw
wa
ayyss a
allllo
ow
w tth
he
e A
An
ng
glle
e G
Grriin
nd
de
err tto
o cco
om
me
e u
up
p tto
o ffu
ullll ssp
pe
ee
ed
d b
be
effo
orre
e tto
ou
ucch
hiin
ng
g a
an
nyy
ssu
urrffa
acce
e..
A
Allw
wa
ayyss tta
akke
e tth
he
e tto
oo
oll a
aw
wa
ayy ffrro
om
m tth
he
e w
wo
orrkkp
piie
ecce
e b
be
effo
orre
e ttu
urrn
niin
ng
g tth
he
e tto
oo
oll “
“O
OF
FF
F”
”..
Let the tool come to a complete stop before setting it down.
T
Th
hiiss tto
oo
oll o
op
pe
erra
atte
ess b
be
esstt u
un
nd
de
err lliig
gh
htt p
prre
essssu
urre
e.. Exerting heavy pressure will not
speed up the work and may cause damage to the motor.
When starting, hold the tool firmly with both hands. (One hand on the rear handle
or motor housing and the other on the side handle.)
To start, push the “On/Off” switch forward, then press down slightly.
To stop, release the “On/Off” switch.
R
RO
OT
TA
AT
TIIN
NG
G T
TH
HE
E R
RE
EA
AR
R H
HA
AN
ND
DL
LE
E
A
Allw
wa
ayyss u
un
np
pllu
ug
g tth
he
e tto
oo
oll b
be
effo
orre
e a
atttte
em
mp
pttiin
ng
g tto
o cch
ha
an
ng
ge
e tth
he
e
g
gu
ua
arrd
d o
orr a
acccce
esssso
orriie
ess..
• Unlock the rear handle by pressing the handle release button.
• Rotate handle into available left or right position of center.
• Before turning tool “ON”, ensure that the handle is locked into a position.
13
ON/OFF
SWITCH