Room equalization procedure, Automatic eq mode – Sunfire Subrosa SRS-210R User Manual
Page 12
User's Manual
1
Subwoofer performance is greatly af-
fected by the room in which it is situated,
and the positioning within the room. The
room effects will boost and cut the output
levels reaching your listening position.
This gives a "room EQ" effect which can
often be far from wonderful.
The SubRosa EQ system can auto-
matically adjust for the effects of room
EQ. It measures the actual frequency
response using the supplied measure-
ment microphone. Then it automati-
cally compensates for peaks or dips and
smooths out the response.
For best results it is recommended that
the subwoofer crossover in your receiver
or processor be set to its maximum set-
ting (or “bypass”). This ensures that the
subwoofer will be properly matched to the
rest of the speakers in your system.
The following procedure will help you
start the automatic equalization:
Automatic EQ Mode
1. Install the subwoofer in the best location
you can find, using the procedure on the
previous page.
. The calibration must be done while the
listening room is quiet. Please turn off
any noisy machinery, including heating
or cooling systems during this process.
Room Equalization Procedure
Have the kids play in the backyard and
give the dog a treat to stop him barking.
A small amount of noise, such as quiet
talking or whispering, is OK.
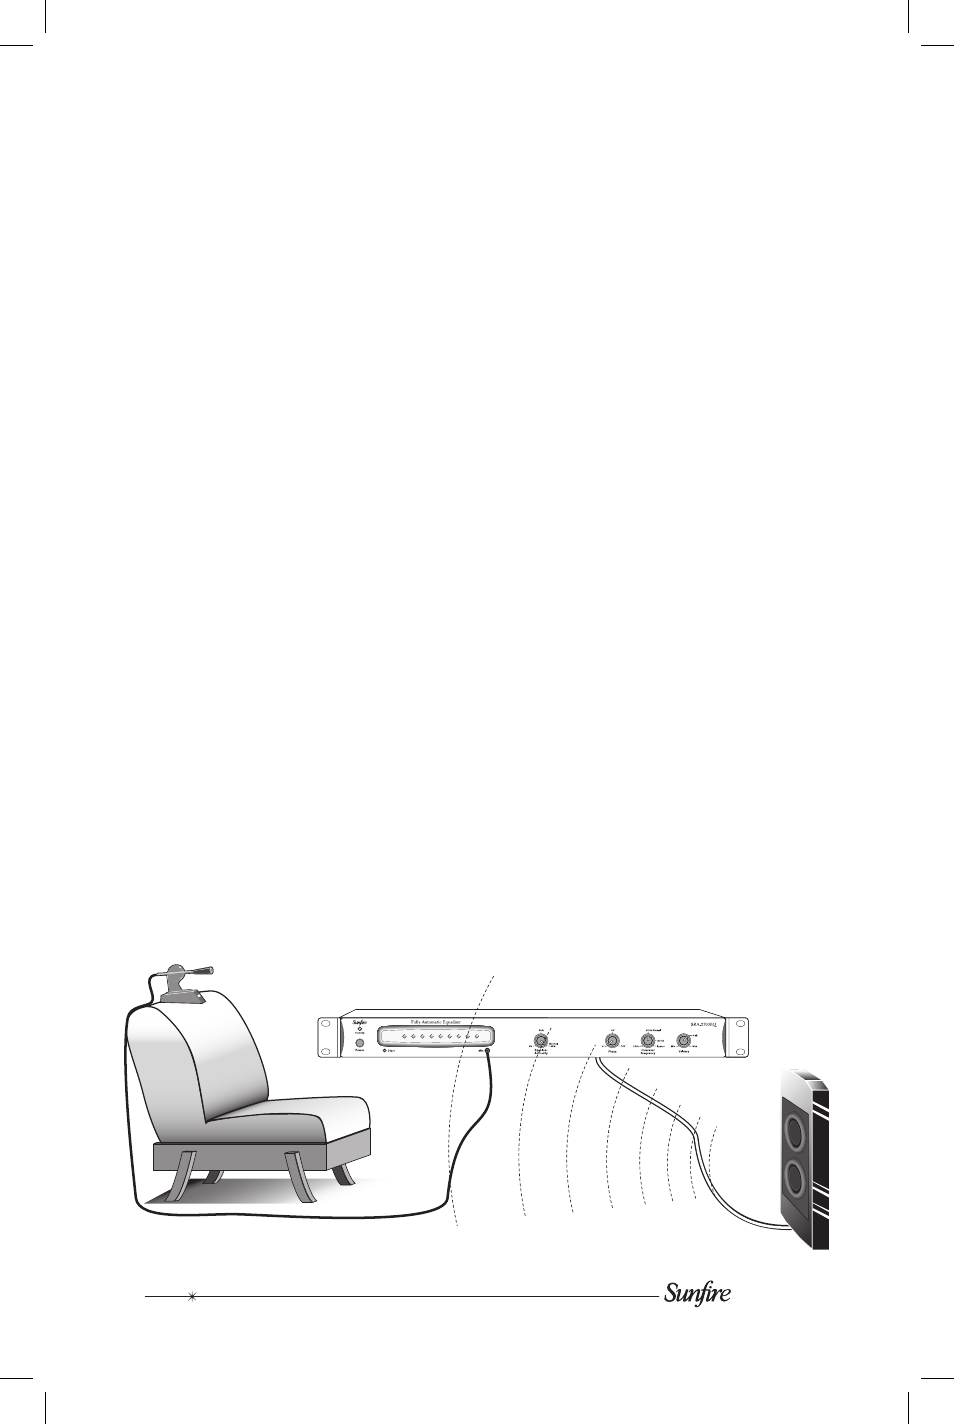
3. Place the microphone in the listening
position (on the couch, for example),
pointing in the direction you’ll normally
be facing while listening to your system.
Only use the microphone supplied.
4. Plug the microphone into the subwoofer
amplifier's microphone jack.
5. Set these controls:
• Volume to 0 dB.
• Crossover to "Bypass."
• Phase to "Normal."
• Equalizer Authority to "Normal"
6. Turn on the amplifier's power switch
and press the Start button to go from
standby to play mode. Press Start again
to start the calibration.
7. The subwoofer will generate a test tone
sweep, slowly increasing up the fre-
quency scale; the microphone will take
measurements of the sound arriving at
your listening position. The LEDs will
flash randomly for a while, then the pairs
will gradually glow constantly as each
band is measured (from left to right).
This sequence will repeat twice until the
measurements are complete. The LEDs
will all blink once and stay on, and the
test tones will stop.