Appendix h: black mark sensor alignment mode – Star Micronics SP500 Series User Manual
Page 122
– 119 –
APPENDIX
Appendix H: Black Mark Sensor Alignment Mode
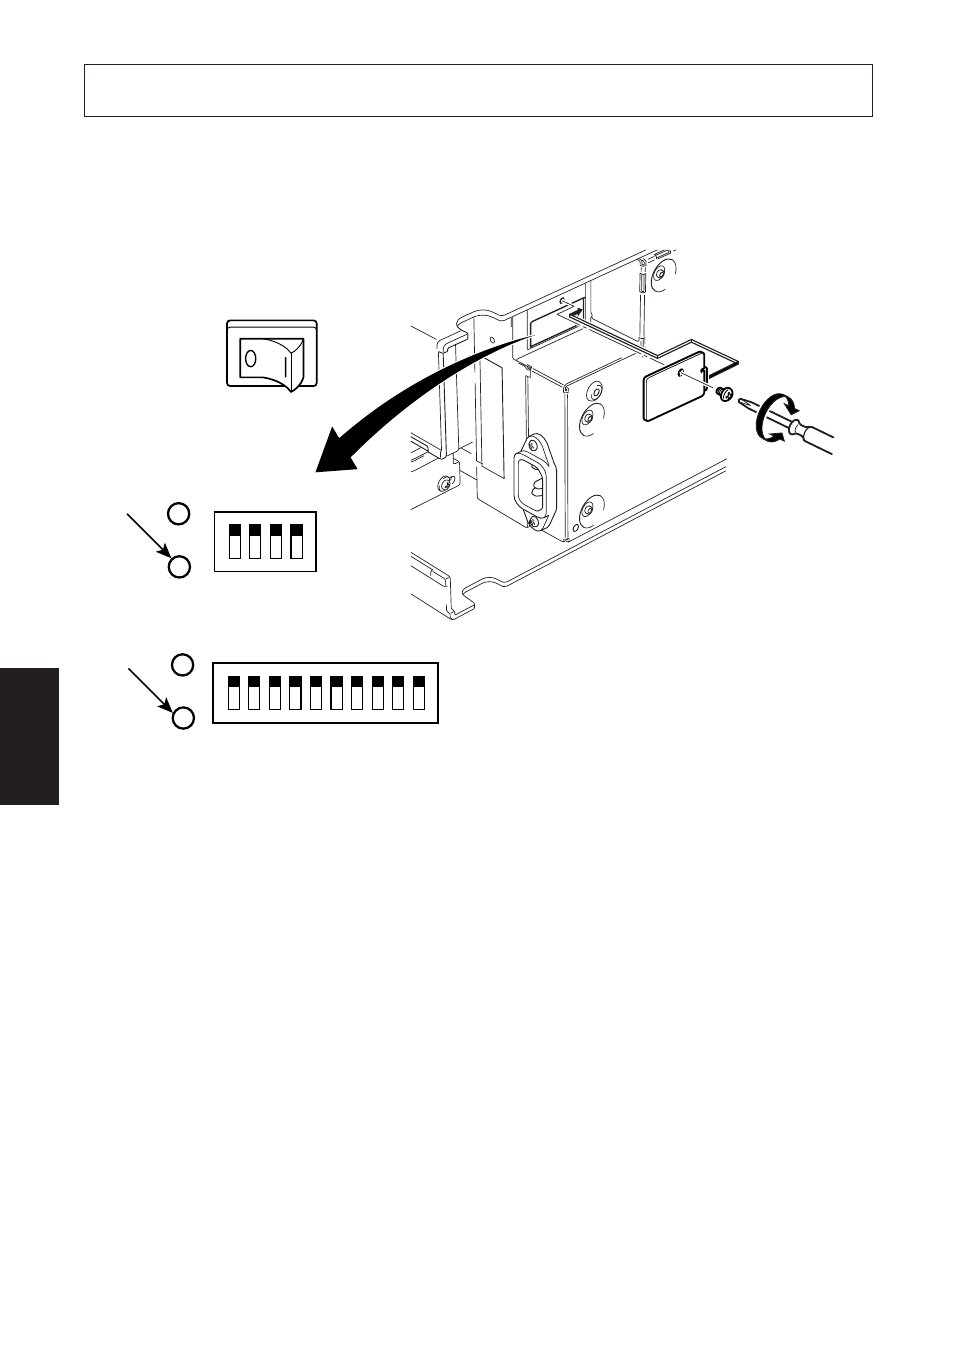
1. Turn the printer off and unplug the power cord.
2. Remove the screws. Then, remove the DIP switch cover on the bottom of the
printer.
3. Since it is adjusted by rotating the volume VR22, check the position of the
volume. Prepare a small slotted screwdriver that will fit in the hole.
4. Set the roll paper not for black mark.
5. Enter the black mark sensor adjustment mode according to the procedure
described Section 6-4.
6. Rotate the volume VR22 using micro screwdriver, to adjust it to a position
whereat both the ERROR (red LED) and the POWER (green LED) lamps
light.
7. Turn the power OFF.
This completes the black mark sensor adjustment.
4
1
10
1
VR22
VR22
Parallel interface
Serial interface
Power off
- LC-90 (131 pages)
- LC-240C (82 pages)
- MP500 Series (2 pages)
- Star SP317 (63 pages)
- SP200F (111 pages)
- NL-10 (35 pages)
- MP115MP-24G-A (42 pages)
- LC-6211 (60 pages)
- 800C (76 pages)
- SLIP SP298 (79 pages)
- LC-1021 (91 pages)
- SP200F SERIES (90 pages)
- SP200F SERIES (114 pages)
- 150 (151 pages)
- LC-1011C (88 pages)
- RS232 (80 pages)
- FUTUREPRINT TSP100 (32 pages)
- SP700 Series (2 pages)
- DP8340RC (40 pages)
- SP342F-A (62 pages)
- PR921-24-A (31 pages)
- SP312F (36 pages)
- SP300 Series (70 pages)
- SP317 (63 pages)
- SP2000 Series (147 pages)
- LC-8021 (86 pages)
- NP-325 (45 pages)
- DP8340 (59 pages)
- PW2000-24 (4 pages)
- HL 80825321 (176 pages)
- Line Thermal Printer (181 pages)
- PUNKT-MATRIX-DRUCKER LC-7211 (182 pages)
- Automatic Sheet Feeder SF-15HA (42 pages)
- Star futurePRNT TSP100GT (2 pages)
- Star SP200 Series (127 pages)
- PT-10Q (36 pages)
- SP298 Series (144 pages)
- LC-8521 (116 pages)
- RSR 28 (5 pages)
- SP320S (94 pages)
- Dot Impact Printer (104 pages)
- LC-4521 (191 pages)
- PT-10Y (32 pages)
- Line Thermal/Dot Printer (209 pages)
- ATAR LC-500 (72 pages)