Star Micronics NX-2460C User Manual
Page 38
32
Using the Printer with Windows 3.1
You can also accomplish the same result by clicking on
Browse…
and
selecting the drive where the driver floppy is loaded. Next you should select
INSTALL.EXE
and click
OK
.
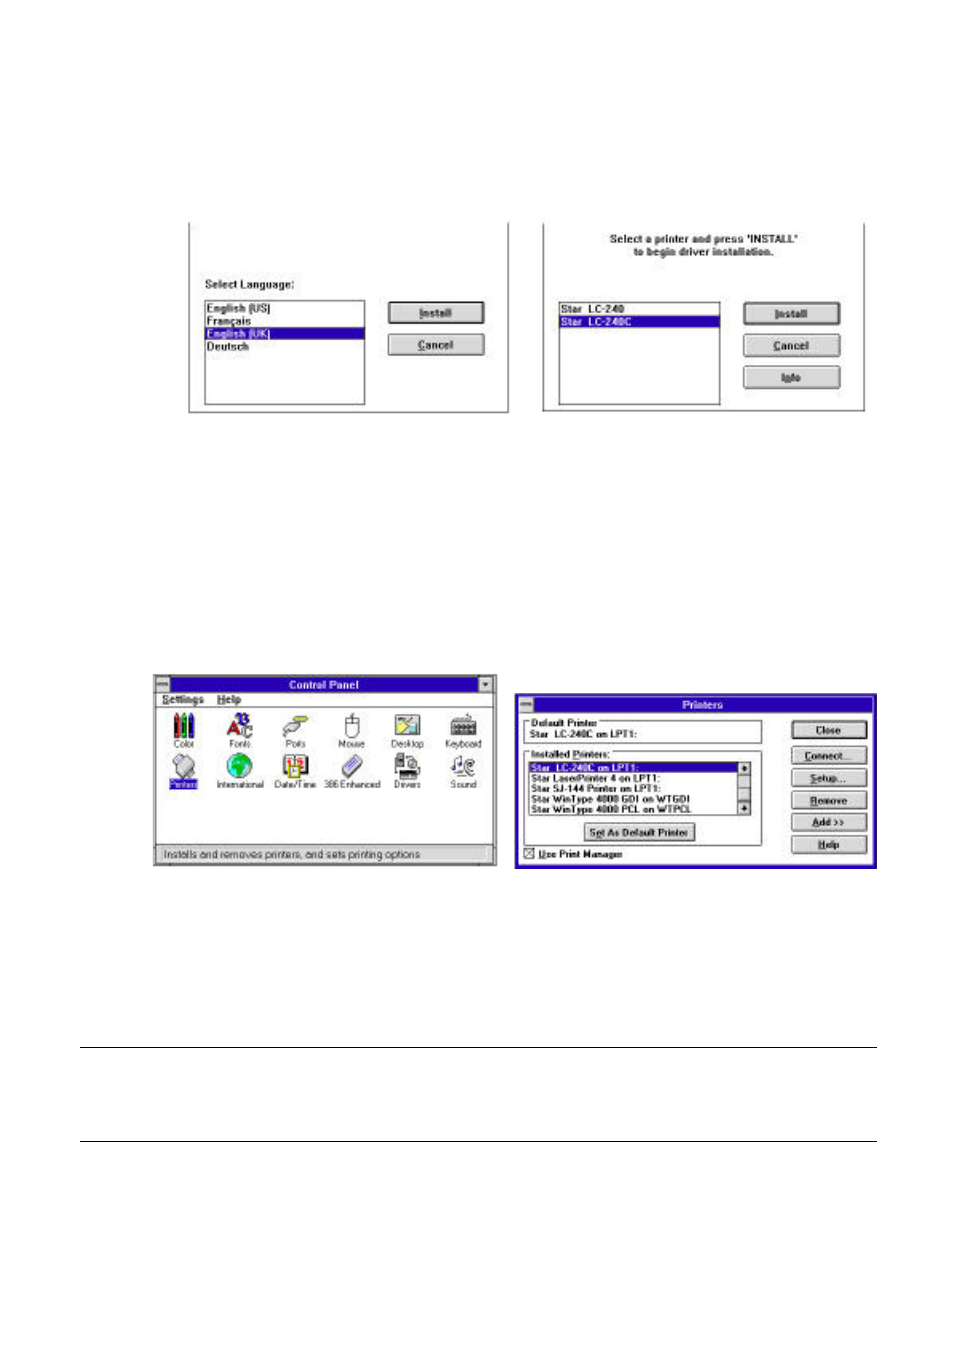
❏ Click on the language that you want to use and then click on
Install
to start
the installation. The language we will use here is English.
❏ Click the name of your printer in the list that appears on the display to
highlight it. If you are using English (UK), you can choose either LC-240
or LC-240C. In the case of English (US), you have a choice between NX-
2460 and NX-2460C.
❏ Click on
Install
, and the
Control Panel
window appears.
Double-click on the Printers icon in the
Control Panel
window.
❏ Double click on the name of the printer model you selected above to select
it as the default printer.
❏ Click on
Close
to clear the
Printers
window.
Note:
Windows applications automatically print on the currently selected default
printer. If you want to print on a different printer, you must first select it.
See “Installing TrueType fonts” on page 36 for information of how to install the
TrueType fonts that are supplied on the 3.5” floppy disk that comes with the
printer.