Security zones - configuration – SonicWALL OS 2.x User Manual
Page 5
Sonic OS 2.x Quick Start Guide
Security Zones - Configuration
The following will guide you through the process of configuring and assigning interfaces to
Security Zones:
1. We start out with the LAN and WAN interfaces as previously defined.
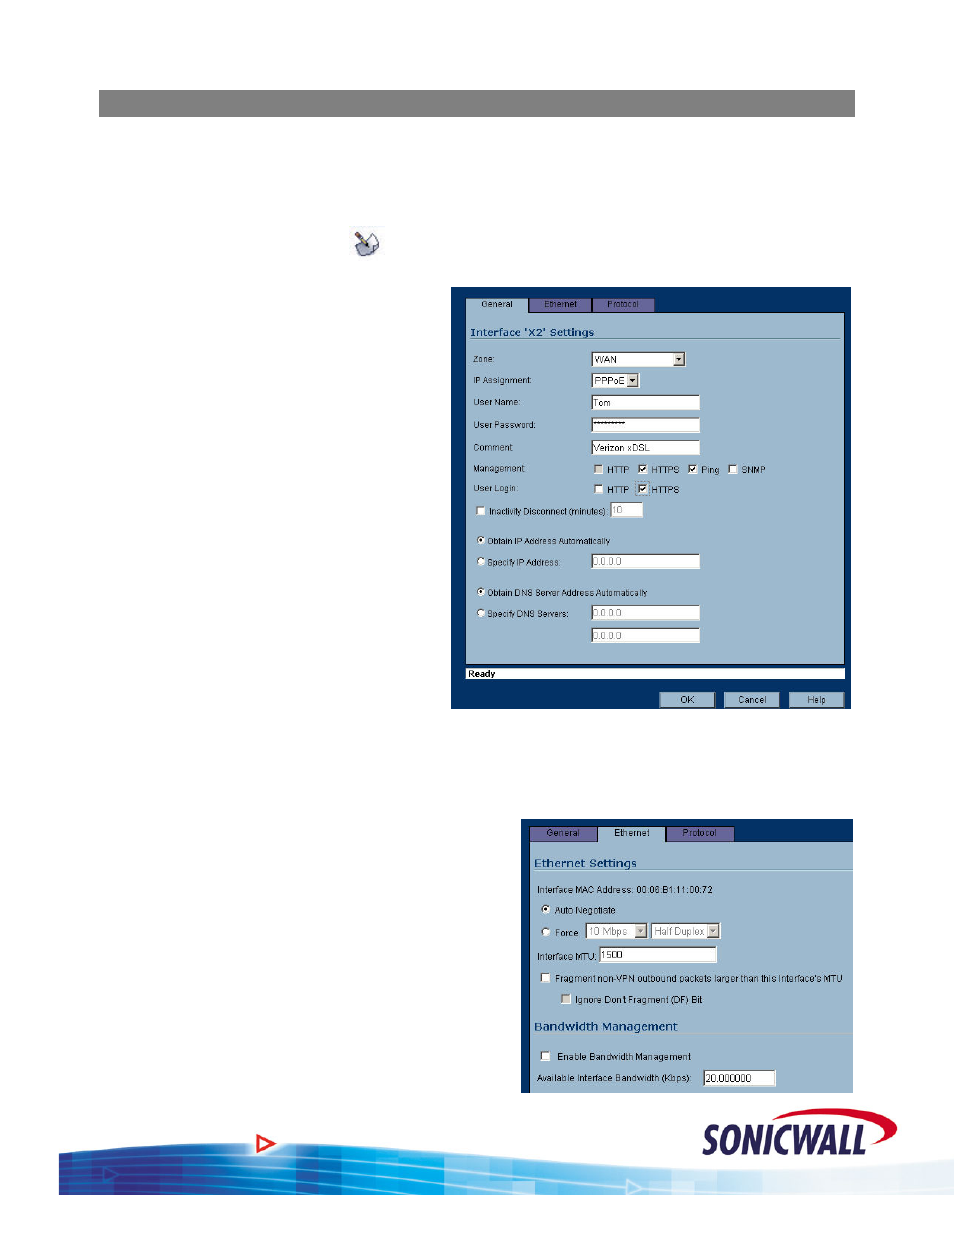
2. Click the configure icon (
) associated with the X2 interface.
3. Select the ZONE as WAN and the IP
assignment as PPPoE.
4. Add the User Name and Password
assigned to the PPPoE DSL account.
5. Enter a Comment if desired.
6. Decide if you want to allow
Management and User Logins on
this interface.
7. If the ISP provided you with a Static
IP address, select ‘Specify IP
Address’ and enter the assigned
Static IP.
8. If you want to set your own DNS
servers, as opposed to the DNS
servers automatically provided by
the PPPoE connection, click ‘
DNS Servers’ and enter the values.
Select th
Specify
9.
e Ethernet tab.
NOTE – Even though the Sonicwall auto-negotiates the Ethernet settings, you should make it a
0. Select the ‘Force’ checkbox and enter the
11.
te changes to
12.
, enter the
.
13.
:
14.
r
d
habit to force the settings to match the connected network equipment.
1
appropriate values for the DSL modem
connected to the X2 interface.
If required, make the appropria
the MTU and fragment settings based on your
configuration. For normal installations,
changes should not be required.
If using Bandwidth Management
available bandwidth for this DSL connection
Click OK to save your settings. The new
WAN interface is displayed in the settings
We will also need a DMZ configured for ou
installation. Click the configure icon associate with the X3 interface.
4