SonicWALL OS 2.x User Manual
Page 16
Sonic OS 2.x Quick Start Guide
8. For the Remote IKE ID, select
Sonicwall Identifier and enter the
serial number of the Pro 4060.
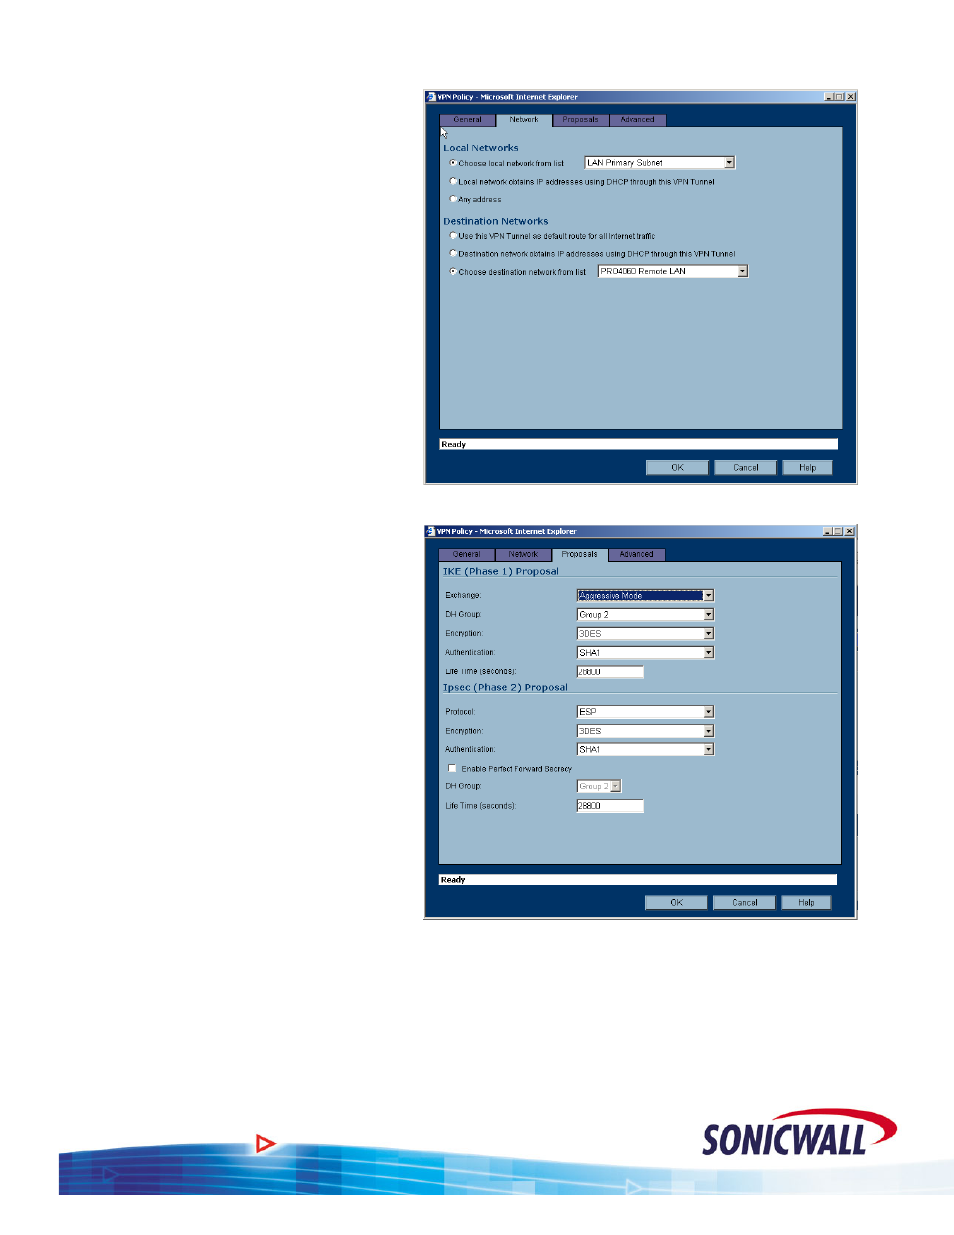
9. Select the Network Tab.
10. For the Local Network, choose
LAN Primary Subnet. This is a
pre-defined address object for t
LAN interface of the TZ170.
he
11. For Destination Networks, select
the previously defined address
object for the network located
behind the Pro 4060
(192.168.168.0/24)
12. Select the Proposal tab.
13. For Exchange, select Aggressive
Mode. Remember, the TZ170
receives a dynamic IP address
from the ISP.
14. Select the rest of the Phase 1 and
2 proposal settings as required.
Ensure they match up with the
settings you’ve made on the Pro
4060.
15. Select the Advanced tab.
16. Check (turn on) the Enable Keep
Alive option. This will keep the
tunnel active and will renegotiate
the tunnel if the WAN IP of the
TZ170 changes.
17. Click OK.
18. You should now be able to
communicate between the two
Sonicwalls via the VPN.
15