Sonic Impact Technologies Power 2 User Manual
Page 13
11
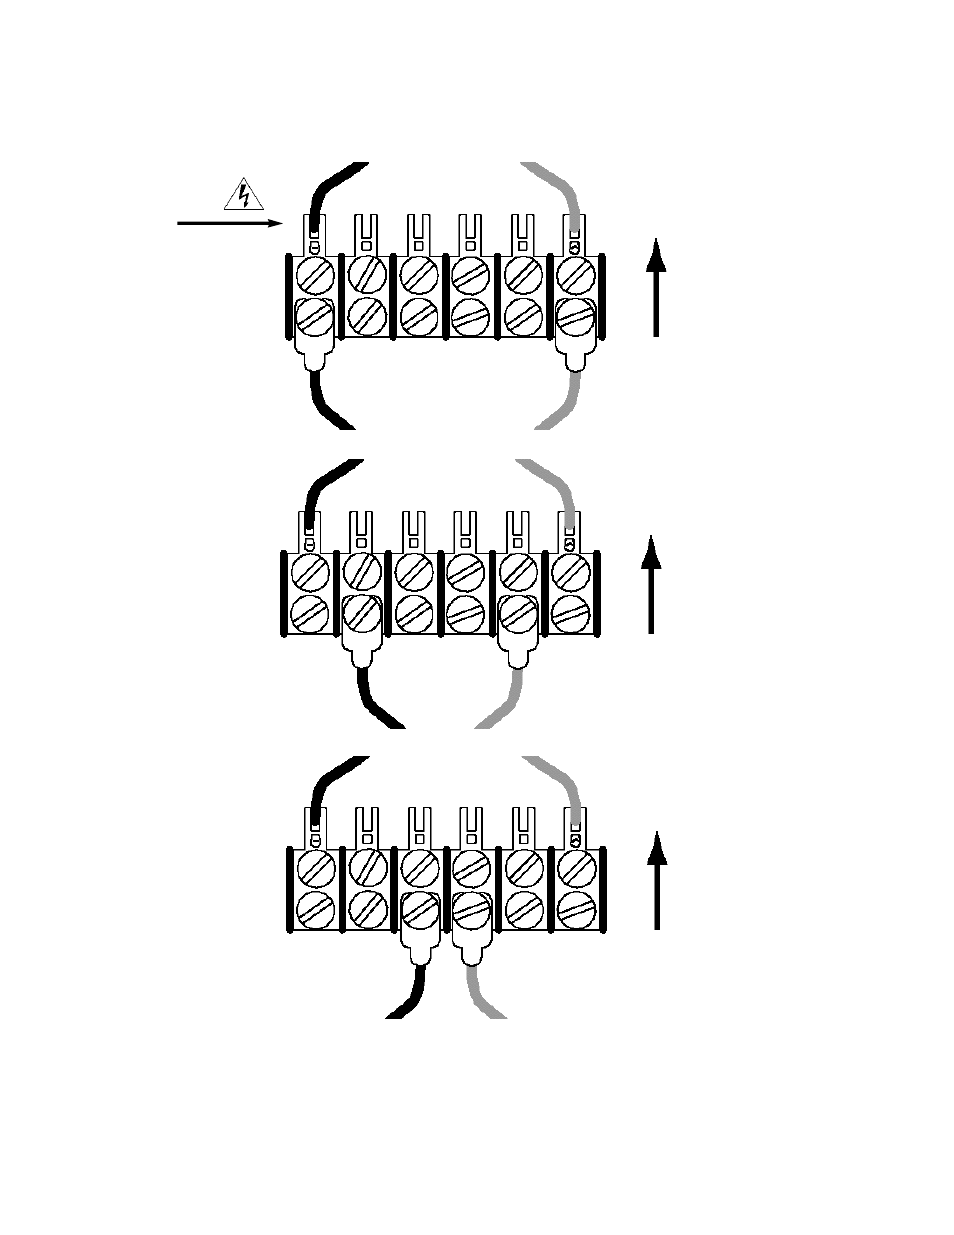
4.Using the slot screwdriver provided with the amp, deal with one connection at a time,
loosening off the tap screws of the first spade lug connection and tightening to the
desired tap. The final connections should resemble these renderings:
8 Ohm Impedance Connections
4 Ohm Impedance Connections
2 Ohm Impedance Connection
5. Repeat for each channel.
6. Ensure all 12 screws per terminal block are tightened so there is no chance of them
vibrating loose.
7. Replace the bottom cover and all external connections.
FRONT OF
THE AMPLIFIER
FRONT OF
THE AMPLIFIER
FRONT OF
THE AMPLIFIER
Note the solder
connections on the
terminal block. Under no
circumstances should
these connections be
tampered with.