Disassembly, Figure 5, Lever pivot screw – Ruger Caulking Gun User Manual
Page 19
19
position of the part in the gun before starting to remove it. If a part is under
spring tension (such as, the Safety or Trigger) remove it cautiously and anticipate
the direction the spring and plunger are most likely to “jump.”
WARNING: If a spring or plunger become lost do not use a substitute. Springs of
correct tension are vital to the safe and reliable performance of firearms.
Before
starting disassembly, remove the sling, scope and rings and place the rear sight
blade in its down flat position.
DISASSEMBLY
(Rifle Must Be Unloaded Prior To Disassembly)
1.
Keep the rifle pointed in a safe direction!
Open the underlever and put the
safety in the “Safe” position.
2.
CHECK TO BE CERTAIN THAT THE CHAMBER IS EMPTY!
3. Study the drawing below and those on pages 9 and 20. Use a screwdriver
whose tip correctly fits the screw slot.
4. Remove the forearm by unscrewing the forearm takedown screw and gently
pulling the forearm away from the receiver.
5. With hammer cocked, insert a “slave pin” through hole in hammer strut.
6. Pull trigger to release hammer spring tension.
7. Remove the hammer spring and strut as an assembly.
8. Lower the lever, unscrew lever pivot screw and lever pivot pin.
9. Remove hammer.
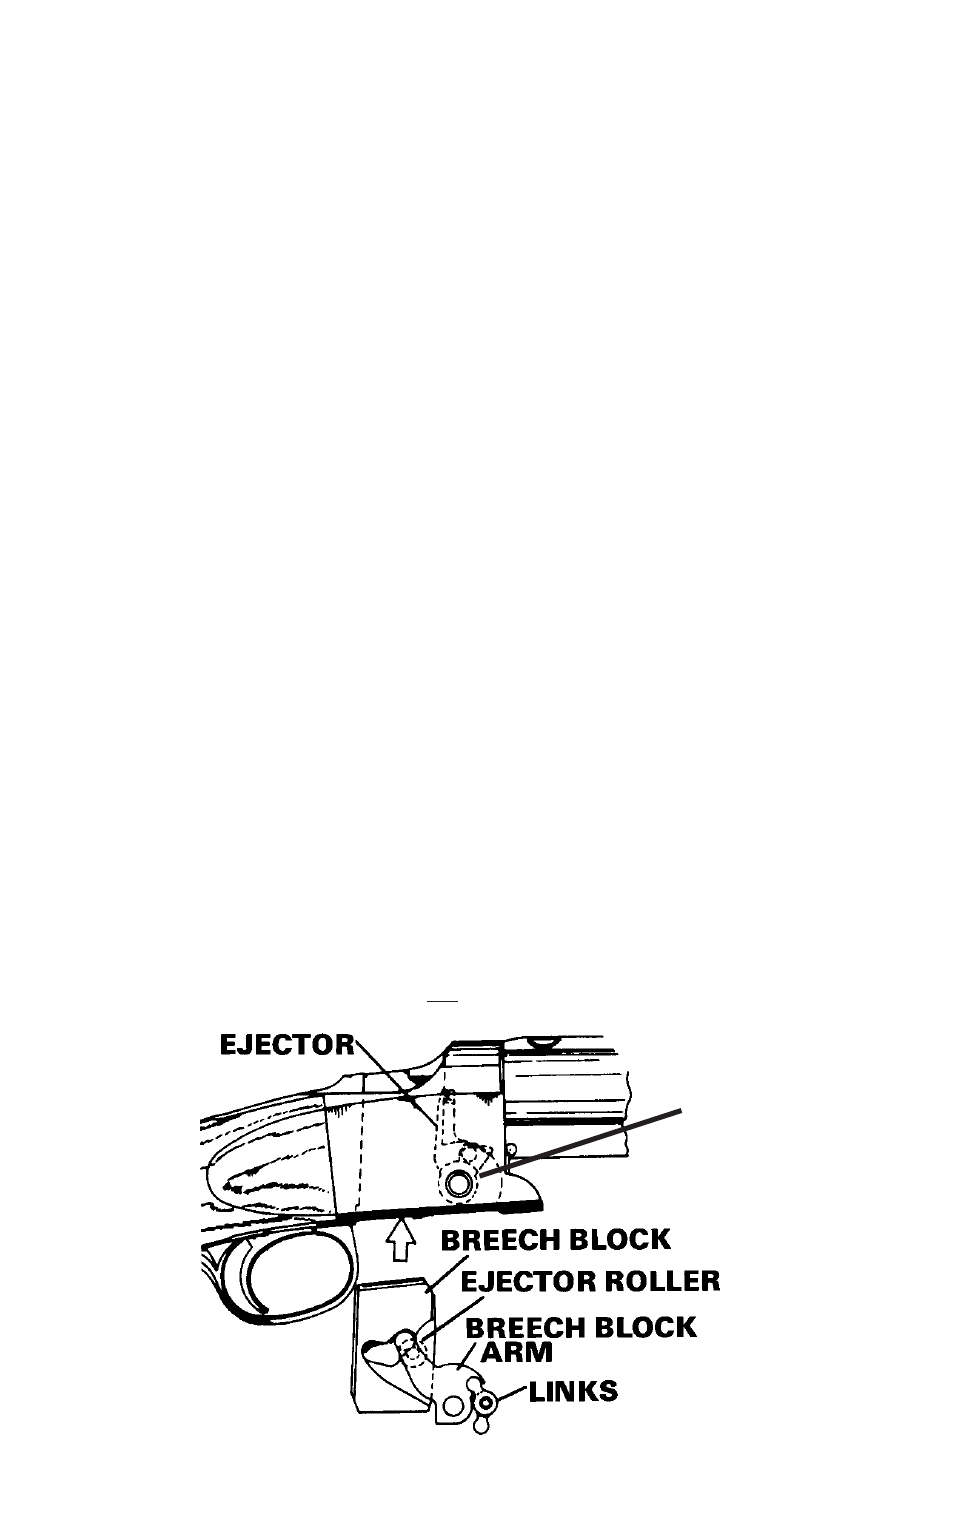
10. Raise lever to close breech, then lower lever about halfway and pull
downward, removing the breech block, breech block arm and the linkage as a
unit from the bottom of the receiver.
11. Remove the ejector, ejector plunger, and ejector plunger spring.
This is the extent of disassembly required for routine inspection, cleaning and
lubrication. Further disassembly is not recommended!
LEVER PIVOT
SCREW
Figure 5