Ceiling-mount setup, Adjusting the height of the image, Height of image – Sharp XG-NV51XE User Manual
Page 16: Ceiling-mount setup …………………………… 13, Height of image ………………………………… 13, Setting up the projector and screen
13
Setup & Connections
Setting Up the Projector and Screen
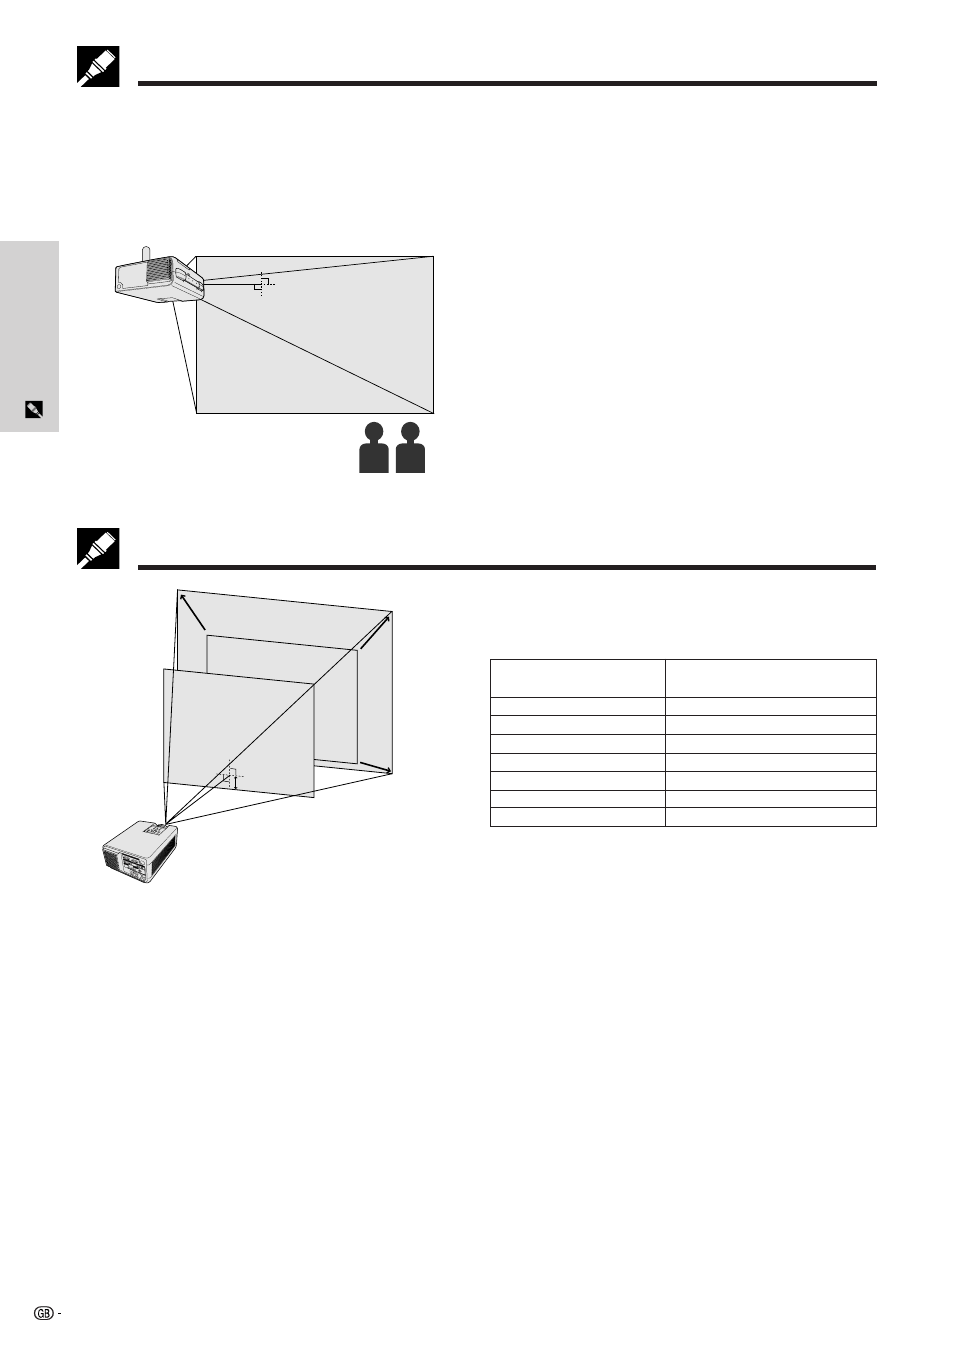
Ceiling-mount Setup
• Use the optional Sharp ceiling-mount bracket for this installation.
• Before mounting the projector, contact your nearest Sharp Authorised LCD Projector Dealer or Service Centre to
obtain the recommended ceiling-mount bracket (sold separately). (AN-NV4T ceiling-mount bracket, AN-TK201/
AN-TK202 extension tube for AN-NV4T.)
• When the projector is in the inverted position, use the upper edge of the screen as the base line.
• Use the projector’s menu system to select the appropriate projection mode. (See page 34 for use of this function.)
Adjusting the Height of the Image
762 cm (300
Љ)
508 cm (200
Љ)
381 cm (150
Љ)
254 cm (100
Љ)
203 cm (80
Љ)
152 cm (60
Љ)
102 cm (40
Љ)
45.4 cm
30.3 cm
23.2 cm
15.5 cm
12.4 cm
9.3 cm
6.2 cm
Distance from the lens centre to the
bottom of the image (H)
Picture size
(diag.)
90˚
H
Height of Image
See the table below for exact distances from the lens
centre to the bottom of the image.
90˚