Assembly instructions – Stamina Products 1725 User Manual
Page 10
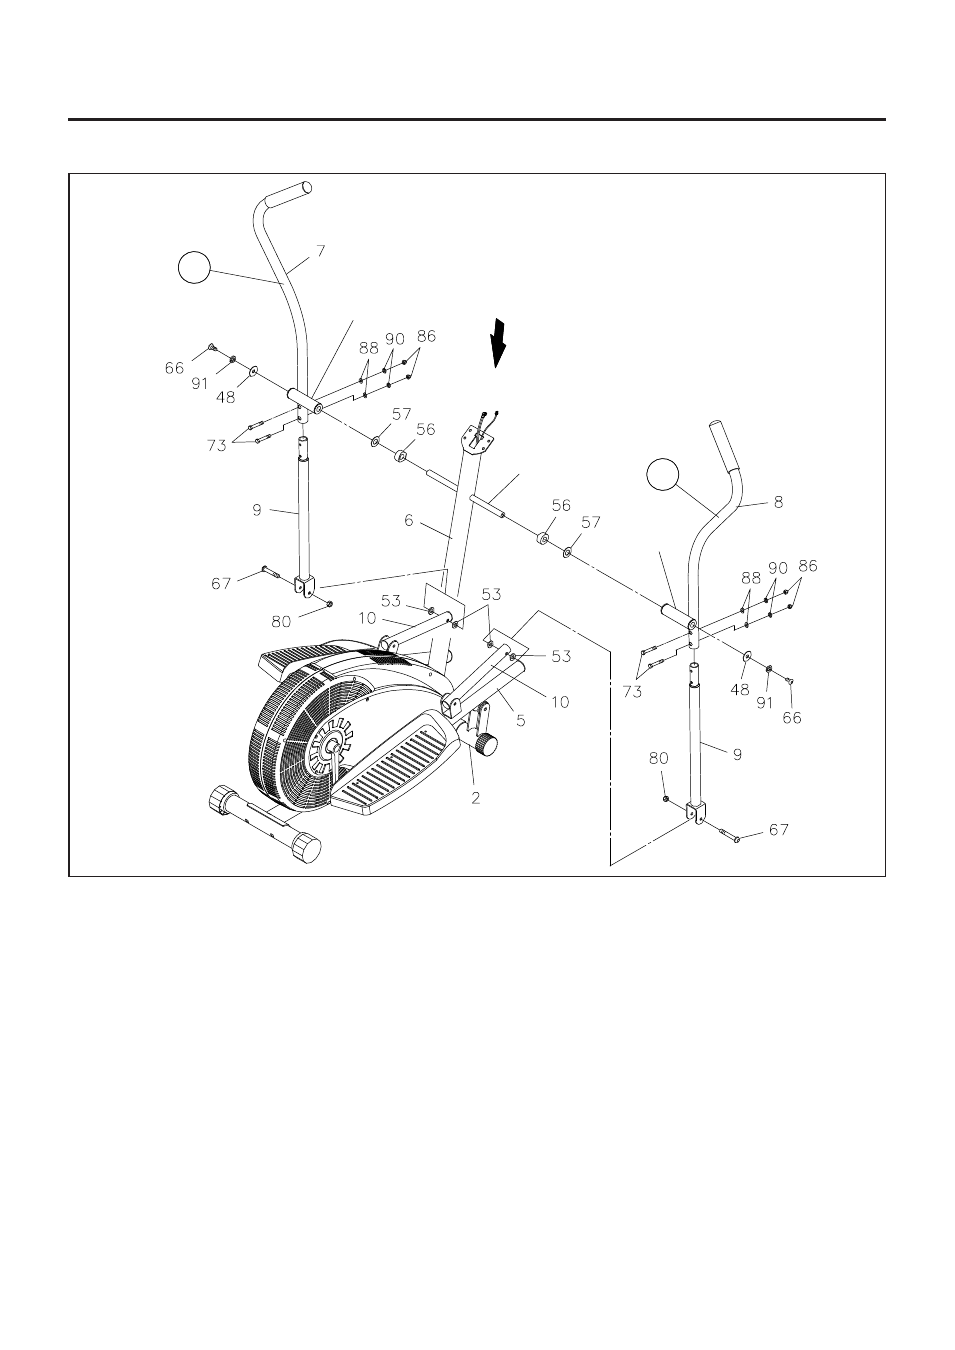
ASSEMBLY INSTRUCTIONS
10
STEP 7:
There is a "L" decal on the LEFT HANDLEBAR(7), and a "R" decal on the RIGHT HANDLEBAR(8).
To assemble the RIGHT HANDLEBAR(8), place a SPACER(56) and a LARGE WASHER(M16)(57) onto
the right side of the SHAFT on the UPRIGHT(6). Slide the RIGHT HANDLEBAR(8) onto the SHAFT and
secure with a LARGE WASHER(M8)(48), LOCK WASHER(M8)(91), and BUTTON HEAD BOLT
(M8x1.25x20mm)(66). Repeat on the left side.
STEP 8:
Attach the LOWER PIVOTING ARMS(9) to the LEFT and RIGHT HANDLEBARS(7, 8) with HEX
BOLTS(M6x1x36mm)(73), ARC WASHERS(M6)(88), LOCK WASHERS(M6)(90), and ACORN NUTS
(M6x1)(86). The HEX BOLTS(M6x1x36mm)(73) fit inside the hex-shaped holes in the HANDLEBARS
(7, 8). Attach the LOWER PIVOTING ARMS(9) to the LINKAGES(10) at both sides with the PLASTIC
WASHERS(M8)(53), BUTTON HEAD BOLTS(M8x1.25x48mm)(67), and NYLOCK NUTS(M8x1.25)(80).
STEP 9:
Look down from the top of the UPRIGHT(6) to make sure the pivot tubes on the HANDLEBARS
(7, 8) are parallel to the FRONT STABILIZER(2) and the PEDAL ARMS(4, 5) are crossing the ROLLERS(60)
properly. Tighten the BUTTON HEAD BOLTS(M8x1.25x15mm)(65) as described in STEP 4 on the
UPRIGHT(6).
Shaft
Look down from the top
L
R
Pivot Tube
Pivot Tube