Sanus Systems WFV66 User Manual
Page 3
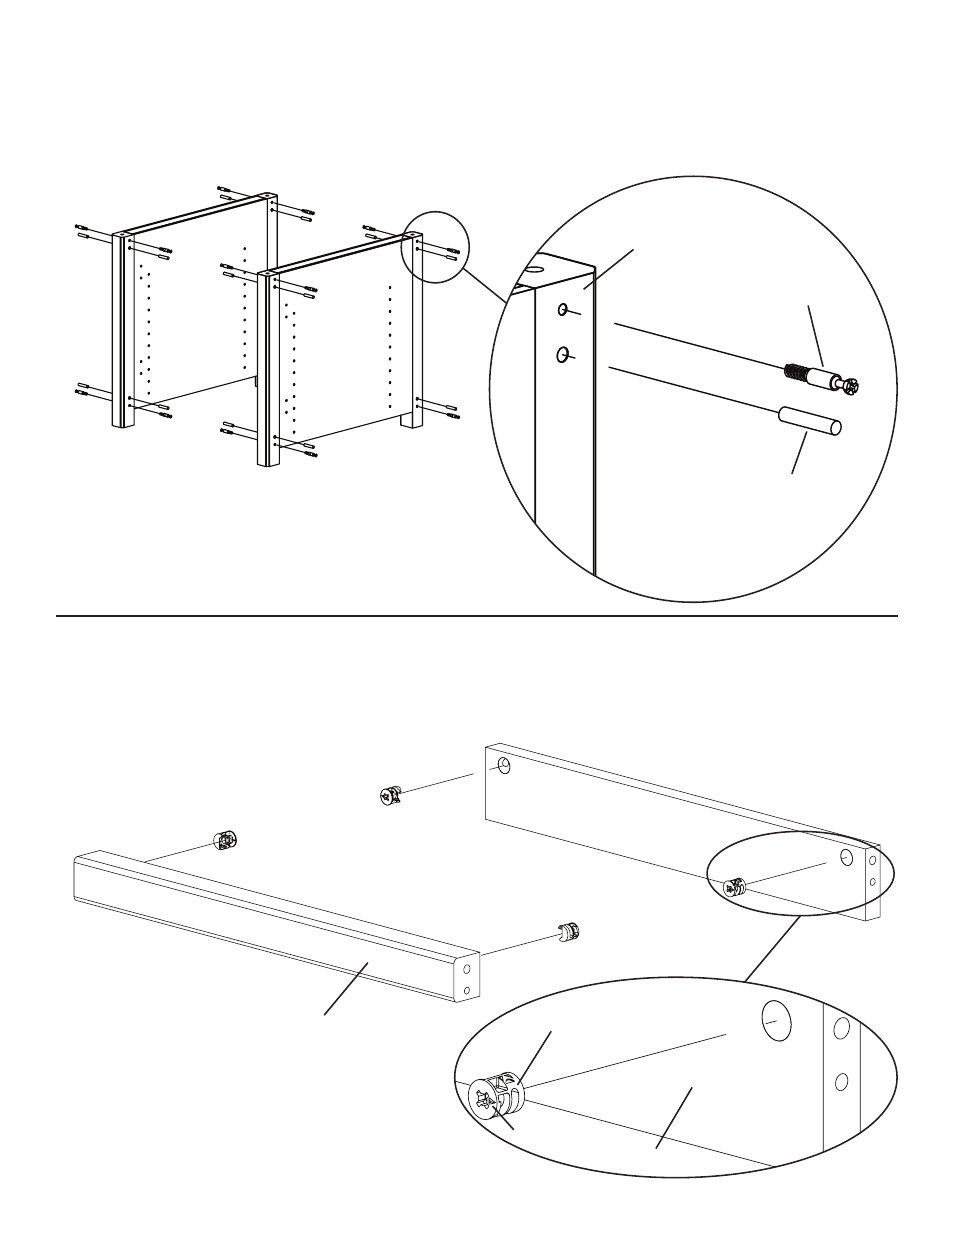
Step 2: Prepare Center Panels
Thread a Cam Pin (a) into each of the smaller holes in each Center Panel (x). Tighten each Cam Pin with a Phillips screw driver. Insert
a Dowel (d) into the larger adjacent hole in the Panels. See Diagram 2 for assistance.
Diagram 2
Detailed View
x
a
d
Step 3: Prepare Stretchers
Add a Cam (b) to each Front Stretcher (o) and Back Stretcher (p). Make sure the arrow in each Cam faces the hole on the side of the
Stretchers. See Diagram 3 for assistance.
Diagram 3
Detailed View
o
b
arrow
p
See also other documents in the category Sanus Systems TV Accessories:
- New VisionMount VLMF109-B1 (2 pages)
- VM1 (18 pages)
- VMF (2 pages)
- SANUS SSMK1 (9 pages)
- FFSF1A (7 pages)
- ML11-B1 (2 pages)
- VISIONMOUNT VMDD26 (8 pages)
- VisionMount VMPL50A-B1 (2 pages)
- PFFP (26 pages)
- VISIONMOUNTTM WALL MOUNT VMAA26 (8 pages)
- VisionMount 6901-100068 (6 pages)
- VISIONMOUNT LL11 (36 pages)
- Sanus Foundations FS46 (2 pages)
- VMFL1 (34 pages)
- New VisionMount VMT15-B1 (2 pages)
- VML10 (36 pages)
- VisionMount LF228-B1 (2 pages)
- LAS1A (8 pages)
- New VisionMount VST15-B1 (2 pages)
- VMCA7 (4 pages)
- VisionMount VLF220 (38 pages)
- BFAV344 (28 pages)
- New VisionMount VLL10 (2 pages)
- New VisionMount VXF220 (2 pages)
- FFMF2A (7 pages)
- XAS1A (8 pages)
- JFBD1 (5 pages)
- VLT15-B1 (2 pages)
- LF228 (40 pages)
- VMPL3 (32 pages)
- VLF220 (38 pages)
- VISIONMOUNT VMXA1 (2 pages)
- NEW VisionMount VLT14-B1 (2 pages)
- VMPL2 (6 pages)
- LT25 (2 pages)
- VM200 (4 pages)
- New VisionMount LMT15-B1 (2 pages)
- SFV265-B1 (2 pages)