Operating the tractor – Simplicity 1693130 User Manual
Page 21
Installing the Mower Deck
1. Raise the attachment lift and slide the mower under
the tractor.
2. Hook up the electrical connection (Figure 15).
3. Start the engine.
4. Set the cutting height to maximum.
5. Fully lower the attachment lift.
6. Shut off the engine.
7. Make sure the mower lift chains are directly below
the lift arms. Attach the 2 mower lift chains to the
tractor lift arms (Figure 14).
8. Turn the ignition switch to the RUN position, and set
the mower cutting height to minimum (it is not neces-
sary to start the engine).
9. Turn the ignition switch to the OFF position.
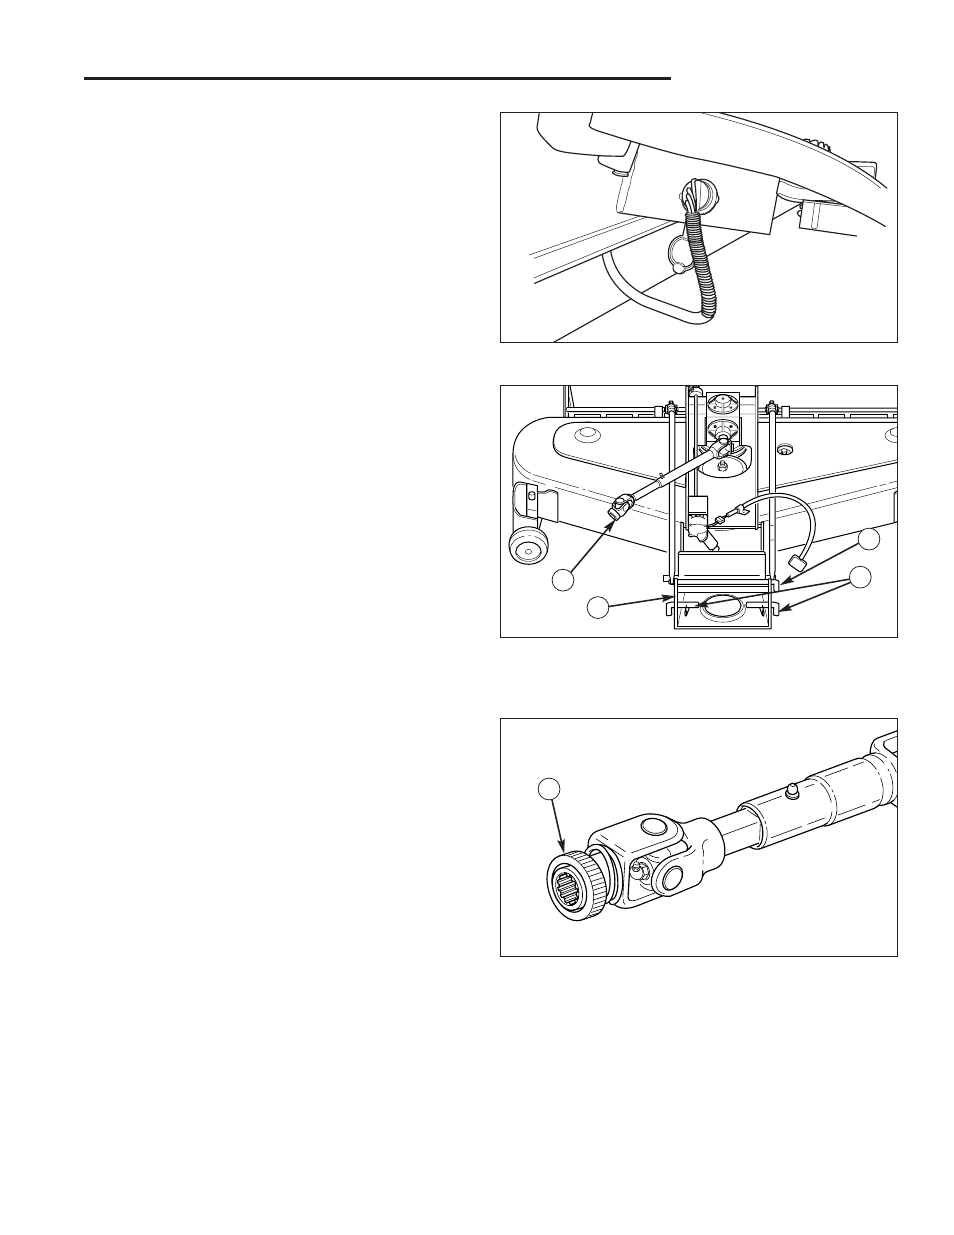
10. Mount the hitch bucket (A, Figure 16) to the deck.
11. Attach the hitch bucket to the tractor using the two
short pins (C, Figure 16) and safety clips.
12. Attach the hitch bucket (A, Figure 16) to the mower
deck using the one long pin (B) and safety clip.
13. Start the engine.
14. Fully raise the attachment lift.
15. Shut off the engine.
16. Pivot the two front gauge wheels from sliding position
to mowing position by pushing down on the top of the
spindle and pivoting the wheel (see Figure 12).
17.
48” & 60” Mower Only: Move the left rear slide wheel
(Figure 13) into mowing position.
18. Pull the drive shaft locking collar (A, Figure 17) back
and slide the drive shaft all the way onto the tractor
PTO.
19. Release the locking collar and pull the shaft back
until the locking collar locks into place on the drive
shaft.
17
Operating the Tractor
Figure 15. Mower Electrical Connection
Figure 16. Front Hitch Bucket and Pins
A.
Hitch Bucket
C. Short Hitch Pins
B.
Long Hitch Pin
D. Drive Shaft
Figure 17. Mower Drive Shaft
A.
Locking Collar
A
A
C
D
B