Assembling the blower (continued) – Shindaiwa 68241-94310 User Manual
Page 6
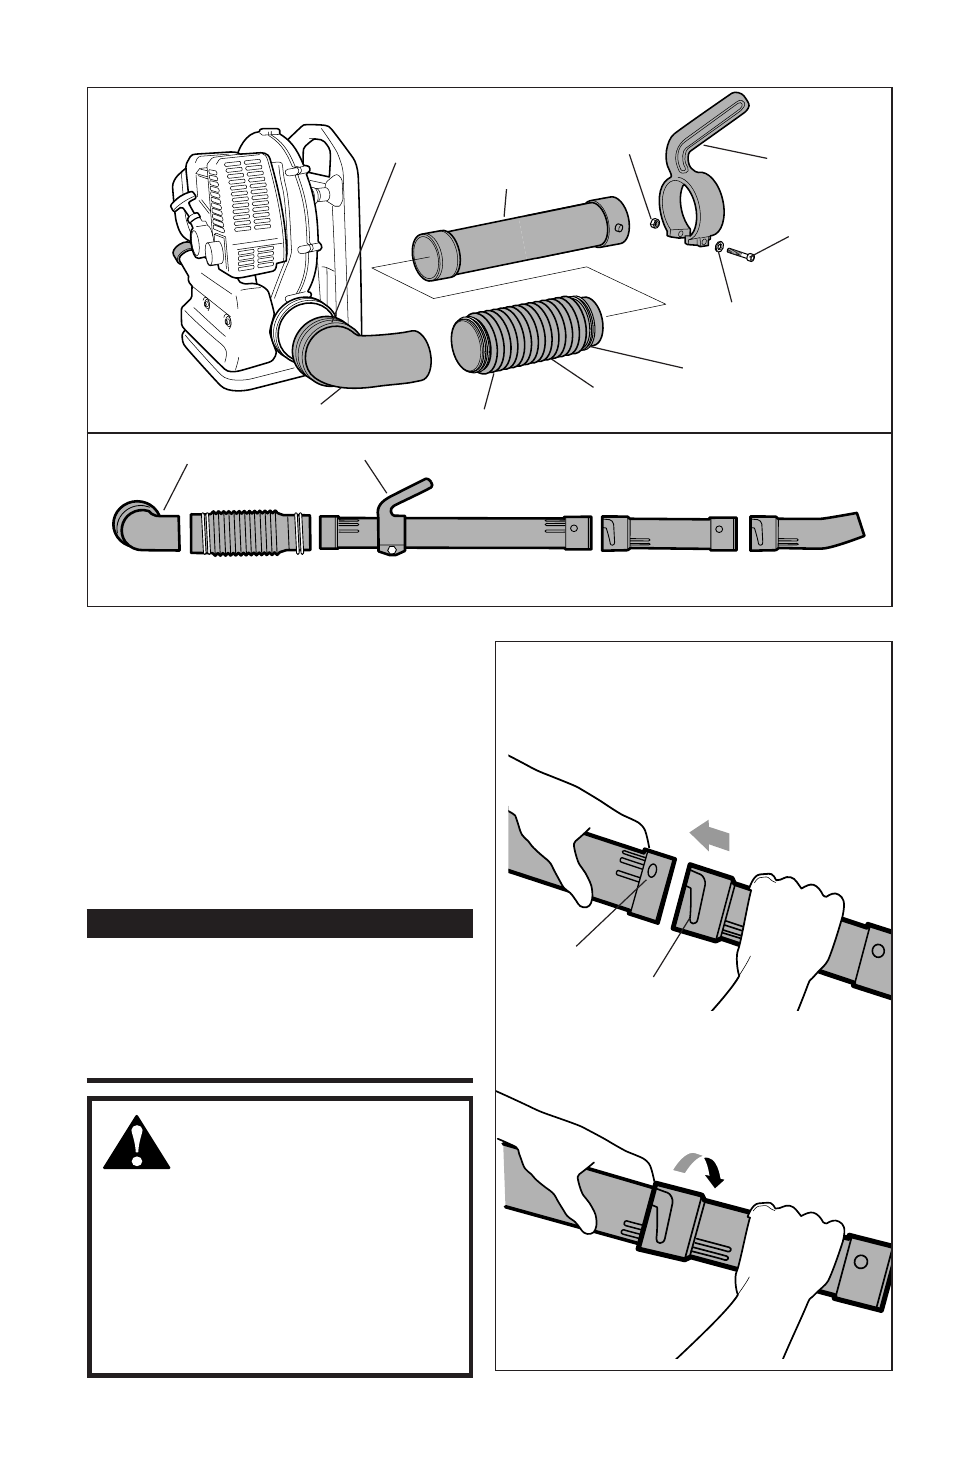
48002A
48003
48004D
Lock Pin
Lock Slot
48004C
Rotate clockwise to lock, mak-
ing sure the 3 lines are aligned
on both tubes.
WARNING!
Danger from rotating impeller!
Stop the engine before installing or
removing the blower tubes! Never
perform any maintenance or as-
sembly procedures on this ma-
chine while the engine is running!
ASSEMBLING THE BLOWER (continued)
6. Grasp the straight tube as shown,
and push the tube over the
swivel tube locking pins (right).
See figure 3.
7. Lock the straight tube to the swivel
tube by rotating the straight tube.
8. Grasp the nozzle tube and lock the
nozzle to the straight tube as in
Steps 6 and 7.
IMPORTANT!
Blower tube installation affects blower
balance and performance! Make sure
the tubes and nozzle are correctly
assembled per above, and that all
connections are tight.
Tube Assembly
90° Discharge Tube
Handgrip
Flexible Tube
Swivel Tube
Straight Tube
Nozzle Tube
115mm Clamp
Swivel
Tube
Nut
Handgrip
Bolt
Washer
85mm Clamp
100mm Clamp
90° Discharge Tube
Flexible Tube
Align the lock pins with the
lock slots, and push the tubes
together.
Figure 2
Figure 3
5