Getting started – Star Tech Development BR4100DC User Manual
Page 8
6
Getting Started
NOTE:
The information in the following section as well as the information in Chapter 2:
Quick Setup is covered on the Quick Installation Guide that accompanies this manual. If
you have already performed the steps in the Quick Installation Guide, you can proceed
to Chapter 3: General Settings.
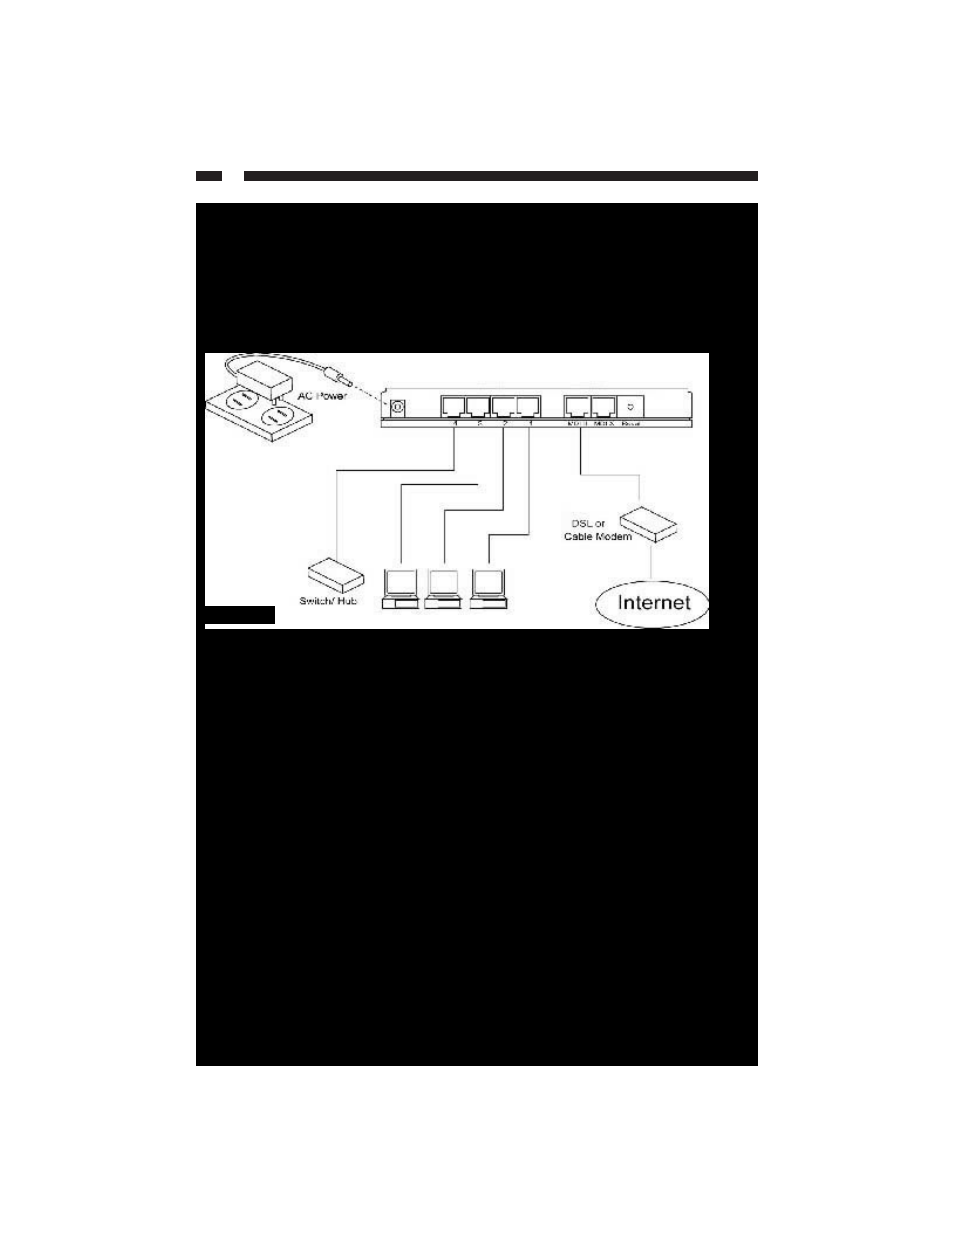
Setting Up Your LAN
1. Make sure all network devices are turned off.
2. Plug the power adapter into the 12VDC port on the back of the router. Plug the other
end into an available power source. The green PWR LED on the router should now be
lit.
3. Using an RJ-45 Ethernet cable, connect each of your network devices to one of the
four LAN ports (labeled 1 through 4) on the router.
4. Using an RJ-45 Ethernet cable, connect your xDSL or Cable modem to one of the
router’s WAN ports (labeled MDI-II and MDI-X). You need to know what type of
modem port and connection cable you are using.
NOTE:
After connecting your modem to your WAN port, check the WAN LNK/ACT
LED on the front of the router. If the LED is lit, you have selected the proper WAN port.
If the WAN LNK/ACT LED is not lit, try plugging your cable into the other WAN port.
Sample Network
Modem port is regular
Modem port is uplink
Straight-
Use MDI-X
Use MDI-II
Through
Cross-
Use MDI-II
Use MDI-X
Over