Setting an initial value and recording timecode – Sony DSR-70 User Manual
Page 63
Chapter 4
Time Data and Sub LCD Menu
Chapter 4
Time Data and Sub LCD Menu
63
5 Operating mode
The ■ mark, indicating an auto editing segment, may
appear at the rightmost position.
The contents displayed other than the ■ mark are
listed below.
a) “+2.0” in the left box is an example of playback speed
indication.
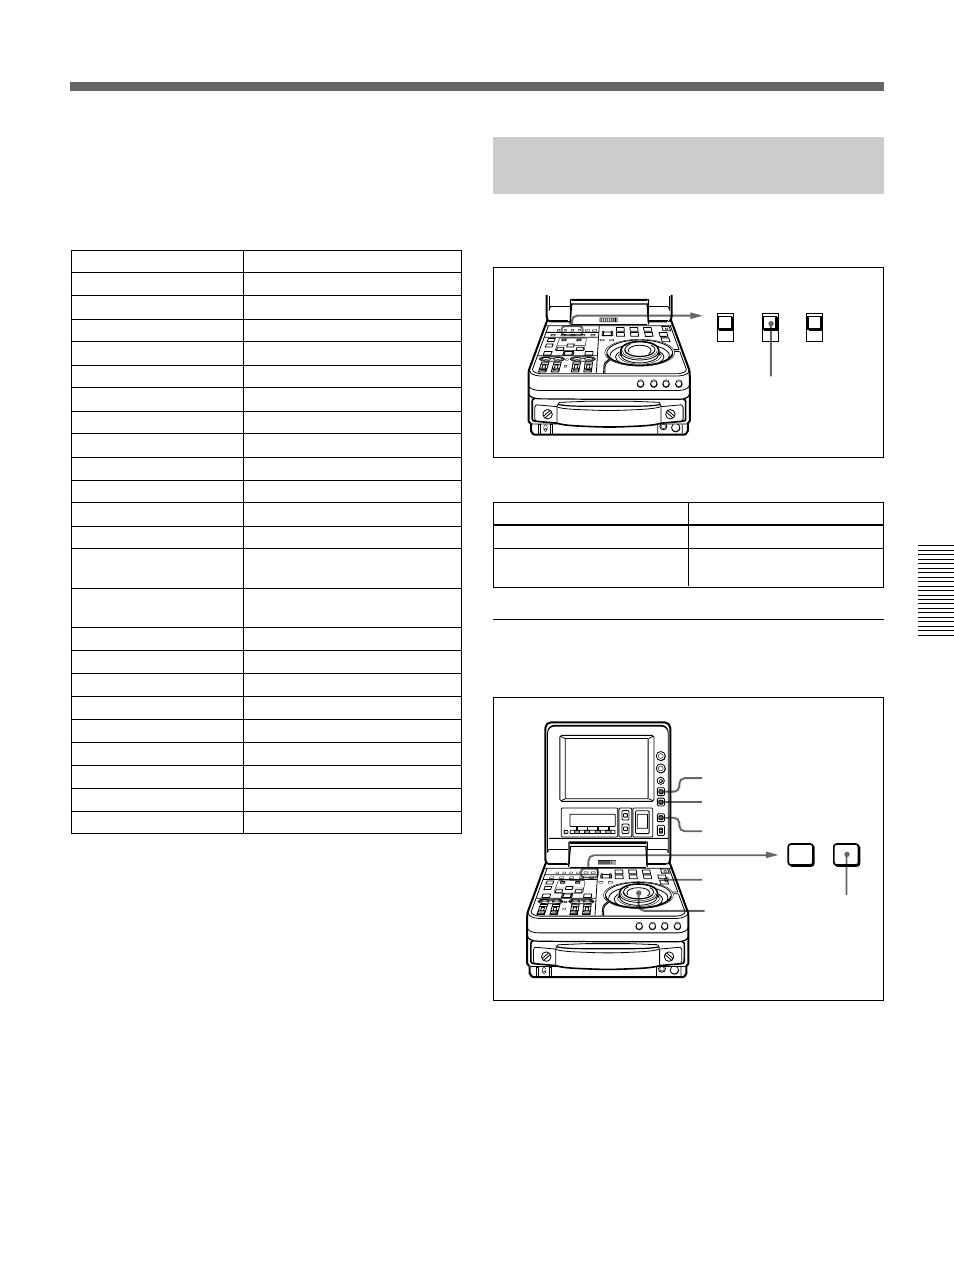
Setting an Initial Value and
Recording Timecode
Set the switches and sub LCD menu items as shown
below.
Sub LCD menu settings
Item
Setting
F-RUN/R-RUN
Desired setting
DF/NDF
Desired setting
(general settings page)
(for DSR-70)
To set an initial timecode value
Perform the following procedure.
1
Press the COUNTER SELECT button and select
TC.
ON
OFF
LOCAL
REMOTE
INT
EXT
TC
CHARACTER
TC INT/EXT: INT
1
3,5
3,4,5,6
7
2
MENU
SET
RESET button
Display
Operating Mode
CASSETTE OUT
No cassette loaded
TAPE UNTHREAD
Tape not yet threaded
STANDBY OFF
Standby off mode
T. RELEASE
Tension release mode
STOP
Stop mode
F. FWD
Fast forward mode
REW
Rewind mode
PREROLL
Preroll mode
PLAY
Playback mode (servo unlock)
PLAY
LOCK
Playback mode (servo lock)
REC
Recording mode (servo unlock)
REC
LOCK
Recording mode (servo lock)
SEQ-REC
Sequential recording mode
(servo unlock)
SEQ-REC
LOCK
Sequential recording mode
(servo lock)
EDIT
Editing mode (servo unlock)
EDIT
LOCK
Editing mode (servo lock)
JOG
STILL
Jog mode still playback
JOG
FWD
Forward jog
JOG
REV
Reverse jog
SHUTTLE
+2.0
Shuttle mode (playback speed)
a)
PREVIEW
Preview mode
AUTO EDIT
Auto edit mode
REVIEW
Review mode
(Continued)