StarTech.com CE IDE HARD ENCLOSURE IDE1810U2Z User Manual
Page 7
Instruction Manual
4
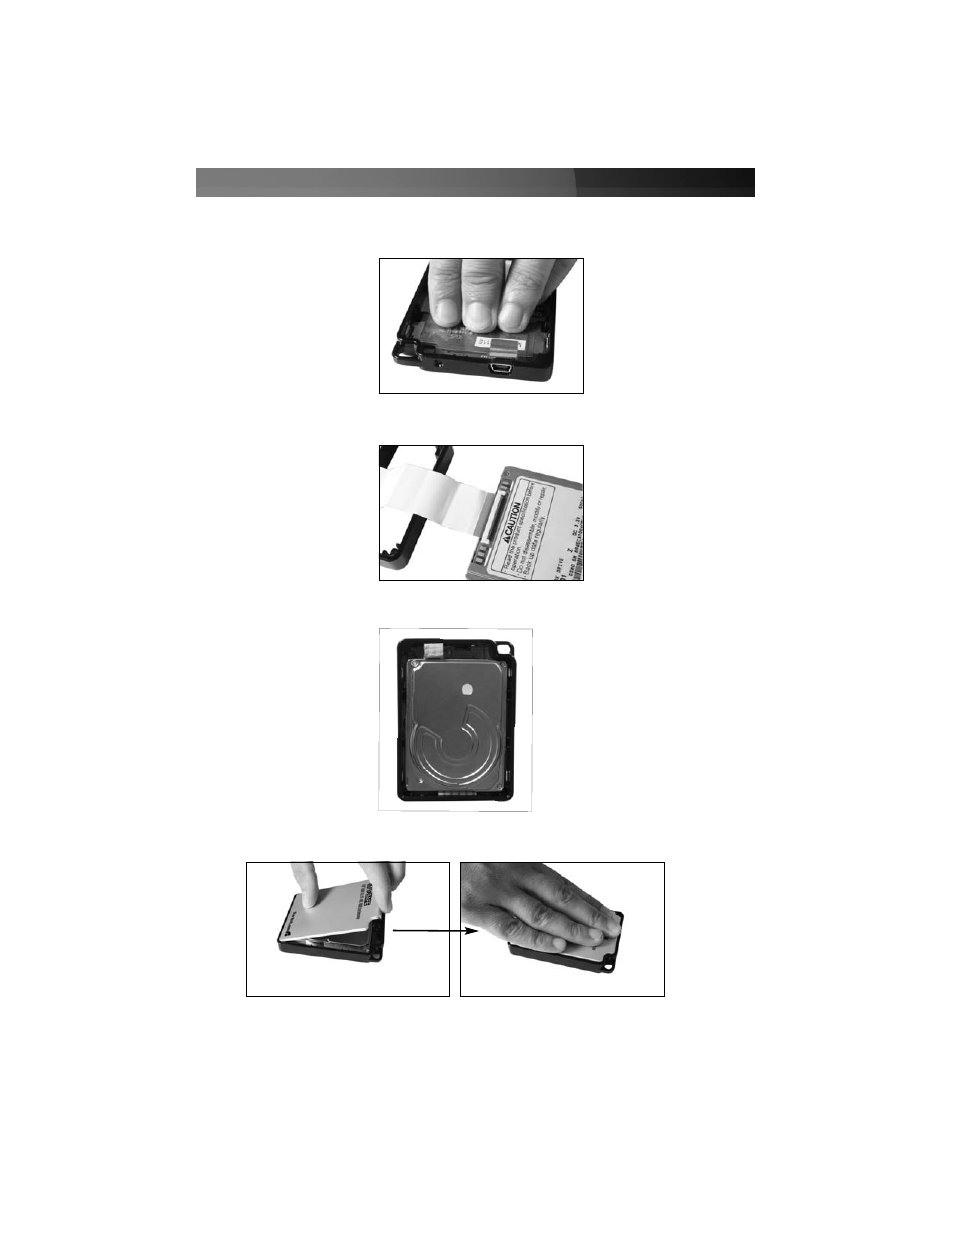
9. Once the drive is connected, situate it in the enclosure so that the label is now facing
into the enclosure:
10. Place the front panel over the drive, by situating the bottom of the panel inside the
enclosure, then securing the remainder:
10. Replace the screw that was removed in step #1.
7. Insert the circuit board (removed in step #3) into the enclosure by aligning the USB
connector (provided by the circuit board) with the USB port (provided by the frame),
and gently applying pressure to the bottom of the circuit board until it is locked in
place:
8. Connect the CE IDE (zif) cable to the drive, such that the label of the hard drive
is facing upward***.
***Please note:
IDE1810U2Z is pre-configured
with a Toshiba compatible ZIF
cable. If you are using an Hitachi
hard drive, please refer to step
#3. b, for information on how to
replace the cable (included).
- INFOSAFE IDE2510U2 (12 pages)
- IDE3510U2GB (11 pages)
- IDE3510U2GB (11 pages)
- PEXSATA22I (12 pages)
- PCI1394B_3 (8 pages)
- CARDBUS CB420USB (9 pages)
- PCI EXPRESS SERIAL ADAPTER PEX4S952 (8 pages)
- ICUSB422 (10 pages)
- ICUSB422 (9 pages)
- MADE EASY HSB110SATBK (2 pages)
- PCI8S9503V (13 pages)
- PCI8S9503V (14 pages)
- P-Touch 9500PC (4 pages)
- EC1000S (9 pages)
- SATSAS225ODD (2 pages)
- SATSAS225ODD (2 pages)
- SAT2510BU2B (10 pages)
- PCI4S650PW (12 pages)
- ST100SLP (10 pages)
- PEXUSB400 (9 pages)
- PCISOUND4LP (10 pages)
- STARVIEW SV441DUSBI (52 pages)
- SAT2510BU2E (12 pages)
- SAT2510BU2E (12 pages)
- PCISOUND4CH (10 pages)
- PEX2EC35 (11 pages)
- PCISOUND5CH (10 pages)
- PCI EXPANSION BAY PEX2PCI4 (13 pages)
- PEX1P (9 pages)
- PCI EXPRESS PEXSATA24E (11 pages)
- HSB220SAT25B (11 pages)
- CTK400LAN (9 pages)
- HSB100SATBK (9 pages)
- ST1000BT32 (11 pages)
- SV211KDVI (10 pages)
- SV211KDVI (10 pages)
- PCI EXPRESS 10/100 PEX100S (11 pages)
- SAT32MSAT257 (9 pages)
- SAT2IDEADP (11 pages)
- SAT32M225 (11 pages)
- S322SAT3R (14 pages)
- IDE2SAT (2 pages)
- 25SAT22MSAT (13 pages)
- SAT2MSAT25 (11 pages)