Assembly – Skil 7300 User Manual
Page 7
-7-
Disconnect the plug from
the power source before
making any assembly, adjustments or
changing accessories. Such preventive
safety measures reduce the risk of starting
the tool accidentally.
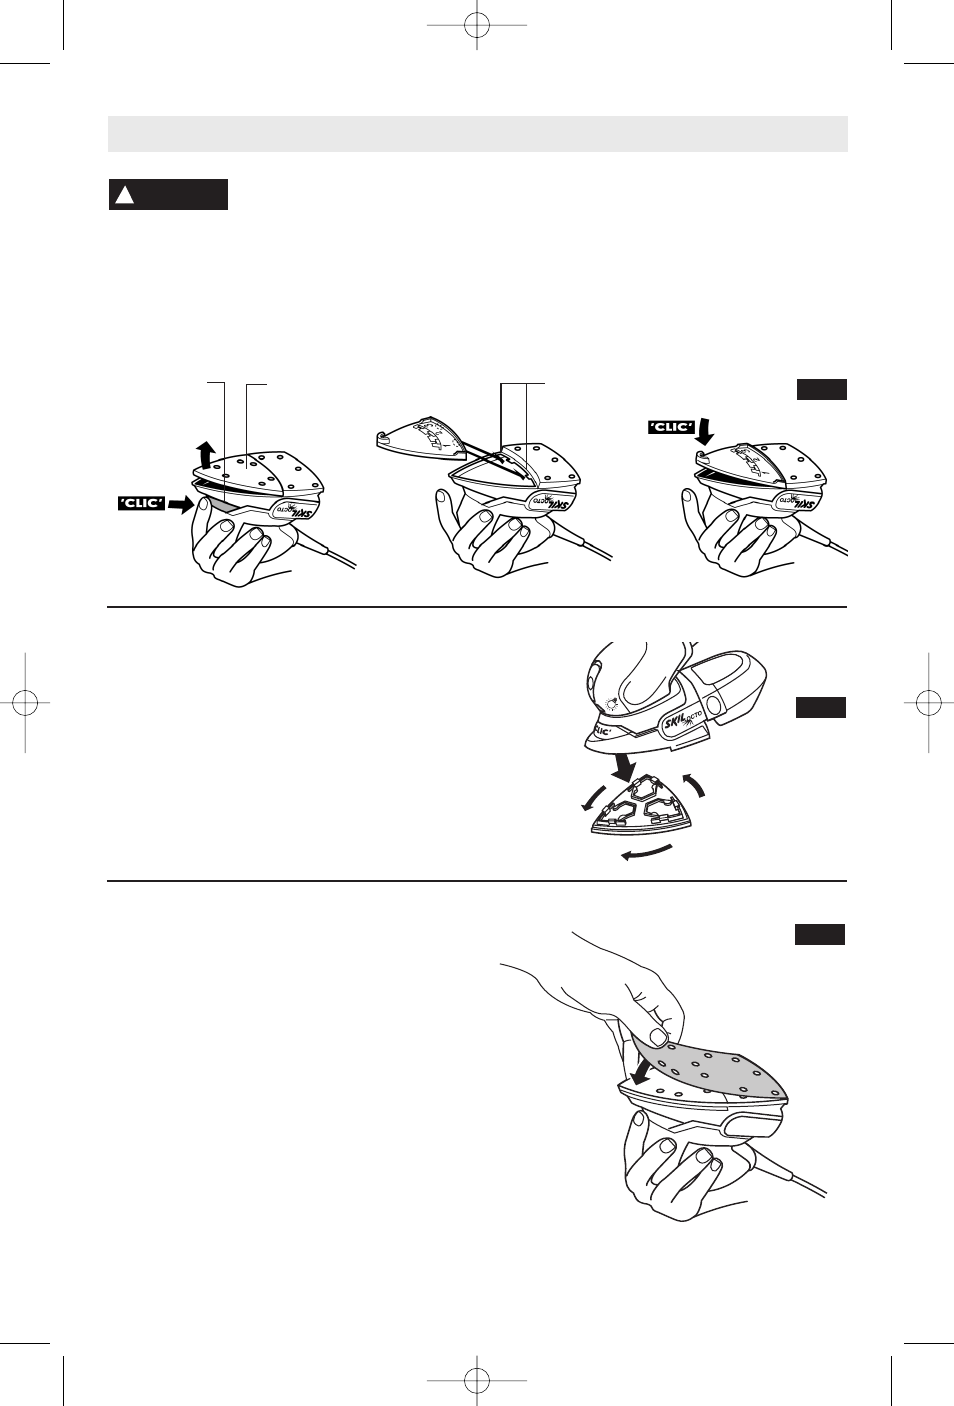
BACKING PAD REMOVAL/INSTALLATION
Your Multi-Finishing sander is equipped with a
hook- and-loop rubber backing pad which may
be removed and attached without the need of
additional tools.
To remove, press the pad/plate unlock button
and pull the backing pad free from the sander
(Fig. 2.)
To install, engage rear of backing pad under
latched in tool’s recess and press front of
backing pad in place until it engages with a
"Click" sound (Fig. 2).
Assembly
!
WARNING
PAD/PLATE
UNLOCK
BUTTON
BACKING
PAD
ROTATING BACKING PAD
For maximum use of abrasive, rotate pad 120
degrees when tip of abrasive becomes worn
Fig. 3).)
FIG. 3
INSTALLING SANDING SHEETS
Your sander uses hook-and-loop backed
sandpaper, which firmly grips the backing pad
when applied with moderate pressure.
To change, merely peel off the old sandpaper,
remove dust from the backing pad if necessary,
and press the new sandpaper in place. Be sure
to align the sanding sheet holes with the holes
in the backing pad to allow the dust extraction
system to function (Fig. 4).
After considerable use the backing pad surface
will become worn, and the backing pad must be
replaced when it no longer offers a firm grip. If
you are experiencing premature wear of the
backing pad facing, decrease the amount of
pressure you are applying during operation of
the tool.
FIG. 4
LATCHES
FIG. 2
SM 2610938371 01-06 1/12/06 8:10 AM Page 7