4 ceiling front projection – Sim2 Multimedia SVP 420 HB User Manual
Page 18
SVP 450 PLUS - SVD 500 PLUS
17
ENGLISHENGLISHENGLISHENGLISHENGLISH
-
If the measurement of the screen diagonal is not in
the table, C can be determined (in cm) as follows.
-
Measure the screen diagonal and take the nearest
value from the table.
-
Calculate the ratio between value C and screen width
in the table.
-
Multiply the result by the actual screen width.
Example:
Suppose we have a 105” screen diagonal. 100”
is the nearest value in the table.
Ihe C/Width ratio is equal to :305/203.2=1,5.
A105” screen diagonal is 213.3 wide.
So, the value of C is: 1,5x213,3=320 cm.
Note:
The screen size refers to the useful area (4/3
format).
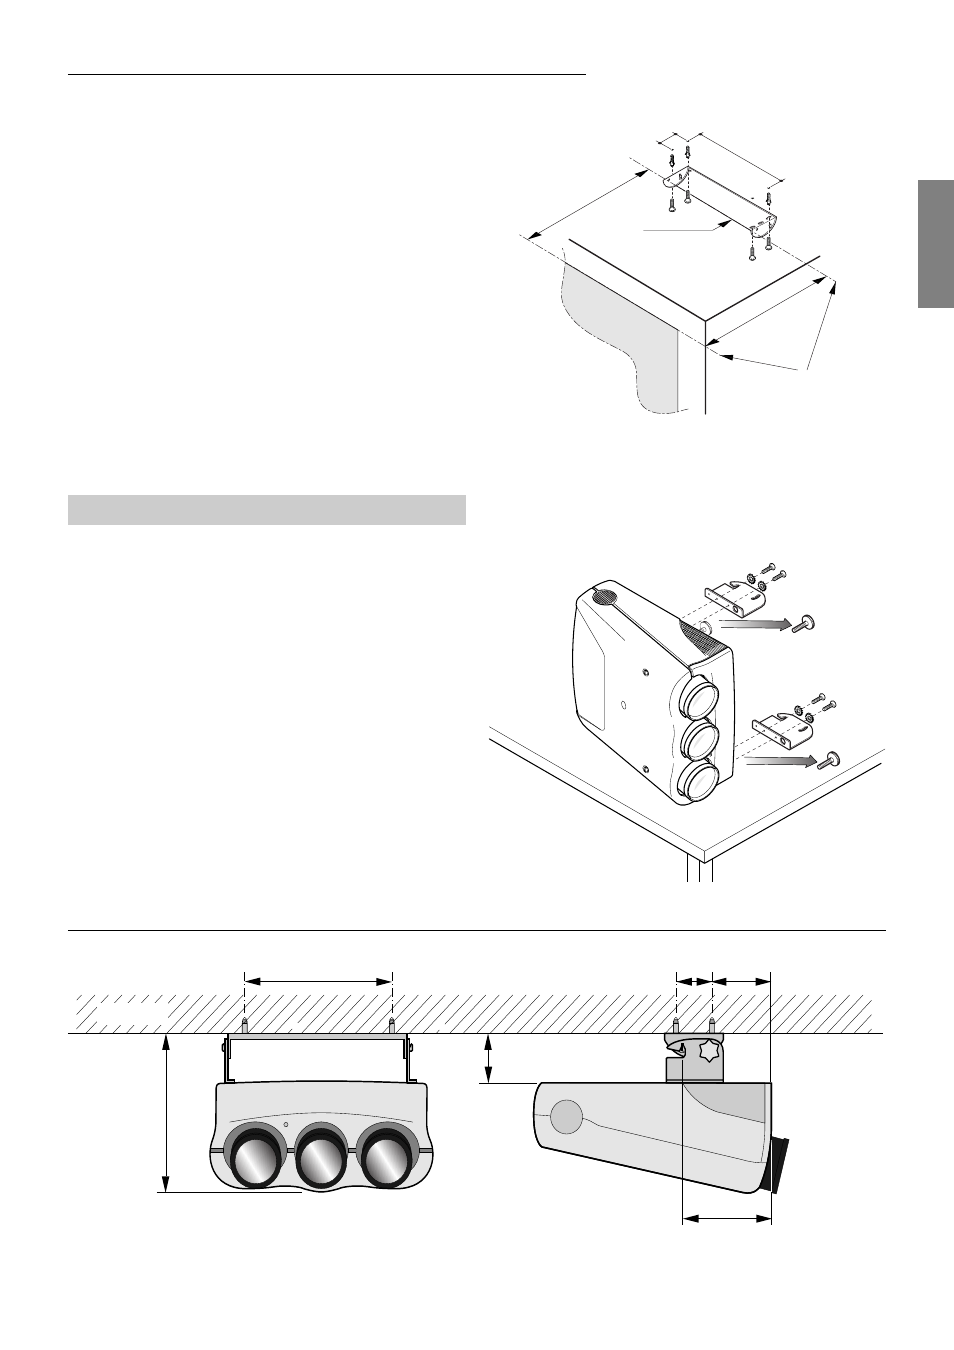
4.3.4 Ceiling front projection
The use of the correct spacers as shown in the
spacers table is mandatory for a perfect focus
uniformity.
Use the ceiling assembly kit (given with the projector) to
install the projector on the ceiling and proceed as follows:
WARNING:
The installer must verify that the ceiling can
support the projector load. The bracket must
be fixed properly and be absolutely parallel
with the screen
MURO
300
395
11
5
93
180
266
1- Fix the bracket, included in the pack, to the ceiling with
the four screws supplied.
2- Put the projector on a table in the vertical position
(sideways)
3- Fasten the left bracket with 2 screws and washers.
4- Repeat the steps above for the right bracket.
SCREEN
FRONT
300
93
=
=
OBSERVE
PARALLELISM
BRACKET