Fig. 1, Driveline, 41–02 driveline lubricating u-joint lubricating – Sterling Trucks Acterra MX User Manual
Page 99
If the driveshaft tube requires straightening or
replacement, balance the repaired driveshaft be-
fore installing it. See Group 41 of the
Acterra
®
Workshop Manual.
7.
Check the driveshaft for missing balance
weights, and for debris build-up. Remove any
build-up. If any balance weights are missing, re-
move the driveshaft and have it balanced; see
Group 41 of the
Acterra
®
Workshop Manual.
8.
For driveshafts with slip-joints, check that the
yoke plug is not loose or missing. See
Ref. 2. Replace the yoke plug if needed. If the
yoke plug is missing, the splined shaft may be
hitting the yoke plug and knocking it out; check
the driveshaft for proper length.
41–02 Driveline Lubricating
U-Joint Lubricating
1.
Wipe all old grease and dirt from each U-joint
grease fitting. See
, Ref. 8.
2.
Use a hand-type grease gun, or a high-pressure
gun with a low-pressure adapter, to lubricate the
U-joints.
f410057a
10/06/94
1
2
3
5
6
4
2
4
7
16
15
14
13
18
17
9
8
3
7
10
11
12
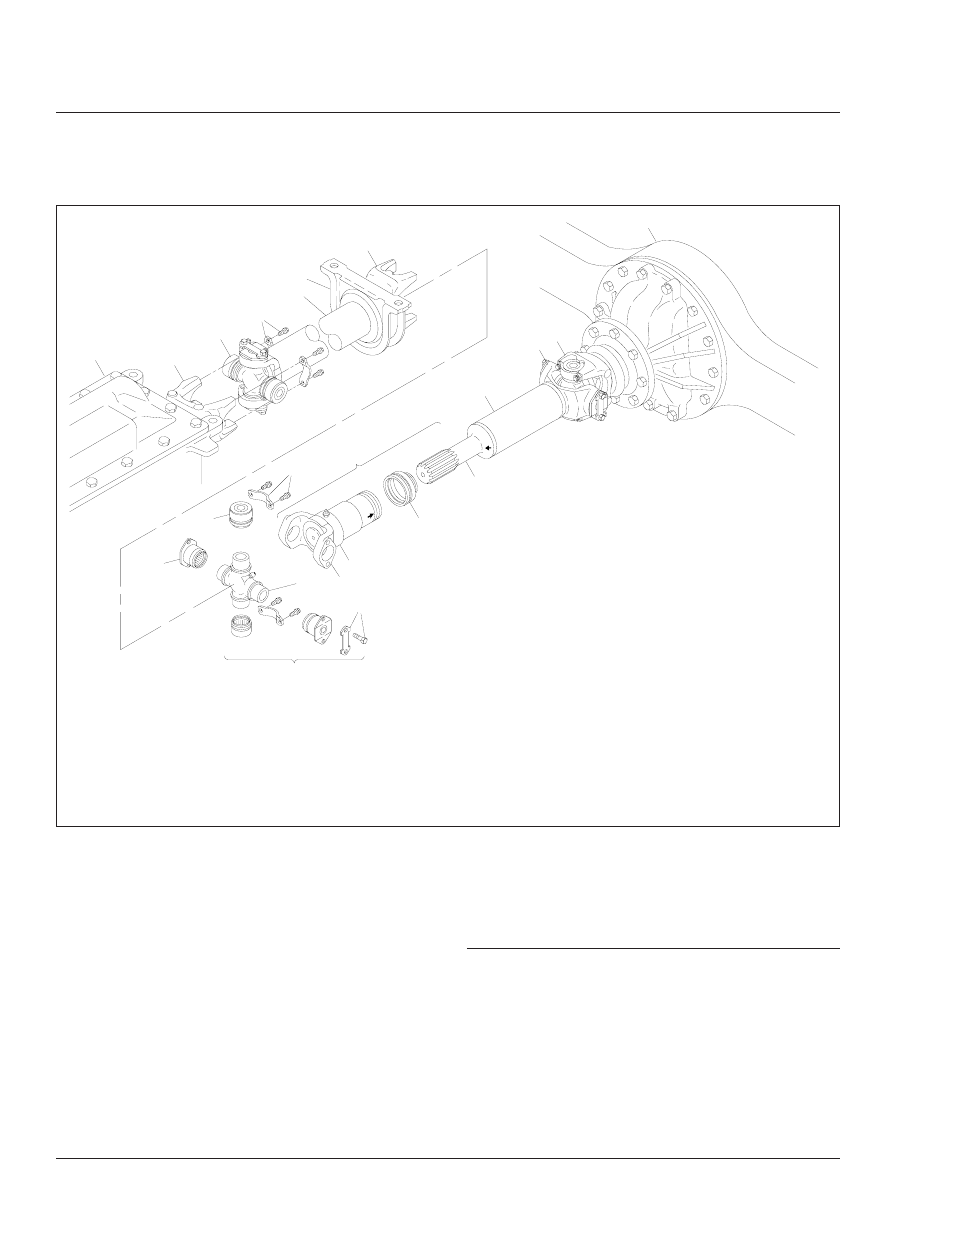
NOTE: Not all fasteners are shown.
1.
Transmission
2.
Half-Round End Yoke
3.
U-Joint Assembly
4.
Yoke Strap and Capscrew
5.
Coupling Shaft
6.
Midship Bearing and Mount
7.
Bearing Cup
8.
Slip-Joint Assembly
9.
Driveshaft Tube
10. Driveshaft Yoke
11. Input Shaft Half-Round End
Yoke
12. Rear Axle
13. Splined Shaft
14. Dust Seal
15. Sleeve Yoke
16. Full-Round-Yoke Lug
17. U-Joint Cross
18. Lockplate and Capscrew
Fig. 1, Driveline Assembly With Midship Bearing for Single-Axle Installation
Driveline
41
Acterra Maintenance Manual, March 2000
41/2