Multiple zone kilns, An overview of multiple, Zone firing – Sentry Industries Sentry 2.0 User Manual
Page 16: Viewing zone temperatures, Two zone kilns: adjust heat in, Center section (cadj), Thermocouple failure, In a multiple zone kiln, Power output lights, Testing multiple zone elements
Chapter 5
Multiple Zone
Kilns
Note: See also Multiple Zone Options, page 21.
An Overview of Multiple Zone Firing
If you are not sure how many zones your kiln has, look into
the firing chamber. The number of thermocouple tips indi-
cates the number of zones.
In single-zone kilns, the Sentry measures temperature
from one location. When the controller turns on the heat, all
the elements turn on.
With two and three zone kilns, the Sentry measures tem-
perature from each individual zone. It then adjusts the heat
separately for each zone to improve temperature uniformity.
To maintain even temperature, the Sentry calculates not
only temperature difference between zones, but also length
of time needed to change temperature. By carefully timing
heat output, it maintains even temperature with a minimal
loss in firing speed.
Note: Multiple zone kilns use the same Cone-Fire
and Ramp-Hold programming instructions as sin-
gle zone kilns.
Note: Firing a Ramp-Hold program at FULL rate
(1799°F/999°C or higher rate) shuts off multi-
ple-zone control for that firing. The kiln then fires
as a single zone kiln.
Viewing Zone Temperatures
The temperature displayed during firing is an average
taken from all zones. Through the Options key, you can gain
more precise temperature readings:
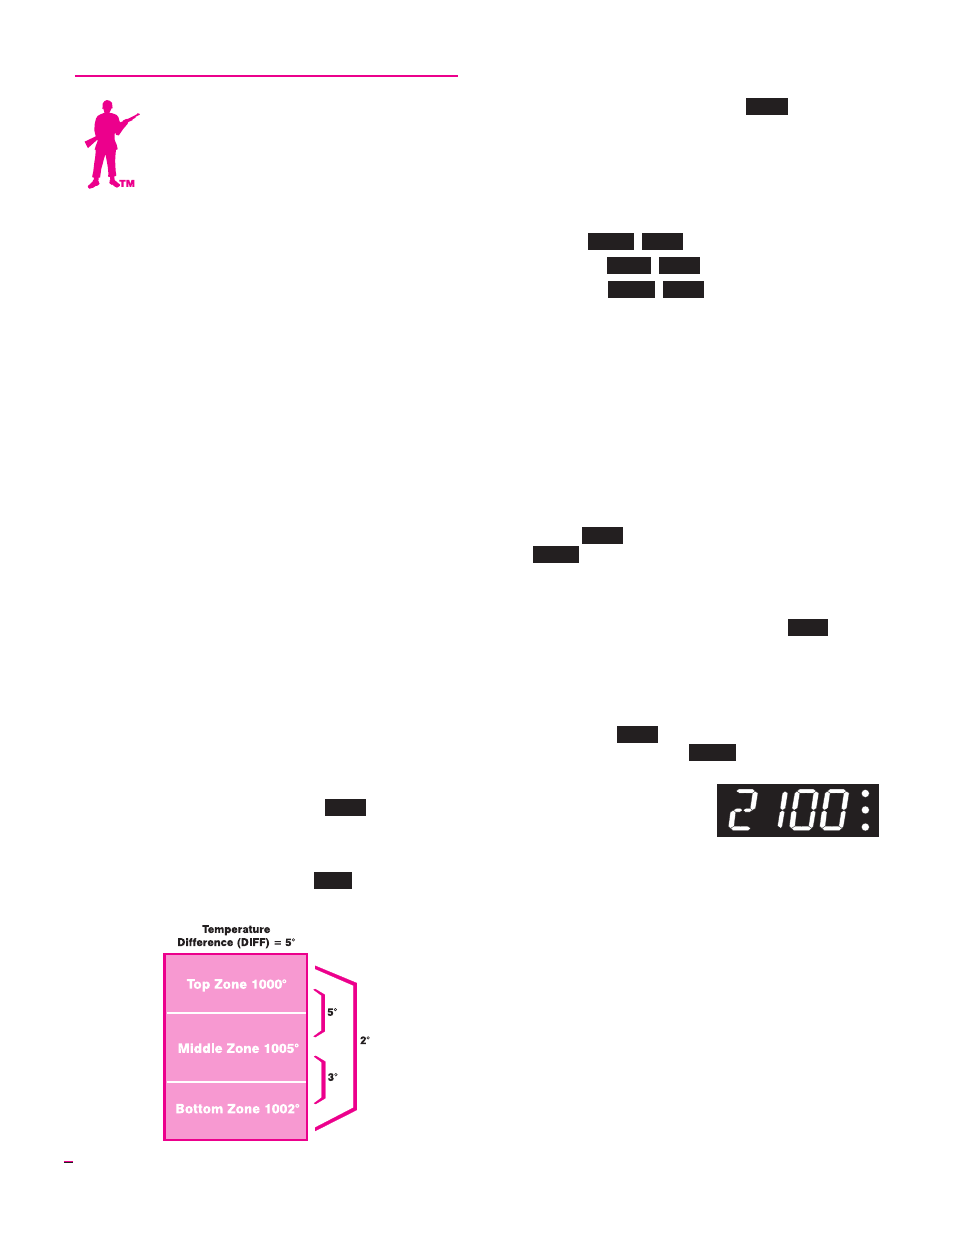
Zone Difference (DIFF)
1 Press OPTIONS repeatedly until
DIFF
appears.
2 Press ENTER.
3 The maximum difference in temperature between
the zones is shown. (Example:
-005
.)
Zone Temperatures (T123)
1 Press OPTIONS repeatedly until
T123
appears.
2 Press ENTER.
3 The temperature for each zone will display one after
the other. This information will cycle for one min-
ute. Then normal temperature display will return.
For example:
■
Top zone:
TC 1¯ 1250
■
Middle zone:
TC 2- 1251
■
Bottom zone:
TC 3_ 1249
Two Zone Kilns: Adjust Heat in
Center Section (CAdJ)
The Center Adjust option is accessed with the Options
key. It appears only on 2 zone kilns that contain 3 relays and 3
banks of elements. It does not appear on 2 zone kilns with 2
relays, or on 3 zone kilns.
The Center Adjust acts as an infinite control switch that
adjusts heat to the center section of the kiln. A number will
display. 100 is the factory default, meaning 100% heat. You
can change the setting from 0 to 200. The higher the num-
ber, the more the heat in the center section.
1 From
IdLE
, press OPTIONS repeatedly until
CAdJ
appears.
2 Press ENTER. Use any number key to change the
number that appears.
3 Press ENTER. Press STOP to return to
IdLE
.
Thermocouple Failure
In a Multiple Zone Kiln
In a multiple zone kiln, if a thermocouple fails, the firing
will continue as a single-zone kiln so long as one thermocou-
ple still operates.
FAIL
will appear, alternating with the
thermocouple that failed (i.e.
TC 1¯
).
Power Output Lights
The 3 lights to the right of the
temperature display turn on
when the controller sends power
to the relays.
■
Two Zone Kiln The top light shows power to the relay
for the top section of the kiln. The bottom light shows
power to the bottom. Ignore the center light.
Three Zone Kiln The top light indicates power to the
top section relay, the middle light to the middle section, and
the bottom light to the bottom.
Testing Multiple Zone Elements
When relays or thermocouples are connected to the
wrong controller terminals, zones will show a wide tempera-
ture difference. To wire the kiln properly, trace the switch
box wiring with the kiln’s wiring diagram. Also, see “Ele-
ment Test,” page 21.
16