Getting started - cont’d using your steam mop – Shark S3501WC User Manual
Page 6
4
TOLL FREE:
1-866-538-6109
5
www.sharkclean.com
English
IMPORTANT: First things first, always
make sure the mop is
UNPLUGGED
from the wall when not in use. Never
fill the mop, attach the mop head,
change or remove the micro-fiber
pocket when the mop is plugged into
the wall. If you have hard water you
might want to use distilled water to
prolong the life of the Shark
®
Steam
Mop. Make sure you only add water
to the tank. Chemicals or cleaning
solution may damage the appliance
and could be unsafe for you and
your family.
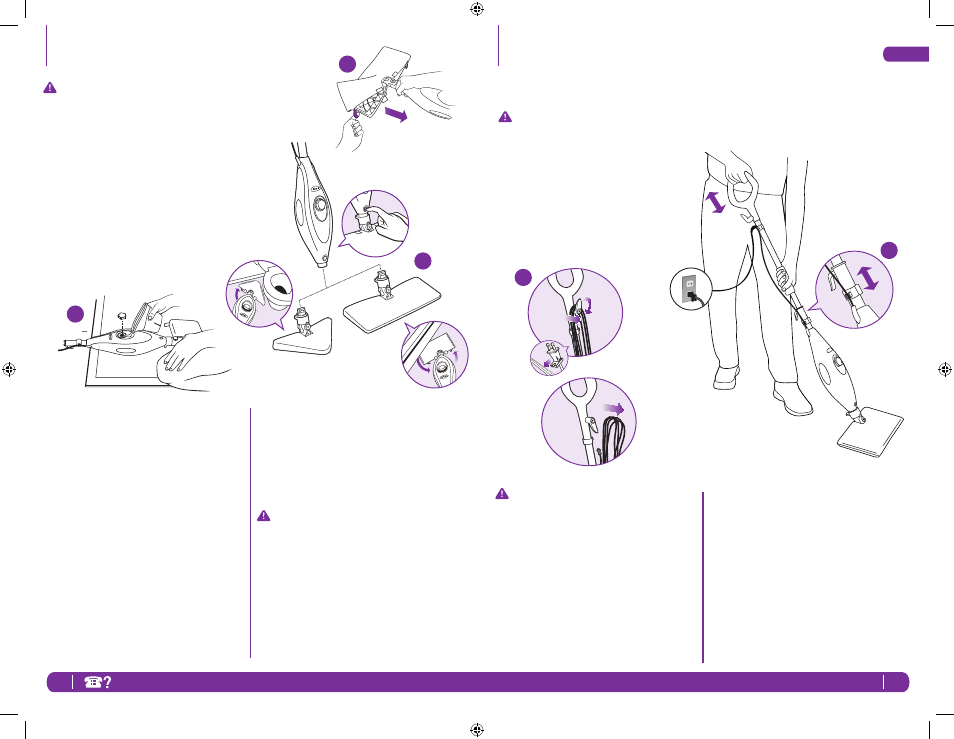
attach the quick fasteners on the
top of the pocket to secure in place.
You can also use the loop to pull the
dirty pocket off when you are done
mopping after it has cooled.
3
Snap the mop head into the base to
secure it.
IMPORTANT: Don’t use on unsealed
wood or unglazed ceramic floors.
On surfaces that have been treated
with wax or some no wax floors,
the sheen may be removed by
the heat and steam action. It is
always recommended to test an
isolated area of the surface to be
cleaned before proceeding. We
recommend that you check the use
and care instructions from the floor
manufacturer.
1
Turn the water tank cap counter
clockwise and remove from the tank.
Use the filling flask and pour water
into the tank. Please don’t overfill.
Replace the cap on the water tank by
turning clockwise and tightening.
2
Select a mop head and cleaning
pad. Each mop head can be used
on your floors. The Triangle Mop
Head was specifically designed to
reach into those tight corners and
spaces, especially those found in
the bathroom. The XL Mop Head
was designed to make quick work of
large open spaces. The Rectangle
Mop Head is completely versatile.
Use the lavender loop on the side of
the micro-fiber cleaning pocket to
place around the mop head. Then
1
2
3
Getting Started - cont’d
Using Your Steam Mop
IMPORTANT: Make sure you don’t
use the mop without attaching
a micro-fiber pocket and adding
water to the tank first. When you are
using the mop for the first time, it
might take longer than the normal
30 seconds to start steaming. Just
pump the handle a few times in a
downward motion to prime the
pump and it should be ready.
2
Pump the handle a few times in a
downward motion. This pumping
action will release steam as you
mop and allows you to customize
the amount of steam you want.
Begin mopping with a forward
and backward motion. The natural
motion of mopping will produce
steam.
NOTE: Make sure the floors are
swept or vacuumed before using the
steam mop.
1
Pull and twist the quick release cord
holder to unwrap the power cord
completely. A great time saver!
Plug into a 120-volt electrical outlet
The power “On” light will turn blue, it
takes approximately 30 seconds for
the mop to heat up and the steam to
be ready.
2
1
S3501WC_IB_English_100119.indd 4-5
1/19/10 2:48 PM