Setting the dip switches, The self test – Samsung SRP-770II User Manual
Page 6
ٻ
ڌڋٻ
6. Setting The Dip Switches
6-1. Setting the Dip Switches
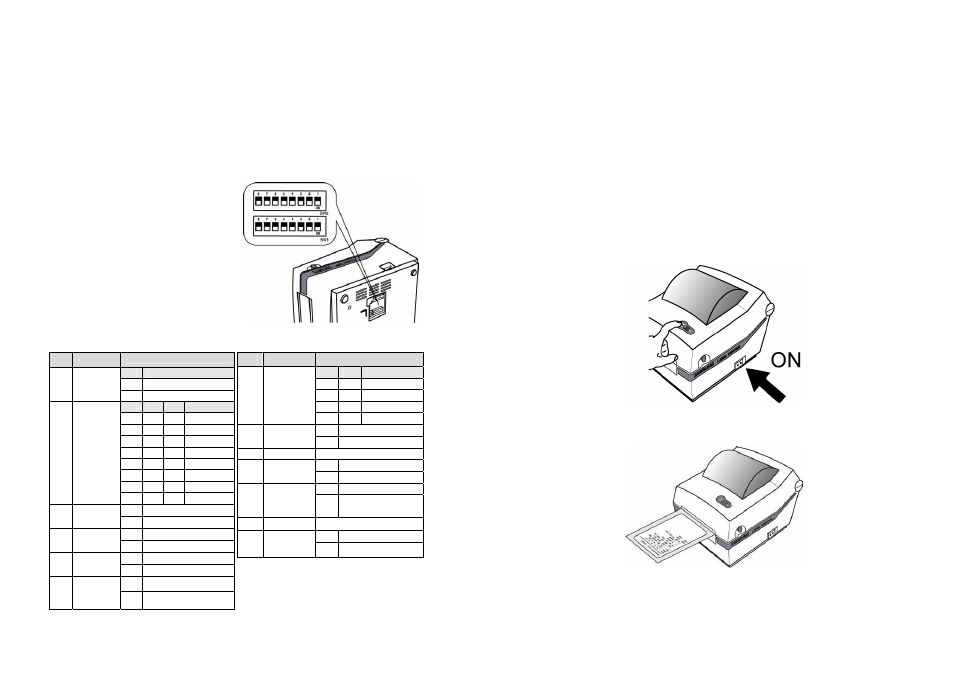
The Dip Switches are located on the bottom of the printer. The Dip Switches are used to
set the Printer to perform various functions. Follow these steps when changing Dip
Switches setting :
1. Turn the printer power switch off.
2. Remove the screw on the bottom
of the printer and open the bracket.
3. Flip the Dip Switches using tweezers
or another narrow-ended tool.
Switches are off when up and on
when down in the Figure below.
4. The new setting takes effect
when you turn on the printer.
Note : Always change Dip Switch settings
only when the printer is turned off.
6-2. Functions of Dip Switches
6-2-1. Dip S/W 1 6-2-2. Dip S/W 2
No
Functions
Details
1
Speed
Off 4.0
ips
1
Speed
Selection
On 5.0
ips
4
3
2
Density
Off Off
Off
13
Off Off
On
14
Off On
Off
15
Off On
On
16
On Off
Off
17
On Off
On
18
On On
Off
19
2
3
4
Density
Selection
On On
On
20
Off Normal
mode
5
Exhibition
Selection
On Demo
mode
Off Label
Paper
6
Media
Selection
On
Thermal Continuous Paper
Off
Without Auto Cuter
7 Auto
Cutter
On
With Auto Cutter
Off Enable
8
Near End
Sensor
Status
On Disable
No
Functions
Details
2
1
Baud Rate
Off
Off
9,600 bps
Off
On
19,200 bps
On
Off
57,600 bps
1,2
Baud
Rate
On
On
115,200 bps
Off
Detect Gap
3
Media
Detection
On
Detect Black-mark
4 Reserved
--
Off
SAMSUNG command
5 Emulation
On
Emulation
Off
Receive Buffer Full
6
Busy
Condition
On
*Offline
*Receive Buffer Full
7 Reserved
--
Off
Disable
8
Long label
Split printing
On
Enable
ٻ
ٻ
ڌڌ
7. The Self Test
The self-test checks whether the printer has any problems. (You cannot perform this
procedure if using the printer’s label peel-off option) If the printer does not function
properly, contact your dealer. The self-test checks the following;
1. Make sure that paper roll has been installed properly.
2. Turn on the power while holding(2sec) down the FEED button. The self-test begins.
3. The self-test prints the current printer status, which provides the control ROM version
and the DIP switch setting.