Adjusting the picture centering, Adjusting the picture size, Adjusting the picture rotation – Sony GDM-90W01T User Manual
Page 9
9
EN
F
D
ES
I
J
2 3
10
CENTER
2 3
10
S I ZE
GEOMETRY
2 3
10
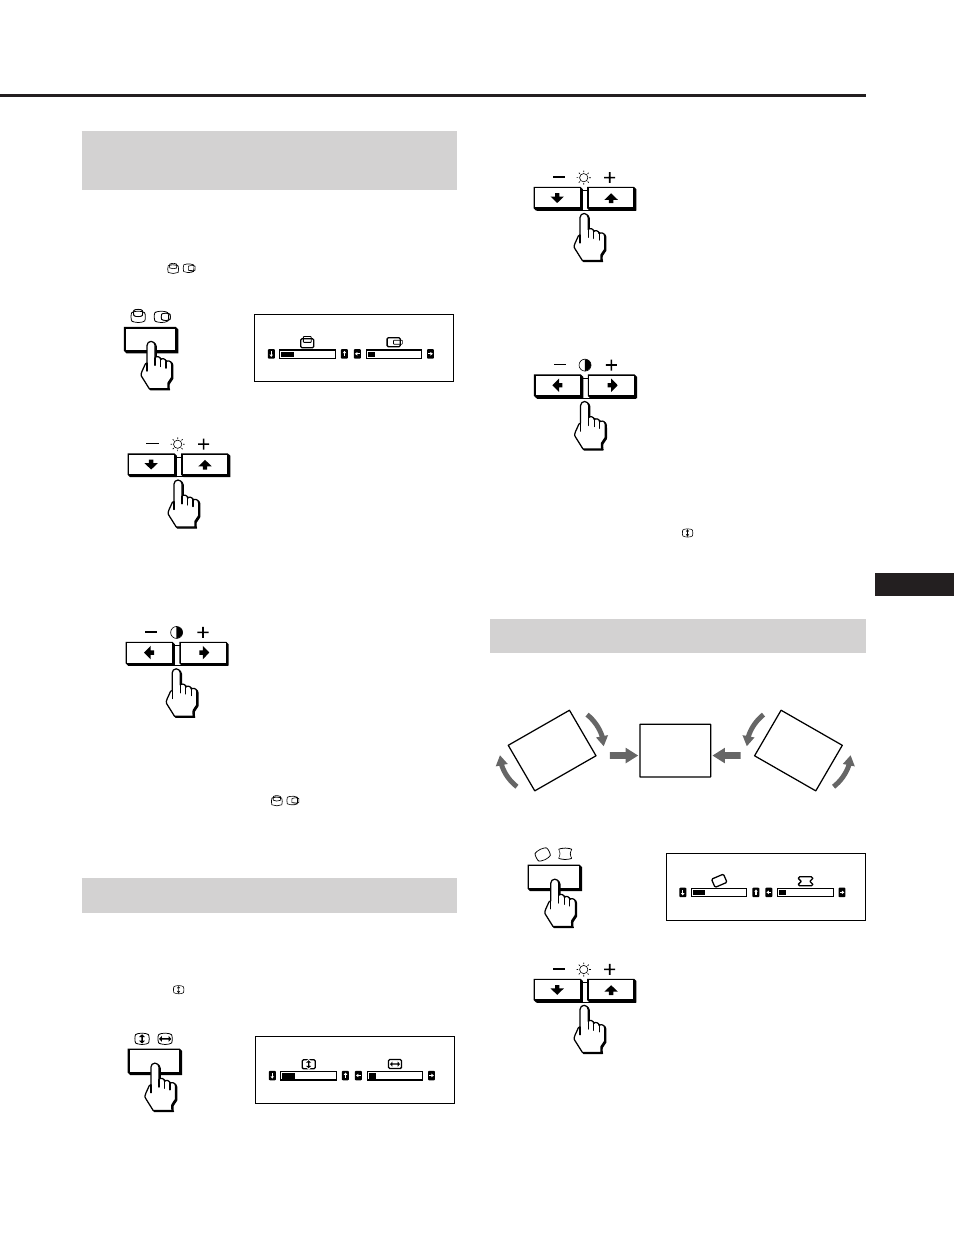
Adjusting the picture
centering
The adjustment data becomes the individual setting for each
input signal received.
1
Press the
button.
The “CENTER” OSD appears.
2
For vertical adjustment
Press the ¨ ./> buttons.
.
. . . to move down
>
. . . to move up
For horizontal adjustment
Press the > ?// buttons.
?
. . . to move left
/
. . . to move right
The OSD automatically disappears after about 10 seconds.
To turn off the OSD, press the
button again.
To reset, press the ? (reset) button while the OSD is on.
The horizontal and vertical centerings are both reset.
Adjusting the picture size
The adjustment data becomes the individual setting for each
input signal received.
1
Press the
Å
button.
The “SIZE” OSD appears.
2
For vertical adjustment
Press the ¨ ./> buttons.
.
. . . to decrease
>
. . . to increase
For horizontal adjustment
Press the > ?// buttons.
?
. . . to decrease
/
. . . to increase
The OSD automatically disappears after about 10 seconds.
To turn off the OSD, press the
Å
button again.
To reset, press the ? (reset) button while the OSD is on.
The horizontal and vertical sizes are both reset.
Adjusting the picture rotation
The adjustment data becomes the common setting for all
input signals received.
1
Press the
Dd button.
The “GEOMETRY” OSD appears.
2
Press the
¨./> buttons.
.
. . . to rotate counterclockwise
>
. . . to rotate clockwise
The OSD automatically disappears after about 10 seconds.
To turn off the OSD, press the Dd button again.
To reset, press the ? (reset) button while the OSD is on.
The picture rotation and the pincushion settings are both
reset.