Aa.. s sttaan nd d – Woodstock REBEL W2000 User Manual
Page 7
6 – W2000 Rebel
®
Assembly of The Rebel
®
is extremely straight forward
and can be accomplished with just a few simple hand
tools. In fact, the only tools you will need are a regular
screwdriver, Phillips
®
screwdriver, adjustable wrench,
3
⁄
16
" Allen
®
wrench and a good quality straight edge.
The design of The Rebel
®
is such that most of the parts
are joined together with socket head cap screws. We
recommend that you assemble The Rebel
®
in the order
presented here. Use the exploded parts diagram for
visual reference during assembly. We suggest that you
use a table or work bench that has sufficient surface
area to hold all of your tools and the finished Rebel
®
safely and securely. It is also best to have a well light-
ed area to reduce eye strain during assembly.
The stand is made up of four legs, two side pieces and
a front piece and back piece. All similar parts are inter-
changeable with one another.
S
Stteep
p 1
1 - Turn the working table up side down and
loosely bolt on all four legs using the
1
⁄
4
"-28 x
5
⁄
8
" socket head cap screws provided.
S
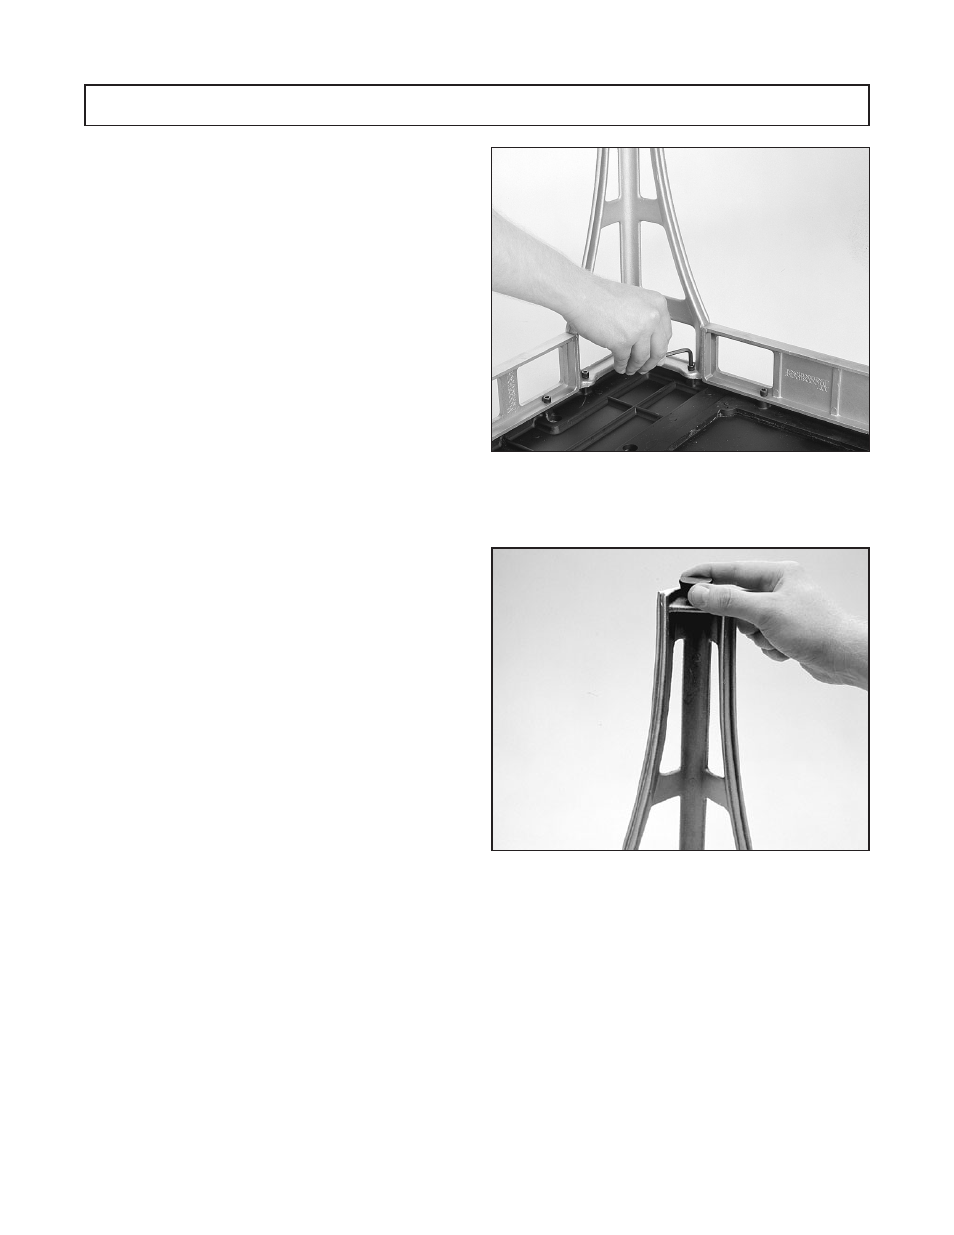
Stteep
p 2
2 - Mount the short and long side panels between
the legs using the
1
⁄
4
"-28 x
5
⁄
8
" socket head cap
screws provided. F
Fiig
gu
urree 2
2..
S
Stteep
p 3
3 - Use a
3
⁄
16
" Allen
®
wrench to assist in starting
and tighten all cap screws down.
S
Stteep
p 4
4 - Attach the feet to the legs. F
Fiig
gu
urree 3
3..
S
Stteep
p 5
5 - Turn the stand assembly over and move on to
the next section.
A
A.. S
Sttaan
nd
d
F
Fiig
gu
urree 2
2.. Mounting legs and side panels to the work-
ing table.
F
Fiig
gu
urree 3
3.. Attaching the feet to the legs.
IIII.. A
Asssseem
mb
blly
y