Star Micronics Star SP317 User Manual
Page 6
– 4 –
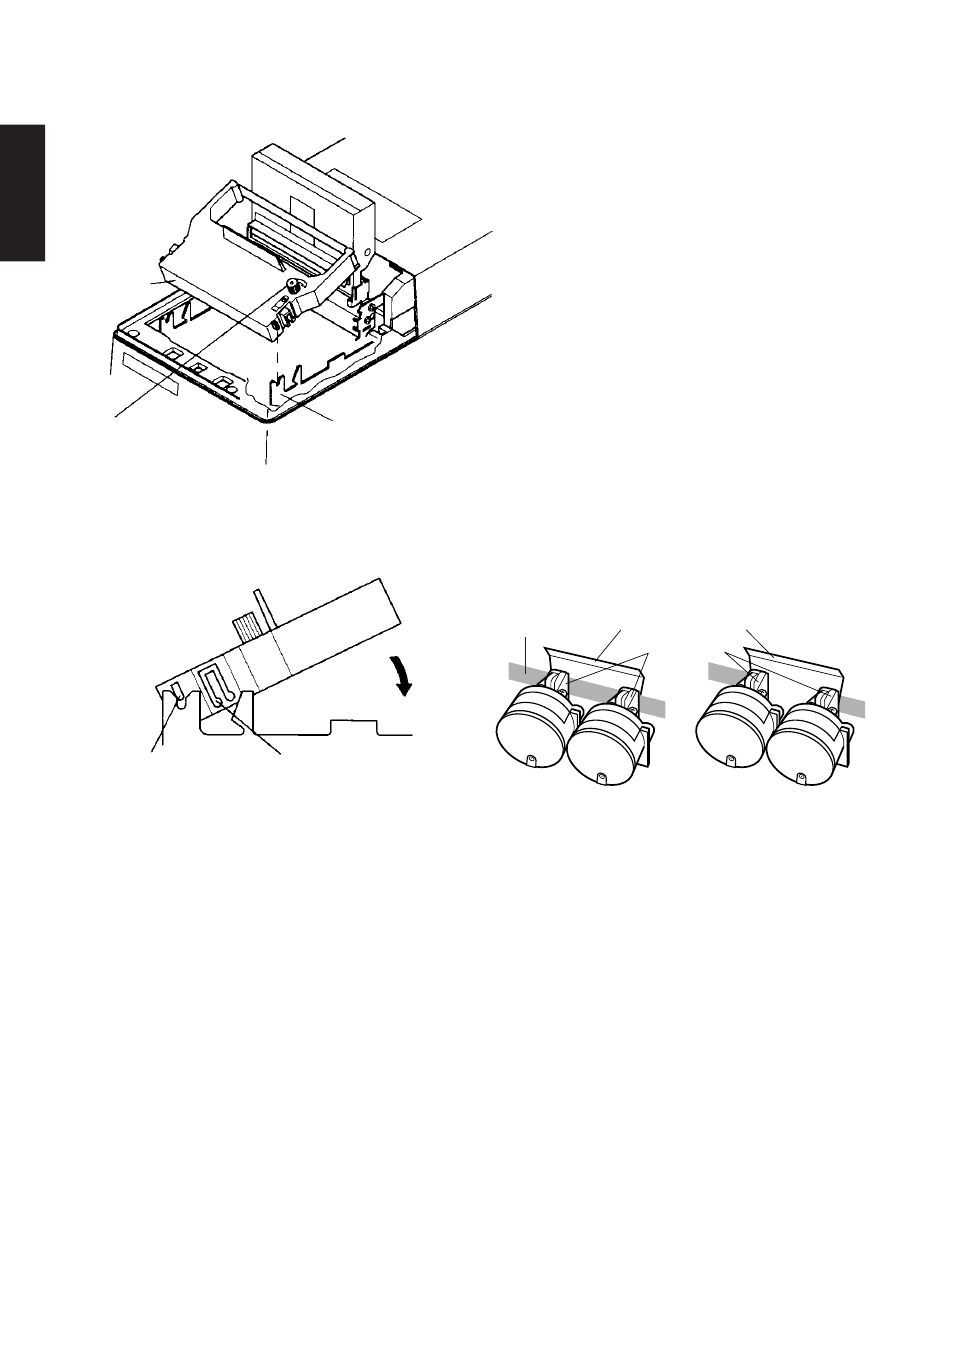
4 To remove slack in the ribbon turn
the ribbon feed knob of the ribbon
cartridge in the direction of the ar-
row.
5 Align the ribbon cartridge guide with
the notched part of the frame. Insert
the ribbon cartridge from that posi-
tion until you hear a locking sound.
Insert the ink ribbon between the
print head and the ribbon separator.
Make sure that the ink ribbon is not
protruding beyond the ribbon sepa-
rator.
6 To remove slack in the ribbon turn
the ribbon feed knob of the ribbon
cartridge in the direction of the ar-
row.
Fig. 1-5 Loading the ribbon cartridge (SP347)
7 Lower the auto cutter and install the front cover in the reverse order of its
removal.
OK
Ribbon separator
Print head
NO
Ink ribbon
ENGLISH
Ribbon
cartridge
Ribbon feed knob
Frame
Guide
Lock part
See also other documents in the category Star Micronics Printers:
- LC-90 (131 pages)
- LC-240C (82 pages)
- MP500 Series (2 pages)
- SP200F (111 pages)
- NL-10 (35 pages)
- MP115MP-24G-A (42 pages)
- LC-6211 (60 pages)
- 800C (76 pages)
- SLIP SP298 (79 pages)
- LC-1021 (91 pages)
- SP200F SERIES (90 pages)
- SP200F SERIES (114 pages)
- 150 (151 pages)
- LC-1011C (88 pages)
- RS232 (80 pages)
- FUTUREPRINT TSP100 (32 pages)
- SP700 Series (2 pages)
- DP8340RC (40 pages)
- SP342F-A (62 pages)
- PR921-24-A (31 pages)
- SP312F (36 pages)
- SP300 Series (70 pages)
- SP317 (63 pages)
- SP2000 Series (147 pages)
- LC-8021 (86 pages)
- NP-325 (45 pages)
- DP8340 (59 pages)
- PW2000-24 (4 pages)
- HL 80825321 (176 pages)
- Line Thermal Printer (181 pages)
- PUNKT-MATRIX-DRUCKER LC-7211 (182 pages)
- Automatic Sheet Feeder SF-15HA (42 pages)
- Star futurePRNT TSP100GT (2 pages)
- Star SP200 Series (127 pages)
- PT-10Q (36 pages)
- SP298 Series (144 pages)
- LC-8521 (116 pages)
- RSR 28 (5 pages)
- SP320S (94 pages)
- Dot Impact Printer (104 pages)
- LC-4521 (191 pages)
- PT-10Y (32 pages)
- Line Thermal/Dot Printer (209 pages)
- ATAR LC-500 (72 pages)