Sears 200.71991 User Manual
Page 12
•
9
•
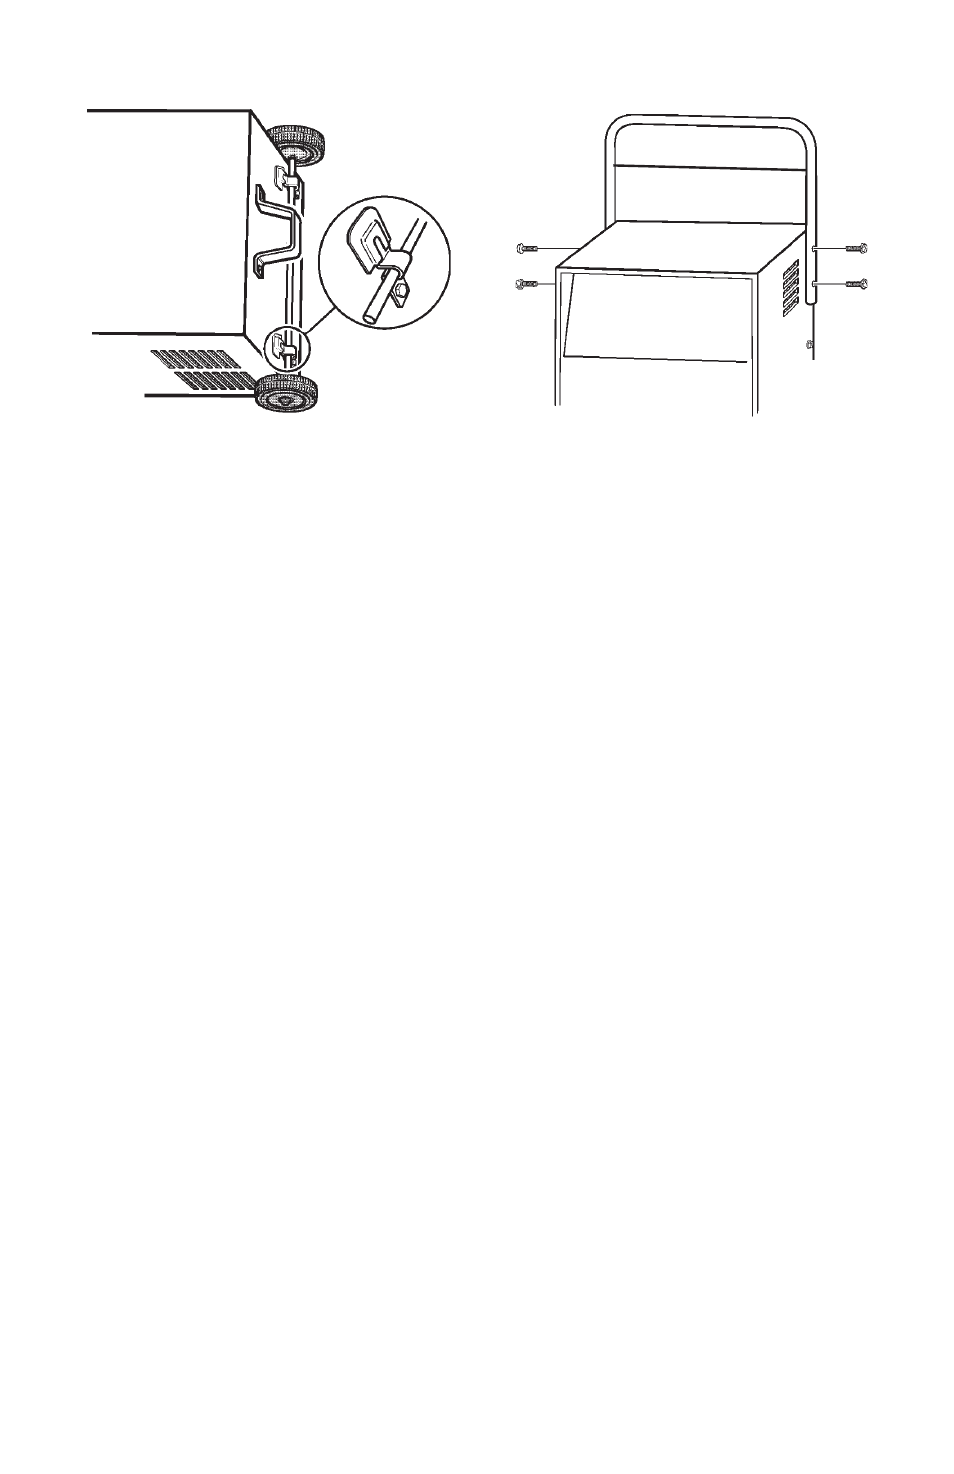
First, carefully lay the charger on its front to prepare for assembly.
10.1
Assemble the foot (Item 6) using two ¼-20 screws (Item 5) and tighten
10.2
securely.
Attach the two axle brackets (Item 1) using one 10-32 screw (Item 4) in
10.3
each. The brackets should have one end hooked into the slot in the char-
ger base. (Do not completely tighten the screws (Item 4) at this time).
Slide the axle (Item 2) into the brackets (Item 1) until centered on the char-
10.4
ger.
Slide one wheel (Item 3) onto the axle with the recessed hub facing out as
10.5
shown.
Next insert pin (Item 8) thru axle hole.
10.6
Repeat this process for the other wheel and when both wheels have been
10.7
pinned to axle, finish tightening the two axle bracket screws (Item 4).
Snap hub caps (Item 7) onto each wheel to cover the pin and axle.
10.8
Next lift the charger upright so that it rests on the wheels and foot.
10.9
Remove the two top side screws (Item 9) from each side of the charger.
10.10
Verify that the foam handle grip (Item 12) is on the handle assembly (Item
10.11
10), install if needed.
Insert the fiberglass clamp rod (Item 11) into the pierced holes on the
10.12
inside of the handle (Item 10).
Align the handle assembly (Item 10) with charger and reinstall the side
10.13
screws (Item 9). Do not over tighten.
Charger assembly is now complete. Battery clips can be clamped to the
10.14
fiberglass rod (Item 11) for convenient storage.
Do not attach clips to the foam area of handle as this will damage the
10.15
foam grip.