Port trunking configuration example, Figure 10: port trunk group configuration example, B. verify the configuration – Juniper Networks EX2500 User Manual
Page 61: Chapter 4: ports and trunking
Port Trunking Configuration Example
47
Chapter 4: Ports and Trunking
Each trunk inherits its port configuration (speed, flow control, tagging) from the
first member port. As additional ports are added to the trunk, their settings
must be changed to match the trunk configuration.
When a port leaves a trunk, its configuration parameters are retained.
Disabled port members of trunk groups are automatically enabled when the
trunk group is deleted.
You cannot configure a trunk member as a monitor port in a port-mirroring
configuration.
Trunks cannot be monitored by a monitor port; however, trunk members can
be monitored.
Port Trunking Configuration Example
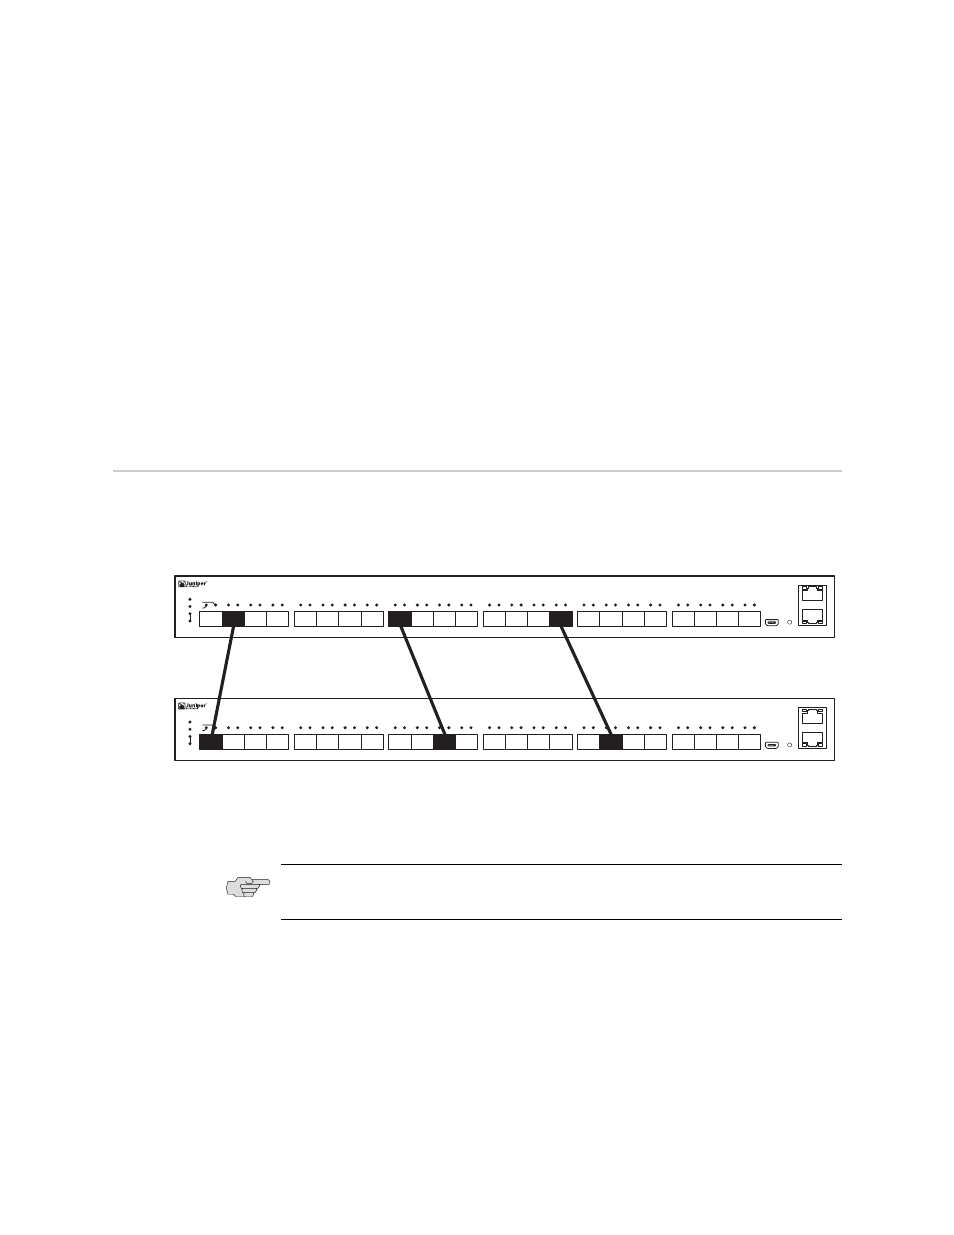
In the example shown in Figure 10, three ports are trunked between two switches.
Figure 10: Port Trunk Group Configuration Example
Use the following procedure to configure port trunking as shown in the Figure 10
example. You must first connect to the each switch’s command line interface (CLI)
as the administrator.
1.
Follow these steps on the EX2500 switch:
a.
Define a trunk group.
ex2500(config)# portchannel 3 member 2,9,16
ex2500(config)# portchannel 3 enable
b.
Verify the configuration.
ex2500(config)# show portchannel 3
9
10
11
12
5
6
7
8
SP
L/A
17
18
19
20
13
14
15
16
21
22
23
24
MGMT
B
A
1
2
3
4
CON
RESET
EX2500
ST-A
SYS
FAN
ST-B
9
10
11
12
5
6
7
8
SP
L/A
17
18
19
20
13
14
15
16
21
22
23
24
MGMT
B
A
1
2
3
4
CON
RESET
EX2500
ST-A
SYS
FAN
ST-B
TRUNK 3: PORTS 2, 9, AND 16
TRUNK 1: PORTS 1, 11, AND 18
11
2
1
16
9
18
NOTE:
For details about accessing and using any of the menu commands
described in this example, see the EX2500 Ethernet Switch Command Reference.