Fence assembly and adjustment – Jet Tools JWBS-18X User Manual
Page 11
11
Fence Assembly and Adjustment
Assembling the Fence to Fence Body
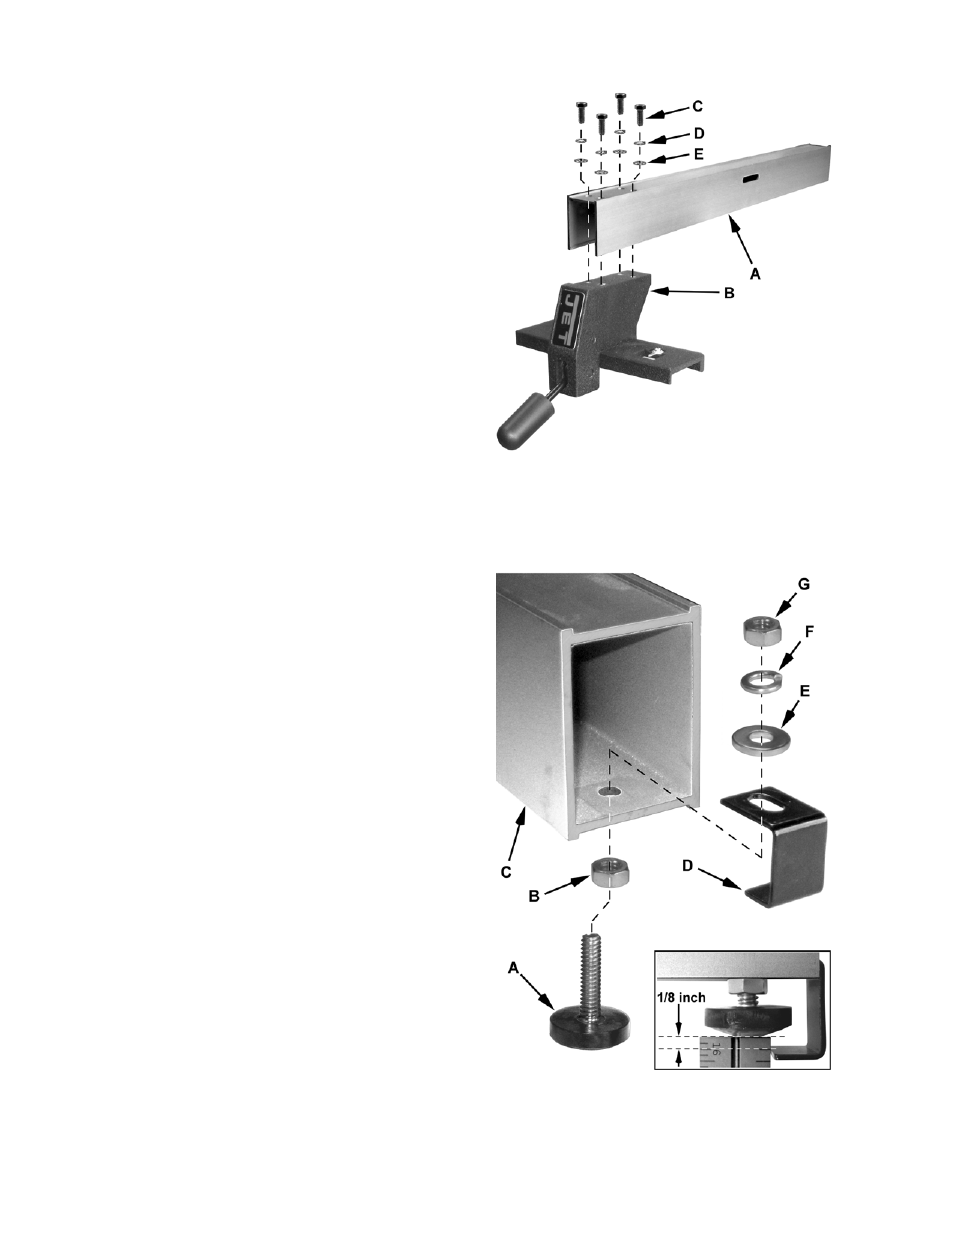
Referring to Figure 7:
1. Attach
the
fence (A) to the fence body (B) with
four 5/16” x 3/4” hex cap screws (C), four 5/16”
lock washers (D), and four 5/16” flat washers
(E). Hand-tighten only at this time.
Assembling the Rear Hook
Referring to Figure 8:
2. Thread a 1/4"-20 hex nut (B) onto the pad’s
threaded stud (A) and insert through the
fence (C) so the threaded stud is now inside
the fence.
3. Place
the
rear hook (D) on the threaded stud.
Finish the assembly by placing a 1/4" flat
washer (E), 1/4" lock washer (F) and 1/4" hex
nut (G) on the threaded stud and finger tighten.
Note: Adjust for a gap of approximately 1/8"
between the pad (A) and hook (D) and as
shown in the inset.
4. Tighten the assembly using two 10mm
wrenches.
Figure 7
Figure 8