5 preparation, 4 menu switches 4-2 menu switch details – JVC BR-DV600U User Manual
Page 12
20
4 MENU SWITCHES
4-2 Menu switch details
502 CHARACTER V.POSITION
Details: Moves the display position of the tape
counter on screen, etc. vertically.
Setting:
The display position can be moved in
q
12 steps from 0 to 11. When the No. 504
set to “MODE + TIME>, setting to “0” is not
possible.
* The tape remaining time indication
position on screen can be changed up and
down with this switch.
504 INFORMATION SELECT
Details: Selects which information is displayed on
the on-screen display.
Setting:
TIME (00):
Time data is displayed
q
MODE+TIME (01): Time data and tape running
mode are displayed.
505 REMAIN ENABLE
Details: Selects whether or not the tape remaining
time is shown on the on-screen display.
Setting:
q
OFF (00): Remaining time is not shown.
ON (01): Remaining time is shown.
514 TIME DISPLAY SELECT
Details: Selects the type of time data displayed.
Setting:
DATE (00):
Shows the date.
CLOCK (01):
Shows the time.
DATE+CLOCK (02): Shows the date and time.
q
TC (03):
Shows the time code data.
516 DISPLAY SELECT
Details: Selects the type of data displayed on the
tape counter in the LCD display.
Setting:
q
TC (00):
Shows the time code data.
CLOCK (01): Shows the date and time. You can
switch between date and time with
the [COUNTER] switch.
q
: Factory setting
(00): The number in the bracket shows the set value on the
counter display.
397 FAN STOP SHUTDOWN
Details: Sets whether or not VCR operation continues
if the fan motor stops.
Setting:
q
ENABLE (00): The power turns off about 1 minute
after the fan motor stops.
DISABLE (01): The VCR continues operation
even after the fan motor stops.
When the fan motor stops, press
the [OPERATE] button as soon as
possible to turn the VCR’s power
off. If not, a malfunction may occur
due to overheating.
414 TCG SELECT
Details: Selects the time code generator mode.
Setting:
q
PRESET (00): Engages the Preset mode.
REGEN (01): Engages the Regen mode.
415 TCG MODE
Details: Selects the time code generator Run mode.
Setting:
FREE RUN (00): Engages the Free Run mode.
q
REC RUN (01):
Engages the Rec Run mode.
416 NON DROP/DROP (U MODEL)
Details: Selects the time code generator Drop Frame
mode.
Setting:
q
DROP (00):
Engages the Drop Frame
mode.
NON DROP (01): Engages the Non-Drop Frame
mode.
500 ON SCREEN
Details: Selects whether or not the on-screen display
is shown on the monitor.
Setting:
OFF (00): The display is not shown.
q
ON (01): The display is shown.
501 CHARACTER H.POSITION
Details: Moves the display position of the tape
counter on screen, etc. horizontally.
Setting:
q
The display position can be moved in
9 steps from 0 to 8. The factory setting is
“0” (the display position at the far right).
* The tape remaining time indication
position cannot be changed.
0 (00)
:
8 (08)
0 (00)
1 (01)
:
11 (11)
21
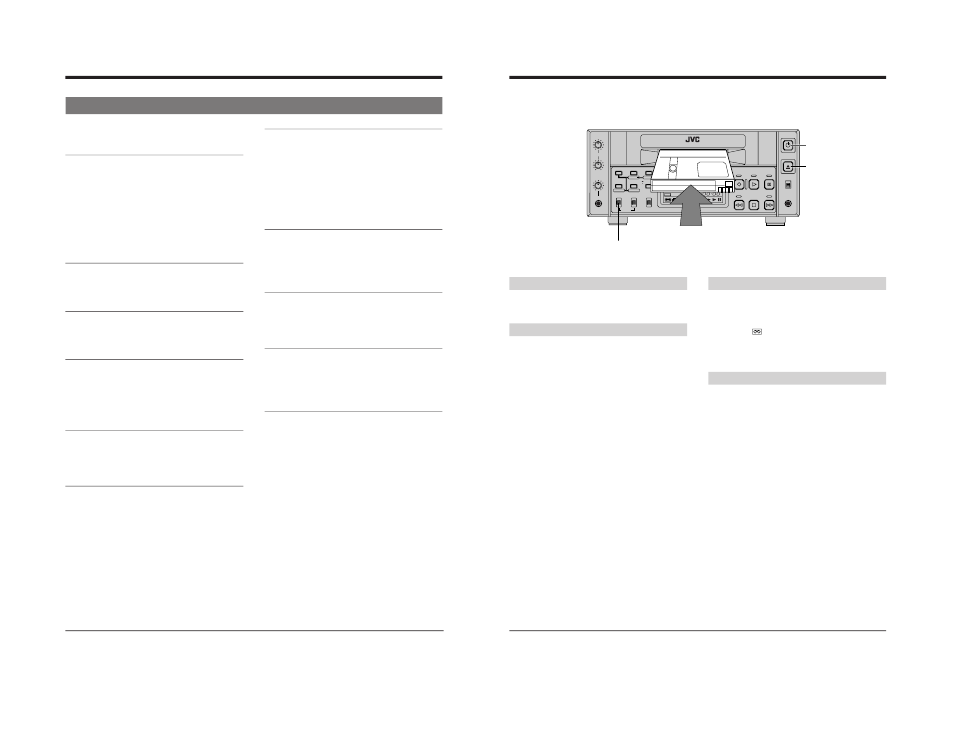
5 PREPARATION
Preparing this unit for recording or playback.
PHONES
MIC
REMOTE
LOCAL
EJECT
OPERATE
REC LEVEL
CH-2/4
CH-1/3
SHIFT
SET
SELECT
SHIFT
MENU
HOLD
AUDIO
MONITOR OUTPUT COUNTER
SHIFT
A. DUB
ADVANCE PRESET
L
CTL
TC
UB
CH-1/2
CH-3/4
R
MIX
MIX
REW
STOP
FF
REC
PLAY
PAUSE
ON/OFF
MENU
OVER
OVER
H
M
S
F
AUD LOCK
SP
32k
48k
SLAVE
PB
NDF
SERVO RF
DEW
AUTO OFF
HOLD
CH 2/4
CH 1/3
VIDEO CASSETTE RECORDER BR-DV600U
dB
40 30
20
10
0
[AUDIO MONITOR] switch
[OPERATE] button
[EJECT] button
Turn the power ON.
Press the [OPERATE] switch. The counter display lights
up.
Turn the power OFF
Press the [OPERATE] switch. “
oPF-oFF
” is shown in the
counter display.
Loading/unloading a cassette
Insert the cassette into the cassette loading slot with the
window facing up. Push the cassette in slowly until the
loading mechanism starts automatic loading.
[
The VCR enters the Stop mode and the cassette
indicator (
) lights.
Press the [EJECT] button to eject the cassette.
[
The cassette tape is ejected.
Audio monitor selection
Use the [AUDIO MONITOR] switch to select the audio
channel to monitor (via the [AUDIO MONITOR OUT]
connectors).